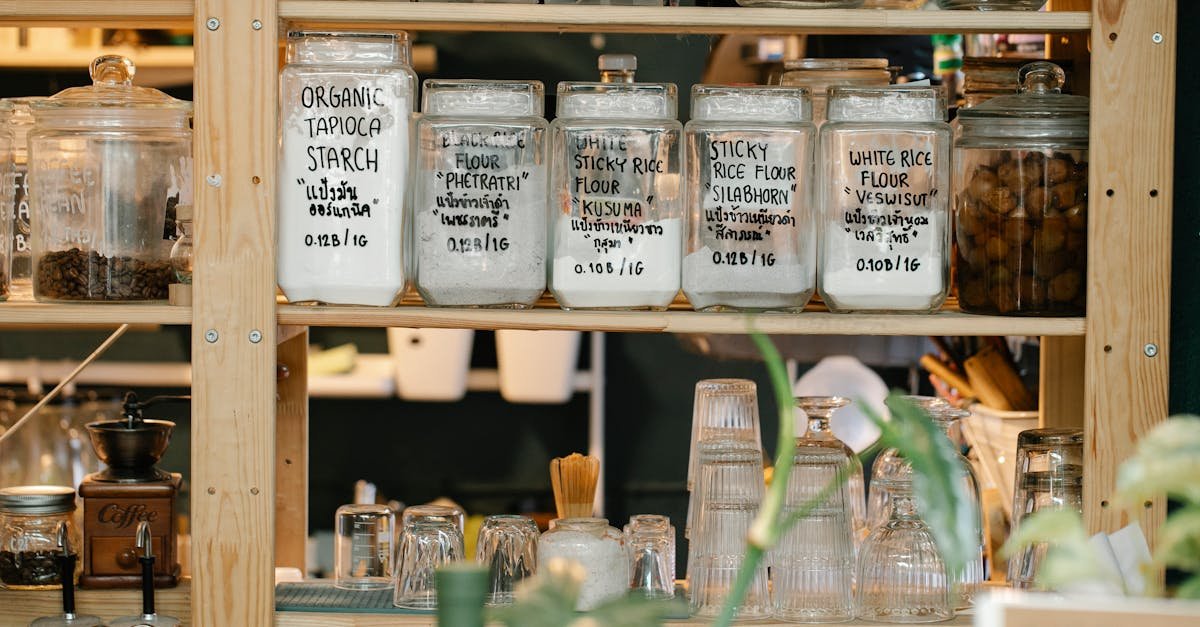
In a compact home, every shelf should work as hard as you do. The good news: even a sliver of shelving or a single cabinet can become a streamlined, stress-free pantry with the right setup. This deep-dive will show you how to organize a small kitchen pantry using smart layouts, vertical solutions, decanting, labeling, and maintenance habits that hold up in real life. You will find step-by-step instructions, product ideas, renter-safe fixes, and advanced tricks that make finding dinner ingredients as easy as opening the door.
Start With a Smart Audit: Measure, Map, and Edit
Great systems grow from clarity. Before you buy a single bin, conduct a quick audit that fits your space and your food habits.
Measure and note constraints
- Height, width, depth: Measure clear interior space from shelf to shelf and the total cabinet or closet dimensions. Depth determines which organizers will actually fit and whether tiered racks, turntables, or pull-outs are practical.
- Door and hinge clearance: Note swing direction, any hinges that jut out, and space behind the door for over-the-door racks.
- Obstacles: Spot electrical panels, odd angles, pipes, and trim that limit full-width shelves.
- Lighting: Check how dark the back corners are; poor light fuels clutter.
Edit: keep, relocate, donate
- Remove everything. Group by category on a counter or table.
- Check dates and quality. Toss stale, spoiled, or pest-damaged items. Donate sealed foods you will not use.
- Right-size volume. If your family rarely eats rice, do not store a 10 lb bag in prime real estate.
- Relocate bulky tools. Appliances, party platters, and seldom-used cookware belong outside your micro pantry. Create overflow zones elsewhere if needed.
Design Principles That Make Tiny Pantries Feel Big
The following rules transform cramped storage into clear, accessible space. They also anchor your approach to small pantry organization so you can maintain order long-term.
- Use vertical first. Add levels to dead space with shelf risers, under-shelf baskets, and stackable bins.
- Decant for visibility. Clear airtight containers keep staples fresh, stack neatly, and reveal quantities at a glance.
- Zone by task. Group items by how you cook and eat: Breakfast, Baking, Snacks, Cans, Dinner Bases, Spices, Oils & Vinegars.
- FIFO: First In, First Out. Put newer products behind older ones and label opened dates.
- Right-size containers. Match container footprints to shelf depth and everyday volumes; avoid dead space above lids.
- Light it up. Motion-sensor LED strips or puck lights reduce visual clutter and hunting time.
- Label everything. Consistent, legible labels reduce decision fatigue and make family members your allies.
Vertical Wins: Shelves, Risers, and Hanging Space
Unlock hidden capacity by building up, not out. These solutions multiply surface area without a remodel.
Use shelf risers on deep shelves
- Tiered can risers: Step organizers let you see labels on cans and jars in the back row.
- Flat shelf risers: Create a second level for short items like tuna tins or spice jars.
- Stackable baskets: Tall shelves become two or three layers of accessible storage with wire or acrylic bins that stack securely.
Exploit underside and door space
- Under-shelf baskets: Slide onto existing shelves to capture the gap above pasta boxes, tortillas, or napkins.
- Over-the-door racks: Perfect for spices, wraps, foil, snacks, and bottles. Choose narrow profiles for small clearances.
- Hooks and rails: Hang measuring cups, bag clips, onion/garlic braids, or small caddies.
- Magnetic strips: If you have a metal door or mount a magnetic board, add magnetic spice tins or a magnetic notepad for inventory.
Depth Control: Pull-Outs, Turntables, and Dividers
The deeper the shelf, the easier it is to lose items. Convert depth into visibility and reachability.
Turntables (lazy Susans) for corners and oils
- 12–16 inch turntables: Best for oils, vinegars, sauces, nut butters, and tall jars. No more digging behind bottles.
- Double-decker lazy Susans: For spices and condiments, especially in upper cabinets.
Pull-out baskets and drawers
- Wire pull-outs: Good visibility for snacks, onions, potatoes, and bagged goods.
- Acrylic drawers: Glide smoothly and contain small packets, bars, and baking add-ins.
- DIY glide: Place bins on felt pads or slim sliders if drilling is not allowed.
Dividers tame chaos
- File-style dividers: Stand cutting boards, wraps, and baking sheets upright.
- Adjustable inserts: Customize sections in large bins for packets, drink mixes, and seasoning envelopes.
Zones That Match Real-Life Cooking
Zoning is where pantry organization becomes intuitive. Create predictable homes for what you reach for daily and separate occasional items to reduce visual noise.
Breakfast and quick-grab
- Front-and-center shelf: Cereals, oatmeal, granola, nut butters, and shelf-stable milk or non-dairy cartons.
- Snack bin: Place at kid height with portioned pouches, crackers, dried fruit, and bars.
Baking zone
- Decant flours and sugars: Airtight containers labeled with product and opened date.
- Tier spices and extracts: Use a narrow tiered rack; corral sprinkles and baking chips in a handled bin.
Dinner bases and dry goods
- Rise and stand: Store pasta, rice, grains, and beans in tall, stackable canisters. Keep a measuring cup in the most-used bin.
- Jar corral: Tomato sauce, broth cartons, and curry paste sit in a shallow bin to prevent tipping.
Cans and jars
- FIFO rail or tier: Use can dispensers that feed from the back, or label the shelf edge with categories: beans, tomatoes, fish.
- Small jars upfront: Capers, olives, and specialty condiments live on a mini lazy Susan.
Spices, oils, and vinegars
- Alphabetize or color code: Pick one method to speed up cooking. Short on space? Magnetic spice jars on the door.
- Oil and vinegar tray: A rimmed tray catches drips and keeps bottles together.
Containers and Labels: Clarity You Can Maintain
Containers do not just look tidy; they simplify shopping, cooking, and cleaning. The key is choosing forms that fit your shelves and portions.
How to choose containers
- Shape: Square or rectangular containers use space more efficiently than round ones.
- Size set: Build a kit around two or three heights so everything stacks cleanly.
- Material: BPA-free plastic is light and durable; glass is heavier, see-through, and odor-safe. Metal canisters work for tea and coffee but need window labels.
- Airtight seal: Extends freshness for flours, snacks, and crackers. Look for easy-open lids for daily use.
Decanting done right
- Keep the original package info. Cut out cooking directions and expiration dates and slip them under the lid or tape them to the bottom.
- Batch refill day: Refill decanted staples after your weekly shop to maintain inventory visibility.
Labeling that works
- Consistent style: Choose one label type and font. Contrast improves readability.
- Include critical details: Product name, opened date, and if relevant, cook ratio or allergy notes.
- Removable options: Use chalk markers, dissolvable labels, or painter's tape for maximum flexibility.
Blueprints by Pantry Type
Not all tiny pantries are built alike. Use these targeted layouts to decide how to organize a small kitchen pantry whether it is a single cabinet, a narrow closet, or a floating shelf setup.
Single cabinet pantry (24–36 inches wide)
- Top shelf: Backstock and light items in stackable bins.
- Eye-level: Everyday staples in clear canisters; lazy Susan for oils.
- Middle: Cans on a tiered riser; snacks in pull-out bins.
- Bottom: Heavier items like jars or small appliances if space allows.
- Door: Narrow rack for spices, wraps, and baggies.
Narrow closet pantry
- Adjust shelves: Shorter spacing for cans and jars; a wider bay for cereal and tall bottles.
- Over-the-door: Add shallow baskets for grab-and-go items.
- Floor zone: Lidded crates for potatoes and onions with breathable sides.
Open shelving or wall-mounted rails
- Uniform containers: Visual calm reduces clutter on display.
- Decor plus function: Use woven baskets for snacks and an attractive tray for oils.
- Light shield: Place light-sensitive items in opaque bins to protect quality.
Under-stairs or slanted spaces
- Custom-fit bins: Use graduated-height containers and label shelf edges clearly.
- Front-access pull-outs: Shallow drawers prevent things from getting lost in the deepest point.
No pantry? Create one
- Freestanding cabinet: Fit with adjustable shelves, door rack, and motion lights.
- Utility cart: A rolling cart with deep shelves, bins, and a top for appliances becomes a flexible micro pantry.
- Above-fridge cabinet: Reserve for backstock in labeled baskets with handles.
RV, boat, or studio setups
- Shock-safe containment: Use bins with lids and tension rods to prevent tipping.
- Minimalist inventory: Keep a tight roster of multi-use ingredients and replenish more frequently.
Habits and Workflows That Keep Order
Setup is step one. Sustainable habits make your system durable and easy to reset, especially if you share the space.
Daily and weekly rhythms
- Daily 60-second reset: Return stray items to zones after dinner.
- Weekly restock: Wipe a shelf, refill canisters, and review inventory before shopping.
- FIFO line-up: Slide new items behind older ones as you unpack groceries.
Inventory and meal planning
- Pantry inventory list: Keep a simple checklist on the door or a shared phone note.
- Use-up weeks: Plan meals around nearing-expiry items to cut waste and free space.
- Bundle ingredients: Store taco shells, seasoning, and salsa in a bin labeled Tacos Night to make cooking automatic.
Budget-Friendly, Renter-Friendly Strategies
You do not need custom cabinetry to master a tiny pantry. Build capacity with affordable tools and gentle modifications.
- Thrift and repurpose: Clean jars for grains and snacks; shoe organizers for packets; magazine files as vertical dividers.
- Command hooks and strips: Mount lightweight caddies and labels without drilling.
- Generic bins first: Start with a few standardized, stackable bins; upgrade selectively later.
- DIY shelf: Add a simple plywood topper or riser to split tall spaces; sand and seal for durability.
- Lighting on a budget: Battery LED pucks or motion strips transform usability for a few dollars.
Advanced Tricks From Grocery Pros
Borrow techniques from retail to elevate your pantry from tidy to effortless.
- Face and front: Turn labels outward and line up edges for quick scanning.
- Par levels: Decide your minimum quantities per staple (e.g., two cans of tomatoes). When you hit par, add to the list.
- Cross-merchandising: Keep complements together: pasta with sauce, oats with toppings, tea with honey.
- Color coding: Use colored bin labels or lid rings to signal categories at a glance.
- QR labels: Link QR codes to a shared digital inventory or recipe ideas.
- Lighting zones: Place micro LED strips under each shelf to eliminate shadows at the back.
Food Safety, Freshness, and Sustainability
A high-functioning pantry protects food quality and reduces waste. These practices integrate seamlessly with small pantry organization.
- Temperature and humidity: Keep the pantry cool and dry; avoid storing near a dishwasher vent or over a heat register.
- Pest prevention: Use airtight containers, wipe spills promptly, and rotate stock. Bay leaves in flour bins can deter pantry moths.
- Light protection: Store oils, spices, and potatoes away from direct light to preserve flavor and nutrients.
- Expiry coding: Label opened dates; use a front bin labeled Eat First for items to finish soon.
- Compost and donate: Compost spoiled produce; donate sealed, in-date foods you will not use.
Weekend Makeover: An 8-Step Plan
If you are ready to tackle the project now, follow this time-boxed method to transform your space by Monday.
Tools checklist
- Measuring tape and notepad
- Microfiber cloths and a mild cleaner
- Label maker or markers and removable labels
- 4–8 stackable bins, 2–4 under-shelf baskets
- 1–2 lazy Susans, 1 can riser
- LED strip or puck lights
Step-by-step
- 1. Empty and assess: Remove everything and group by category on a table.
- 2. Clean: Vacuum crumbs, wipe shelves, and line if needed.
- 3. Measure again: Confirm heights and depths against your organizers.
- 4. Draft zones: Sketch shelf assignments: top for backstock, eye-level for daily use, bottom for heavy.
- 5. Install vertical helpers: Place risers, under-shelf baskets, and door racks.
- 6. Decant and label: Move staples into containers; add clear labels and opened dates.
- 7. Load by frequency: Put everyday items front and center; backstock up high.
- 8. Set par levels and inventory: Create a simple list; stick it inside the door.
Troubleshooting: Common Pain Points and Fixes
- Problem: Tall containers hit the next shelf. Fix: Swap for shorter, wider canisters or raise the shelf by one notch.
- Problem: Items fall over on wire shelves. Fix: Add shelf liners or trays with solid bottoms.
- Problem: Door rack hits interior contents. Fix: Use a low-profile rack and keep the interior a half-inch clear near the door edge.
- Problem: Family puts things anywhere. Fix: Use picture labels for kids and color-coded zones; do a quick weekly reset together.
- Problem: Spices everywhere. Fix: Consolidate duplicates, decant to uniform jars, and alphabetize on a tier or magnetic board.
- Problem: Noisy, cluttered look. Fix: Standardize bins and labels; move secondary items to opaque baskets.
Frequently Asked Questions
How do I start when I feel overwhelmed?
Begin with a 20-minute sprint: empty one shelf, group items, toss expired goods, and wipe surfaces. Seeing immediate progress builds momentum to continue learning how to organize a small kitchen pantry without burnout.
Is decanting really necessary?
Not for everything. Decant high-turn staples like rice, oats, flour, and snacks to boost visibility and freshness. Keep specialty flours, small baking ingredients, or rarely used grains in their original packages inside a labeled bin.
What belongs in a tiny pantry versus the fridge?
Keep shelf-stable staples inside: grains, pasta, canned goods, oils, vinegars, spices, and unopened nut butters. Move nuts, some flours, and seeds to the fridge or freezer for longer freshness if your pantry is warm.
How do I maintain order after the initial setup?
Adopt three habits: a 60-second nightly reset, weekly decant-and-wipe, and FIFO placement after shopping. A shared inventory note prevents overbuying.
Which organizers are worth it in a very small space?
Top performers are a lazy Susan for oils, a tiered can riser, two to four stackable bins, and an over-the-door rack. They multiply capacity and cut search time.
Can I keep bulk buys in a tiny pantry?
Yes, but separate backstock from everyday use. Store extras up high or in another room. Refill smaller containers in your active zone to avoid clutter.
A Sample Layout You Can Copy Today
Use this universal map to anchor small pantry organization in almost any footprint:
- Top shelf: Backstock, paper goods, party snacks (opaque bins).
- Second shelf: Clear canisters of grains and pasta; can riser to the side.
- Middle shelf (eye-level): Breakfast bin, snack bin, lazy Susan with oils and sauces.
- Below middle: Baking zone canisters, spice tier or double-decker turntable.
- Bottom: Heavier jars, potatoes/onions in breathable bins.
- Door: Spices, wraps, zip bags, and a small notepad or QR code for inventory.
Mindset: Progress Over Perfection
The most effective pantries evolve. Start simple, test your layout for two weeks, then tweak shelf heights, bin sizes, and label placement. The goal is not perfection; it is seamless cooking and zero stress when you open the door.
Putting It All Together
Now you have a complete roadmap for how to organize a small kitchen pantry that is adaptable, attractive, and easy to maintain. Measure, edit, and zone your essentials. Add vertical layers, containers, and clear labels. Light the space and set weekly habits. With a few smart tools and a pro grocer mindset, your tiny pantry will deliver mighty order every single day.
Quick Recap: The Non-Negotiables
- Measure first: Buy organizers that fit your actual dimensions.
- Zone by use: Breakfast, Baking, Snacks, Dinner Bases, Cans, Spices, Oils & Vinegars.
- Vertical tools: Shelf risers, under-shelf baskets, over-the-door racks.
- Visibility: Clear bins and canisters, consistent labels, good lighting.
- Habits: FIFO, nightly reset, weekly restock and decant.
Your small space is not a limitation; it is an invitation to be intentional. Start today, and let your pantry prove that smart design beats square footage every time.