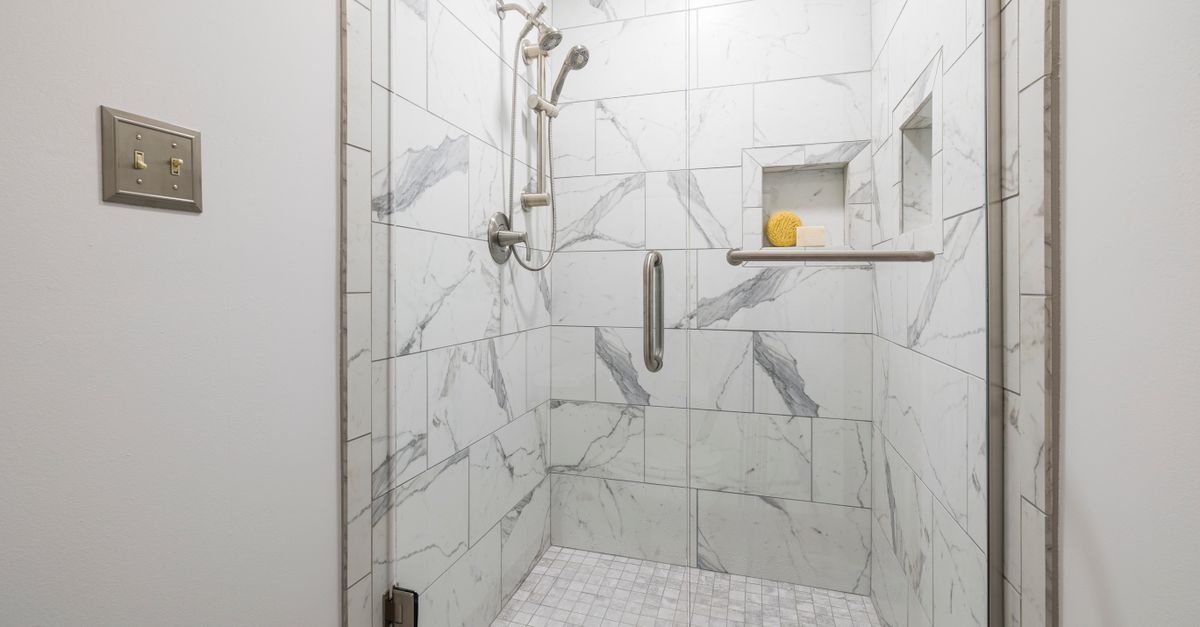
Clean edges and perfect corners are the difference between a good tile job and a great one. Wall tile profiles, sometimes called tile trims, edge profiles, or finishing strips, eliminate raw cuts, protect tile edges, and create a sleek, durable border on backsplashes, bathrooms, showers, and feature walls. In this comprehensive guide, you will learn how to install wall tile profiles like a seasoned pro—covering planning, layout, materials, cuts, corners, terminations, setting techniques, grout and silicone detailing, and maintenance. Whether you are finishing a kitchen backsplash, a shower surround, or a tiled accent wall, this tutorial will help you achieve seamless, long-lasting results.
Why Wall Tile Profiles Matter
Wall tile profiles do much more than look good. They protect tile edges from chipping, absorb impact, and offer a finished line where tile meets paint, drywall, glass, or another surface. They also simplify transitions at external and internal corners, around window returns, and across termination points. In wet areas like showers and tub surrounds, many trims include integrated features that promote drainage and allow for movement—vital for longevity.
- Protection: Shields exposed tile edges from damage and wear.
- Aesthetics: Provides a crisp, consistent, designer-grade finish.
- Performance: Aids in water management and movement accommodation.
- Versatility: Works with ceramic, porcelain, natural stone, glass, and mosaics.
Key Concepts and Terminology
- Tile profile or trim: A metal or PVC strip installed where tile terminates or turns a corner.
- Anchoring leg: Perforated flange embedded in thinset or adhesive behind the tile.
- Reveal: The visible edge of the profile once installed.
- End cap/inside corner/outside corner: Factory accessories for neat terminations and corner junctions.
- Movement joint: A gap or specialized profile that allows for thermal and structural movement.
Types of Wall Tile Profiles
By Shape
- Square or L-angle edge profiles: Simple, modern look; common on backsplashes and shower walls.
- Rounded or quarter-round trims: Softer, classic edge for traditional interiors.
- Jolly trims: Minimal, straight reveal for contemporary projects.
- Listello and decorative strips: Accent bands for visual interest along walls.
- LED-ready channels: Profiles that house low-voltage lighting for niches and accent walls.
- Movement-joint profiles: Engineered to absorb expansion and contraction.
By Material
- Aluminum tile trim: Lightweight, affordable, available in anodized finishes and colors.
- Stainless steel tile trim: High durability and corrosion resistance, ideal for showers and commercial kitchens.
- Brass profiles: Premium look that patinates over time; elegant in classic or luxury bathrooms.
- PVC tile edging: Budget-friendly and easy to cut; best for dry interiors.
Finish Options
- Brushed or polished metals: Match to fixtures and hardware for cohesive design.
- Color-coated finishes: Coordinate with grout, cabinetry, or wall paint.
- Textured finishes: Increase grip and resist fingerprints in high-touch zones.
When to Use Wall Tile Trims Instead of Bullnose
Bullnose tile pieces can be hard to source or not available for certain tile series. Profiles provide a consistent alternative that works with virtually any tile thickness and style. Use trims for:
- Backsplash edges terminating at drywall or cabinets.
- External corners at columns, returns, nib walls, and shower entrances.
- Internal corners where a caulked joint is insufficient or aesthetics call for a metal line.
- Window returns and niches for tidy, chip-resistant edges.
- Transitions to glass, mirror, or other finishes.
Design and Planning Essentials
Before you think about how to install wall tile profiles, finalize the layout. A clean layout saves cuts, prevents awkward slivers, and ensures trims land where they belong. Good planning makes installation faster and results more professional.
- Tile thickness and profile height: Choose a profile with a reveal that matches or slightly exceeds the tile thickness to protect the edge. For example, if your tile is 8 mm thick, select a trim designed for 8 to 10 mm tile.
- Grout joint size: Standard joints range from about 1.5 to 3 mm for porcelain; coordinate the profile reveal to align with grout lines.
- Vertical and horizontal alignment: Use a laser level to align trims so that grout joints carry neatly into the profile.
- Corner strategy: Decide whether to miter the trims, use factory corner pieces, or combine approaches. Factory corners speed up work and look seamless.
- Movement joints: Plan soft joints in wet areas and long runs; consider a movement-joint profile if needed.
- Terminations and end caps: Determine where trims will end and what caps or returns you require.
- Waterproofing continuity: In showers, ensure profiles do not puncture or bypass membranes.
Tools and Materials
Gather everything before you begin. This avoids rushed decisions and messy outcomes.
- Profiles and accessories: Edge profiles, inside/outside corners, and end caps sized to tile thickness.
- Tile and setting materials: Thinset mortar or appropriate adhesive for your substrate and tile.
- Cutting tools: Fine-tooth hacksaw or a non-ferrous metal blade for aluminum, metal snips for PVC, and an angle grinder or miter saw with suitable blade for stainless steel. A miter box helps with precise 45-degree cuts.
- Trowels and floats: Notched trowel sized for tile, margin trowel, grout float.
- Measuring and layout: Tape, pencil, square, level or laser level, spacers.
- Finishing: Sandpaper or a deburring tool, files, painter's tape, silicone or hybrid sealant, matching grout, and color-matched caulk.
- Safety: Eye protection, hearing protection, gloves, and dust control.
Surface Preparation
Great edges start with a flat, sound, properly prepared substrate.
- Substrate: Use cement backer board or an approved board in wet zones; prime drywall where required in dry areas.
- Flatness: Check with a straightedge; skim coat if necessary. Profiles emphasize inconsistencies—flat walls matter.
- Waterproofing: Apply a liquid-applied membrane or bonded sheet membrane in showers, wrapping into corners and around niches. Follow cure times.
- Layout lines: Strike level lines for the first course and vertical control lines at terminations and corners.
How to Install Wall Tile Profiles: A Step-by-Step Guide
The following method assumes thinset mortar over a prepared wall. If you use an adhesive in a dry area, adapt the steps accordingly and follow the adhesive manufacturer's guidance.
Step 1: Dry Fit and Pre-Measure
- Measure the total run for each profile, including returns around corners or into window returns.
- Mark cut locations on the profile with a fine marker. Account for corner accessories or miter overlaps.
- Hold the trim to the wall and confirm that the reveal height matches tile thickness and that grout lines align.
Step 2: Cut the Profiles
- Use a miter box and a fine-tooth blade to cut aluminum or brass trims cleanly. For stainless steel, use an angle grinder with an appropriate metal-cutting disc or a slow-speed miter saw with a suitable blade.
- For PVC, a sharp hacksaw or quality shears work. Avoid crushing the channel; support the piece while cutting.
- Deburr and smooth cut edges with a file or sandpaper to remove sharpness and ensure tight joints at corners.
- Dry-fit factory corners or end caps to verify fit. Adjust with fine filing if needed.
Step 3: Trowel the Setting Bed
- Spread thinset using the correct notch size for your tile. Comb in straight, even ridges.
- Where the profile's anchoring leg will go, apply a thin coat of mortar so the perforations fully embed.
- Avoid overfilling where the reveal sits; leave space to set tile flush without oozing mortar over the trim face.
Step 4: Set the Profile
- Press the anchoring leg into the fresh mortar, aligning the trim vertically or horizontally with your level or laser.
- Gently wiggle to key the mortar into the perforations. Do not bend the reveal.
- Use spacers if needed so the profile's visible edge lines up with grout joints.
- For long runs, set in sections and recheck alignment frequently.
Step 5: Set the Adjacent Tile
- Back-butter the tile if required for full coverage. Press tiles firmly so their edges finish flush with the trim's reveal.
- Maintain a narrow joint—often 1.5 to 2 mm—between the tile and the trim to be grouted later. Some pros tape the trim face to keep it pristine.
- Clean any mortar smears off the reveal immediately with a damp sponge. Dried thinset is difficult to remove from metal.
Step 6: Corners and Accessories
- For external corners, either miter two trims at 45 degrees for a crisp seam or use a factory external corner piece that snaps into the channels.
- At internal corners, leave a small soft joint between profiles or tiles and caulk with silicone; internal corner trims are also available.
- Use end caps at terminations instead of leaving a raw cut. Dry-fit everything before final setting.
Step 7: Allow to Cure
- Let the thinset cure per manufacturer instructions before grouting—often 16 to 24 hours.
- Protect exposed returns and corners during cure to prevent dings.
Step 8: Grout and Caulk
- Grout the joint between tile and trim with the same grout used for the field. Use a float to pack the joint tightly.
- Wipe the trim face clean promptly. On textured or brushed finishes, work with the grain.
- At movement locations, change to a color-matched silicone or hybrid sealant instead of grout.
Installing Profiles in Common Wall Situations
Kitchen Backsplash Terminations
- Where: At the open edge against painted drywall or cabinet sides.
- How: Run a straight Jolly or square profile vertically. Start tile from the profile and work inwards to maintain factory edges against the trim.
- Tip: Match the trim finish to faucets, cabinet hardware, or appliances.
External Corners on Shower Entrances and Nib Walls
- Where: Columns, half walls, and shower thresholds.
- How: Use two trims forming a 90-degree corner via miters or a factory external corner fitting. Keep reveals aligned through the vertical run.
- Waterproofing: Ensure membranes wrap around the corner behind the trims.
Internal Corners in Wet Areas
- Where: Wall-to-wall corner in showers and tub surrounds.
- How: Most pros skip a metal trim and use a soft, silicone caulked joint for movement. If you choose an internal trim, follow the manufacturer for sealing the anchoring legs without piercing waterproofing.
Window Returns and Sills
- Where: Bathrooms and kitchens where tile wraps into a window recess.
- How: Install profiles along the inner edges for a neat, protective border. Preplan the depth so the tile, thinset, and trim fit without proud edges.
- Detail: Slight slope outward on sills encourages water to shed.
Shower Niches and Shelves
- Where: Niches for shampoo and soap or recessed shelves.
- How: Trim all four sides with matching profiles and miter the corners, or use square connectors. Keep reveals even on all sides for symmetry.
- Advanced: LED-ready channels can frame a niche; follow low-voltage and moisture guidelines.
Precision Details That Elevate Your Finish
- Consistent reveals: Aim for the same visible width along the entire profile length.
- Aligned joints: Carry grout lines into the profile for a unified grid.
- Factory corners vs miters: Corners save time and can outlast miters in high-traffic zones.
- Protection during install: Apply painter's tape to profile faces while grouting to avoid micro-scratches.
- Soft joints where needed: Swap grout for silicone at room transitions, change of plane, or large expanses.
Choosing the Right Profile Size
Select a reveal that matches your tile thickness once bedded in mortar. If your tile is 8 mm but you back-butter, the effective thickness may be slightly more. Many installers choose the next size up for slight clearance, then flush out with thinset. Avoid selecting a reveal that is significantly taller than the tile, which can create a dust-catching ledge and shadow line.
Adhesive vs Thinset: Which to Use?
- Thinset mortar: The gold standard for porcelain and ceramic on backer board or primed drywall. Offers superior bond strength and moisture resistance.
- Tile adhesive: Suitable for some dry-area backsplashes on gypsum board. Check the adhesive rating and tile size limits.
- Epoxy or specialty mortars: For glass tile or challenging substrates; confirm trim compatibility when using aggressive chemicals.
How to Keep Profiles Flush With Tile
Flushness is the hallmark of professional trim work. To achieve it:
- Back-butter tiles as needed to meet the reveal without lippage.
- Adjust thinset thickness beneath the tile next to the profile for micro-tuning.
- Place a straightedge across the tile and profile to check evenness as you go.
- Correct misalignment immediately; thinset corrections are harder once partially set.
Grouting Against Metal or PVC
Different materials require a light touch during cleanup.
- Metal trims: Avoid abrasive pads. Use a soft sponge; wipe along the grain on brushed finishes.
- PVC trims: Grout can scuff; tape the face before grouting and peel while the grout is still workable.
- Color-matched caulk: Consider caulk for the profile-to-tile joint in areas subject to movement.
Advanced Techniques and Special Cases
Miters That Last
- Cut both sides of a miter with the same saw and setup to ensure angles match.
- Lightly ease the sharp external edge with a file to reduce chipping risk.
- In high-traffic corners, prefer factory corners or stainless steel for durability.
Integrating LED Profiles
- Use low-voltage, moisture-rated LED strips in LED-ready channels.
- Plan for power supply locations and routing before tiling; avoid puncturing membranes.
- Seal connections appropriately and allow for heat dissipation.
Movement and Expansion Management
- Insert soft joints at perimeter edges and every several meters in long runs.
- Use dedicated movement-joint profiles where sunlight or temperature swings are significant.
- Never hard-grout a change of plane; use a flexible sealant.
Common Mistakes to Avoid
- Wrong profile size: A too-small reveal leaves tile edges exposed; too large looks clumsy.
- Skipping dry fits: Without test fitting, corner joints can gap or misalign.
- Setting out of level: Trims exaggerate crooked lines. Always check with a level or laser.
- Embedding over dust or paint skin: Clean and prep surfaces for mortar bond.
- Grout haze on trims: Immediate cleanup prevents stains and micro-scratches.
Troubleshooting and Fixes
- Profile sits proud of tile: Remove tile while mortar is fresh, reduce mortar under the tile, or step up to a slightly thicker back-butter on adjacent tiles.
- Gapping at a miter: Recut the miter, or use a factory corner. Minor gaps can be disguised with color-matched sealant, but do not rely on it for structure.
- Wavy line along a long run: Pull the trim, re-trowel, and reset using a straightedge. Mortar must still be workable.
- Scratched finish: Lightly buff brushed aluminum with a Scotch-Brite style pad in the direction of the grain; avoid this on polished finishes.
Maintenance and Cleaning
- Clean metal trims with mild soap and water; avoid harsh acids or abrasives.
- For stainless steel, a stainless cleaner restores sheen; for brass, decide whether to preserve patina or polish regularly.
- Inspect silicone joints annually and renew if cracked or moldy, especially in showers.
Safety and Best Practices
- Wear eye and hearing protection when cutting metal.
- Use dust extraction for cutting operations; ventilate the workspace.
- Observe cure times and do not rush grouting or use of the shower.
- Follow all manufacturer instructions for thinset, membranes, and trims.
Environmental and Durability Considerations
- Choose corrosion-resistant metals in wet areas; stainless steel is the most robust option.
- Where possible, select finishes compatible with long-term cleaning products you plan to use.
- For sustainability, select durable profiles that will not require early replacement, and recycle metal offcuts.
FAQ: Quick Answers
- Do I have to use a trim on all tile edges? No, but exposed edges are prone to chipping. Trims provide the cleanest, most durable finish where bullnose is not available.
- Can I install profiles after tiling? Trims are designed to be embedded with the tile. Retrofits are tricky and rarely look as good.
- What if my tiles are different thicknesses? Use a trim sized to the thicker tile and build out thinner tiles with mortar, or step to a different profile on that run.
- How do I cut stainless steel trims? Use an angle grinder or a miter saw with a suitable blade, cut slowly, and deburr thoroughly.
- Should I miter or use corner accessories? For speed and reliability, factory corners are excellent. Miters can be crisper if executed perfectly.
Project Planning Checklist
- Confirm tile thickness and select profile size accordingly.
- Order enough trims plus extra for mistakes and offcuts.
- Decide on corner method and order accessories if needed.
- Mark layout lines and check for level and plumb.
- Prepare substrate and waterproofing.
- Gather tools and safety gear.
- Test-cut and dry-fit all visible corners and ends.
Case Study: Shower With External Corners and a Niche
Imagine a porcelain-tiled shower with two external columns and a recessed niche. The plan calls for brushed stainless steel trims on all exposed edges, including the niche interior.
- Selection: Choose 10 mm trims for 9 mm porcelain plus mortar build. Order external corner accessories and four internal corner connectors for the niche.
- Layout: Laser vertical lines where trims will run at the column edges and niche. Align grout courses so they meet the trim at full or cleanly cut tiles.
- Installation: Set the vertical trims first, ensuring perfect plumb. Tile into them course by course, checking flushness. At the niche, miter or use connectors; keep reveals identical all around.
- Finishing: Grout all joints, then silicone the inside corners and the niche-to-wall change of plane. Polish trims and remove protective tape.
Time and Cost Considerations
- Material cost: Aluminum trims are budget friendly; stainless steel costs more but pays off in durability for showers.
- Labor time: Expect additional time for precise measuring, cutting, and fitting—especially at corners and niches.
- Value add: Profiles elevate the perceived quality of the job and help tiles last longer without chipping.
Step-by-Step Recap
- Plan your layout and select the correct profile and accessories.
- Dry-fit everything and mark cuts.
- Cut profiles cleanly and deburr.
- Trowel mortar and embed the anchoring leg true to level.
- Set tiles flush to the reveal with a neat joint.
- Execute corners with miters or factory pieces.
- Let cure, then grout and apply silicone where needed.
- Clean, polish, and inspect your work.
Putting It All Together
Mastering how to install wall tile profiles comes down to preparation, precision, and patience. The right profile, placed with a true line and partnered with a flush tile face, creates a finish that reads as custom and high end. From backsplash terminations to shower niches, external corners to window returns, the techniques above ensure your edges are protected, your lines are straight, and your details are durable.
Pro Tips for Flawless Edges
- Use a laser level to set long vertical trims; micro-variations become obvious on metal.
- Pre-tape the reveal before grouting to avoid cleanup headaches.
- Keep a dedicated fine file for miters; a few careful passes can close a visible hairline gap.
- In showers, always prioritize waterproofing continuity; trims should never compromise the membrane.
- When in doubt about size, test on a scrap board with your actual tile and mortar stack.
Next Steps
With the planning, cutting, and setting methods above, you are ready to execute crisp, elegant edges on any wall tile project. Secure your materials, double-check your layout, and work methodically. Your walls will reward the effort with clean lines that look great for years to come.
If you are working in an unusual environment or with specialty tiles, consult the profile manufacturer's technical guide for any product-specific requirements. The fundamentals here apply broadly, but details can vary by system.