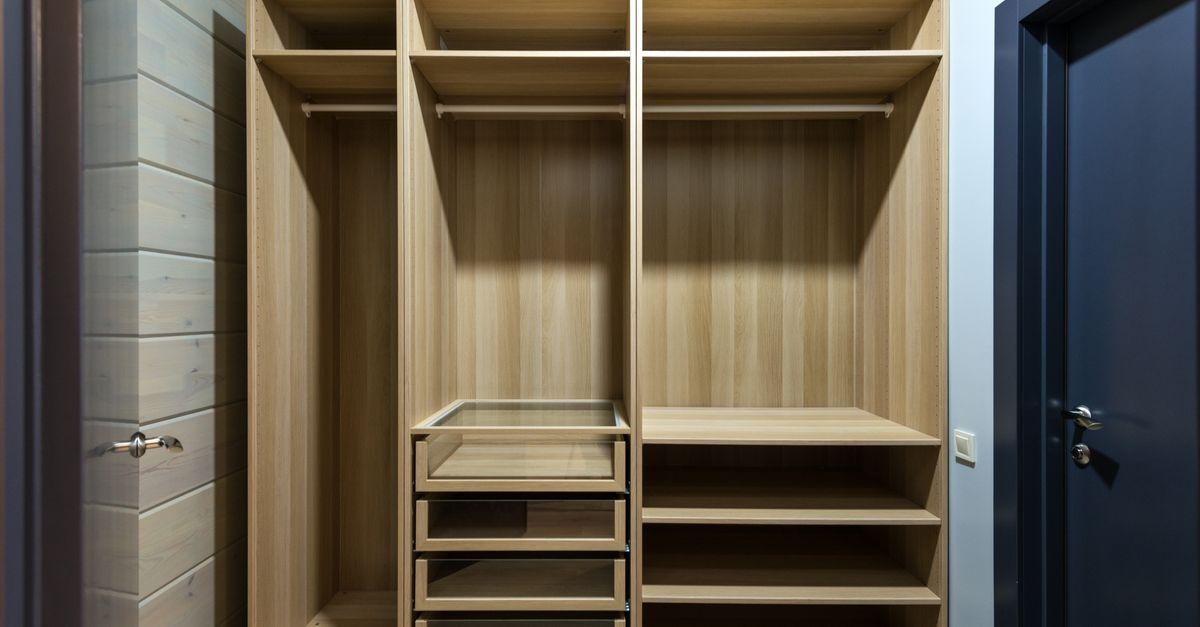
When square footage is scarce, design has to work harder. The good news? A thoughtful built‑in wardrobe can hold far more than you imagine—while looking calm, curated, and effortlessly chic. Below, you’ll find practical, design‑forward ideas for saving space, organizing faster, and styling smarter so every inch pays rent.
Why Built‑Ins Win in Small Spaces
Freestanding wardrobes often leave gaps above, below, and beside the cabinet—wasted space that collects dust instead of storing essentials. A built‑in wardrobe, by contrast, is tailored to the wall height, room width, and your exact clothing mix. That custom fit unlocks storage from floor to ceiling, hides clutter, and delivers a clean architectural line that visually expands the room. When you’re looking for ideas for saving space in a built‑in wardrobe, the structure itself becomes your best ally.
- Seamless fit: No awkward voids; every centimeter can be planned as usable storage.
- Tailored interiors: Configurations match your wardrobe—not a generic average.
- Visual calm: Sliding or panel doors simplify sightlines, making small rooms feel larger.
- Resale value: Quality built‑ins read as an upgrade in apartments and small homes.
The Big Picture: Start With a Plan
You don’t need a massive renovation to transform your closet. You do need a smart blueprint. Before you compare drawer inserts or shoe racks, map how you really live and dress. Then you can apply targeted ideas for saving space in a built‑in wardrobe that match your routine, not someone else’s Pinterest board.
Step 1: Audit What You Own (And What You Actually Wear)
Most cramped closets are not short on space; they’re crowded with unused stuff. Begin with a ruthless inventory:
- Sort by category: Workwear, casual, gym, formal, outerwear, shoes, accessories.
- Right‑size your mix: Count long‑hang items (dresses, coats) versus short‑hang (shirts, blouses, blazers). This drives rail height.
- Try the 80/20 test: Keep what you wear 80% of the time front and center. Archive or donate the rest.
- Set seasonal rules: Rotate off‑season pieces to upper shelves or vacuum bags.
Step 2: Measure Precisely
In small rooms, a 1–2 cm error costs a shelf. Measure width, height, and depth at multiple points; walls are rarely perfectly square. Note door swings, skirting boards, sockets, vents, and ceiling slopes. Confirm clearance for sliding doors, and plan for ventilation to prevent mustiness.
Step 3: Define Priorities
Decide your must‑haves based on lifestyle:
- Workwear heavy? Double short‑hang rails and a tie/belt pull‑out.
- Sneaker collector? Pull‑out shoe trays or angled shelves with fences.
- Jewelry or small accessories? Shallow velvet‑lined drawers with dividers.
- Shared closet? Symmetrical zones and clear labeling to prevent overlap.
Core Layout Moves That Multiply Capacity
These are the foundational ideas for saving space in a built‑in wardrobe that consistently yield more storage without making your closet feel cramped.
1) Double Up Your Hanging Space
Install two short‑hang rails—one above the other—to instantly double capacity for shirts, blouses, and blazers. Reserve a narrower bay for long‑hang pieces. Adjustable rail brackets let you reconfigure as your wardrobe shifts.
- Optimal heights: Upper rail at ~200–210 cm; lower rail at ~100–110 cm from the floor (adjust for garment length).
- Use slim, uniform hangers: They save inches and keep shoulders from stretching.
- Clip‑on cascading hooks: Stack outfits vertically without wrinkling.
2) Right‑Size Shelves and Spacing
Oversized shelves become messy piles. Opt for adjustable, shallow shelves (22–30 cm apart) for knitwear, denim, and handbags. Add under‑shelf baskets to exploit negative space beneath each shelf.
- File fold knits: Store folded pieces upright to see everything at a glance and prevent toppling.
- Use bookends or acrylic dividers: Keep stacks contained without wasting width.
3) Swap Dead Space for Drawers and Baskets
In many closets, the lower half turns into a catch‑all. Replace it with internal drawers or ventilated baskets that pull all the way out. You’ll gain accessible volume and reduce visual clutter.
- Shallow top drawers (6–10 cm): Perfect for jewelry, watches, belts, ties, and sunglasses.
- Mid‑depth (12–18 cm): Tees, gym wear, pajamas, tech accessories.
- Deep drawers (20–28 cm): Chunky knits, handbags, or linens (use dividers to avoid overstuffing).
4) Prioritize Pull‑Outs
Pull‑out accessories transform hard‑to‑reach nooks into prime real estate:
- Pull‑out shoe trays: Store two rows per tray; visibility curbs duplicates.
- Trouser rack: Pants hang crease‑free and compact.
- Valet rod: A slim, retractable perch for tomorrow’s outfit.
- Swivel mirror: Hidden full‑length checking without stealing wall space.
5) Exploit the Upper Third
Ceiling‑high built‑ins reclaim valuable cubic space. Use the topmost shelves for off‑season storage in labeled boxes or vacuum bags. Consider a pull‑down wardrobe lift to make high rails accessible in a single motion.
6) Choose Sliding or Pocket Doors
Where swing clearance is tight, sliding or pocket doors protect circulation space. Mirrored panels bounce light and visually double the room. For a minimal look, use integrated finger pulls instead of protruding handles.
Fine‑Tuning: Smart Accessories That Punch Above Their Weight
Once the structure is set, small upgrades amplify function. Here are practical, style‑savvy ideas for saving space in a built‑in wardrobe that deliver outsized impact.
Hooks, Rails, and Rods
- S‑hooks: Hang handbags or belts from a rail without bulky organizers.
- Over‑the‑door solutions: Great for robes, totes, or daily rotation pieces.
- Clip rails: Corral scarves and caps on a single slimline bar.
Dividers, Inserts, and Trays
- Drawer dividers: Segment by category to prevent rummaging.
- Jewelry trays: Flocked inserts protect delicate pieces and maximize shallow drawers.
- Bag shapers or shelf cubbies: Keep handbags upright, saving shelf width.
Shoe Storage That Actually Works
Shoes are space hogs. Pick a method that suits your collection:
- Angled shelves with a front lip: Better visibility; excellent for heels.
- Pull‑out wire racks: Ventilated, adjustable, and compact.
- Clear drop‑front boxes: Stackable; ideal for collectors and dust protection.
- Under‑hang shoe drawers: Tuck under lower rail to reclaim floor area.
Lighting: The Invisible Space‑Saver
Good lighting prevents double buying and speeds up dressing. Low‑profile LED strips with motion sensors illuminate shelves and rails without bulky fixtures.
- 3000–4000K color temperature: True‑to‑life colors without harshness.
- Sensor placement: One per bay to avoid shadow pockets.
- Rechargeable battery LEDs: Perfect for renters—no wiring, no holes.
Design for Illusion: Make Small Look Spacious
Style choices can visually expand a compact closet while supporting function. Consider these subtle yet powerful moves:
- Light, matte finishes: Reflect ambient light softly, reducing visual bulk.
- Continuous vertical lines: Fluted panels, vertical handles, or grain up the doors draw the eye upward.
- Mirrored or glass accents: Door panels or back panels add depth and bounce light.
- Minimal hardware: Integrated pulls reduce clutter and snag risks.
Organization Systems That Keep Order (Without Daily Effort)
True space‑saving isn’t a one‑time install—it’s a system that runs itself. These approaches reduce friction and keep the closet photogenic with minimal maintenance.
Capsule Thinking, Flexible Storage
A capsule wardrobe philosophy—curating versatile favorites—pairs perfectly with compact built‑ins. You don’t have to go ultra‑minimal; just group high‑rotation items within easy reach and archive the rest. Use modular inserts so capacity can flex up or down by season.
Seasonal Rotation: A Repeatable Ritual
- Label by season + category: “Winter knits,” “Summer linens,” etc.—top shelves or under‑bed boxes.
- Vacuum‑seal off‑season: Compress bulk while deterring pests.
- Quick refresh rule: On each rotation, donate or sell anything unworn.
Color‑Coding and Zoning
Color‑coding sounds aesthetic; it’s also practical. Sorting by tone makes faster decisions and keeps inventory visible. Combine with zones—work, weekend, workout—so your hand moves directly to the right bay.
Ideas for Saving Space in a Built‑In Wardrobe: 25 High‑Impact Tactics
Use these targeted tactics to squeeze maximum function from minimal square footage. Mix and match according to your layout and lifestyle.
- 1. Double short‑hang rails to instantly multiply capacity.
- 2. Pull‑down wardrobe lifts for high rails you can actually reach.
- 3. Internal drawers instead of open stacks for cleaner, denser storage.
- 4. File‑folding tees and knits in shallow drawers for visibility.
- 5. Angled shoe shelves with front fences to prevent slides.
- 6. Pull‑out trouser racks for crease‑free, compact pant storage.
- 7. Slim, uniform hangers to reclaim valuable rail width.
- 8. Under‑shelf baskets to capture forgotten headroom.
- 9. S‑hooks to hang bags or accessories on existing rails.
- 10. Valet rod to stage outfits and speed mornings.
- 11. LED motion lighting to illuminate dark corners.
- 12. Clear labeled bins for top shelves and corners.
- 13. Door‑mounted organizers for belts, ties, and scarves.
- 14. Pull‑out mirrors to save wall space yet keep full‑length checks handy.
- 15. Adjustable shelves so spacing evolves with your wardrobe.
- 16. Sided‑to‑side rails in shallow niches where front‑to‑back won’t fit.
- 17. Over‑cabinet cubbies for luggage or archive storage.
- 18. Drawer organizers tailored to jewelry, watches, tech, or eyewear.
- 19. Vacuum bags for bulky coats and duvets.
- 20. Labeled shelf dividers to keep stacks upright.
- 21. Multi‑clip hangers for skirts/shorts on a single footprint.
- 22. Tiered shoe racks to reclaim floor depth.
- 23. Corner carousels or angled shelves to exploit tricky corners.
- 24. Sliding doors to protect floor area in tight rooms.
- 25. A laundry pull‑out so dirty clothes don’t sprawl across the floor.
Tailor to Your Space: Layouts That Solve Specific Problems
If Your Closet Is Very Shallow (≤ 45 cm internal depth)
- Side‑to‑side hanging: Mount rails left‑to‑right instead of front‑to‑back.
- Use forward‑facing hooks: For bags, scarves, and caps on side walls.
- Shallow drawers + shelves: 30–40 cm deep can still be highly efficient.
If You Have a Sloped Ceiling or Loft Niche
- Custom angled doors or curtains: Hide irregular lines cleanly.
- Lower cabinet for drawers under the slope; reserve hanging for full‑height areas.
- Use pull‑down lifts in the tallest bay to offset lost height.
If You’re Sharing a Single Wardrobe
- Split vertically: One bay each; mirror configurations when possible.
- Color‑coded bins or labels: Prevents category drift between users.
- Duplicate everyday tools: Two valet rods, two jewelry trays—less friction.
Budget to Bespoke: Choosing the Right System
You can apply the same space‑smart principles across budgets. The trick is knowing where to spend and where to save.
Flat‑Pack and Modular (Budget‑Friendly)
- Pros: Affordable, configurable, easy to upgrade with add‑ons (think drawers, shoe racks, lighting).
- Cons: Standard widths may leave gaps; materials may flex under heavy loads.
- Space tip: Use filler panels and custom‑cut shelves to close gaps to the wall or ceiling.
Custom Joinery (Mid to High‑End)
- Pros: Millimeter‑perfect fit, premium hardware, tailored interiors, integrated lighting.
- Cons: Longer lead times and higher costs.
- Space tip: Ask for full‑height doors with a concealed overhead hatch for infrequent‑use items.
Hybrid Approach
Combine a modular carcass with custom doors and fillers. You’ll get a seamless look at a friendlier price, plus the flexibility to reconfigure interiors later.
Workflow Matters: Make Dressing Friction‑Free
Space saving is meaningless if your daily routine feels fiddly. Design around your rhythm so the closet serves you in seconds.
- Entry flow: Keep a small tray in the top drawer for wallet, keys, and watch.
- Laundry loop: A pull‑out hamper with dual compartments (lights/darks) stops floor piles.
- Next‑day staging: Use the valet rod to prep outfits—fewer morning decisions.
- Maintenance minute: A weekly 5‑minute reset returns strays to their homes.
Smart Tech for Small Closets (Optional, Surprisingly Handy)
Technology won’t create new cubic meters, but it can unlock hidden capacity by sharpening visibility and reducing duplicates.
- QR‑coded bins: Scan to see contents of high shelves without pulling boxes down.
- Outfit apps: Track what you wear, spotlight underused pieces, and guide edits.
- Battery LED sensors: Auto‑on lighting ensures nothing gets buried in the dark.
Sustainability and Care: Protect What You Own
Storing smarter is greener: you buy less, keep pieces longer, and reduce textile waste. A few protective measures also preserve your investment.
- Natural pest deterrents: Cedar blocks or lavender sachets over chemical mothballs.
- Breathable garment bags: Cotton for wools and silks; avoid plastic long‑term.
- Airflow matters: Leave a few millimeters of space behind panels; add discreet vents if needed.
- Dehumidifiers: In damp climates, a mini unit prevents mildew and odor.
Common Mistakes (And Easy Fixes)
- Mistake: Too many long‑hang bays. Fix: Switch one to double short‑hang and add a trouser rack.
- Mistake: Deep, unlit shelves. Fix: Install LED strips and shelf dividers; move small items to drawers.
- Mistake: Mismatched bulky hangers. Fix: Standardize to slim velvet or thin wooden hangers.
- Mistake: Wasted top space. Fix: Add a pull‑down lift or labeled bins and a step stool hook.
- Mistake: Over‑door chaos. Fix: Limit to a few hooks and rotate seasonally.
Mini Case Studies: Small Space, Big Style
Studio Apartment, No Hall Closet
Constraint: One 160‑cm wall for a full wardrobe. Solution: Three‑bay built‑in with sliding mirror doors; middle bay double short‑hang with shallow drawers below; flanking bays with angled shoe shelves and a pull‑down lift for coats. Result: Daily wear front‑and‑center, off‑season above, shoes dust‑free, room feels larger thanks to mirrored doors.
Sloped‑Ceiling Loft Bedroom
Constraint: Eaves cut usable height in half. Solution: Custom carcass that hugs the slope; drawers under the low side, hanging at full height, and a corner carousel. Result: Zero dead zones; drawers replace awkward floor areas; dressing is faster.
Shared Closet for Two
Constraint: One 200‑cm built‑in serving two people. Solution: Symmetrical split; each side gets a valet rod, jewelry tray, and deep drawer. Shared center with pull‑out trouser rack and shoe drawers. Result: No overlap, fewer morning negotiations, and easy resets.
Renter‑Friendly Upgrades (No Holes Required)
- Tension rods: Add a secondary rail without drilling.
- Adhesive hooks and cable clips: For belts, hats, and LED strip management.
- Freestanding drawer units: Slide under hanging for instant compartments.
- Removable over‑door racks: Elevate daily‑use items without carpentry.
How to Maintain the System (In Minutes, Not Hours)
- 1‑in, 1‑out rule: When something new arrives, one item leaves.
- Weekly reset: Five minutes to refold knits, return strays, and empty the valet rod.
- Quarterly audit: During seasonal rotation, prune duplicates and replace tired basics.
- Label check: If labels stop matching contents, tweak zones immediately.
Quick Checklist: From Cluttered to Curated
- Measure everything (height, width, depth, obstructions, door swings).
- Inventory and edit—let usage guide the layout.
- Install double short‑hang rails; reserve one bay for long items.
- Convert floor space into drawers or baskets.
- Add pull‑outs: shoe trays, trouser rack, valet rod, mirror.
- Light the interior with motion‑sensor LEDs.
- Use adjustable shelves and under‑shelf baskets to fill vertical gaps.
- Adopt a rotation system and label bins clearly.
- Standardize slim hangers and add dividers for drawers and shelves.
- Finish with sliding or mirrored doors to maximize room feel.
Frequently Asked Questions
How deep should a built‑in wardrobe be?
Standard hanging depth is 55–60 cm to fit hangers comfortably. If you’re working with less, pivot to side‑to‑side rails, hooks, or shallow drawers and shelves.
What’s the best mix of hanging vs. drawers?
Let your inventory decide. As a baseline for compact closets: two bays of double short‑hang, one narrow long‑hang, and drawers occupying the lower third across at least one bay. Adjust as your clothing mix changes.
Are sliding doors always better for small rooms?
Often, yes—no swing clearance needed. But they slightly reduce access width to the interior. Pocket or bifold doors can be great if install conditions allow.
Which accessories deliver the biggest gains?
Double rails, internal drawers with dividers, pull‑out shoe solutions, and LED lighting. These core moves consistently increase usable capacity and speed up daily routines.
Wrapping Up: Small Space, Big Style
Maximizing a tight closet isn’t about cramming more stuff inside—it’s about designing a calm, efficient system that serves your real life. From double‑hanging rails and adjustable shelves to pull‑out accessories, lighting, and seasonal rotation, the smartest ideas for saving space in a built‑in wardrobe blend function with finesse. Plan carefully, edit ruthlessly, and treat every centimeter as prime real estate. The result? A built‑in that feels bigger, looks sleeker, and makes getting dressed delightfully simple.
Bonus: 10‑Minute Micro‑Upgrades You Can Do Today
- Swap to slim, matching hangers and recover 15–25% rail width.
- Add an adhesive LED motion light to the darkest shelf.
- File‑fold one drawer and insert a simple divider.
- Hang an S‑hook rail for bags and hats.
- Label two top‑shelf bins “Next Season” and “Special Occasion.”
- Stage tomorrow’s outfit on a temporary valet hook.
- Corral belts and ties into a single pull‑out or compact tray.
- Vacuum‑seal two bulkiest off‑season items.
- Mount shelf dividers to stabilize knit stacks.
- Do a 10‑item edit—free space is the best organizer.
Whether you DIY with a modular system or commission bespoke joinery, the principles above will help you turn a tight footprint into a high‑function dressing hub. Start small, iterate, and enjoy the daily ease that a well‑designed built‑in delivers.