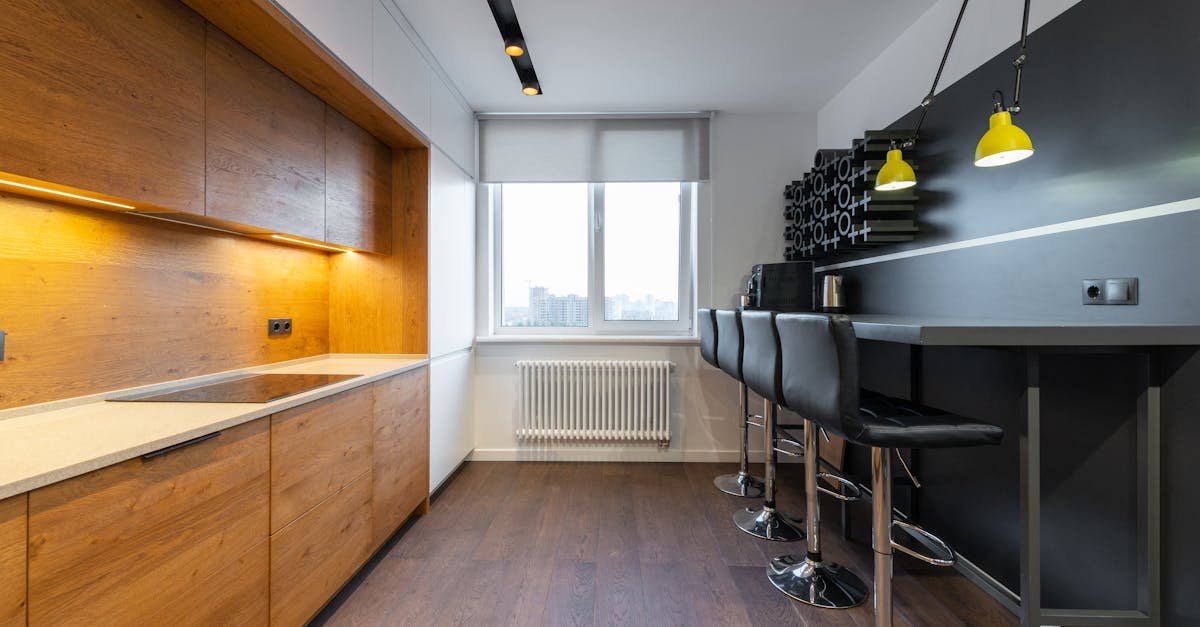
If your cooking zone is compact but your ambitions are big, a breakfast bar can be the small-space hero that transforms the way you live and cook. Beyond offering an extra slice of countertop, the right bar can optimize circulation, consolidate storage, and create a casual dining hub without demanding a separate dining room. This in-depth guide shows you how to design a small kitchen with a breakfast bar that looks polished, functions beautifully, and adapts to your everyday life.
Why a Breakfast Bar Is a Small-Kitchen MVP
A breakfast bar delivers multiple wins in tight quarters. It provides a spot for quick meals, remote work, or kids' homework while doubling as a prep surface. It can also serve as a subtle room divider in open-plan apartments, or as a clever extension in a galley kitchen. When done right, it helps your small kitchen feel bigger, brighter, and more flexible.
- Multi-tasking surface: Food prep by day, laptop station by afternoon, aperitif counter by night.
- Space-efficient seating: Stools tuck away, so you reclaim floor area when not dining.
- Zoning without walls: Define kitchen and living spaces with a low-profile peninsula or a wall-mounted ledge.
- Storage opportunity: The bar base can hide drawers, shelves, pull-outs, or appliances.
- Light and social: A casual perch invites conversation without crowding the cook.
Start Smart: Measure, Map, and Model
Before picking materials or stools, invest time in planning. In small kitchens, a few centimeters or inches can decide whether the breakfast bar feels effortless or awkward. Assess the room’s shape, openings, and workflow, then experiment with scaled sketches or simple digital models to refine dimensions.
Essential Dimensions and Clearances
The following guidelines help ensure comfort and code-conscious design. Adjust to your body size, local regulations, and appliance models.
- Counter height: Standard counter seating is about 90 centimeters (36 inches). Bar-height seating is roughly 105 centimeters (42 inches). Choose one and keep it consistent.
- Overhang for knees: Aim for 25 to 30 centimeters (10 to 12 inches) of overhang for comfort. Add hidden brackets if you exceed 25 centimeters.
- Stool spacing: Allow 60 centimeters (24 inches) per seat for elbow room. For wider stools or arms, plan more.
- Walkway clearance: Keep 90 to 110 centimeters (36 to 44 inches) of clear path behind seated diners whenever possible.
- Work triangle or work zones: Position the cooktop, sink, and fridge or primary prep zone so movement is efficient. If a triangle is not possible, create balanced zones.
- Overhead clearance: If adding pendants, hang shades so the bottom is roughly 70 to 80 centimeters (28 to 32 inches) above the countertop to preserve sightlines.
Workflow and Zones
Link your bar to the main tasks you do daily. If you chop vegetables near the sink, position the bar close by so it can extend prep space. If the bar is meant for laptops and snacks, place outlets with USB charging nearby and set it away from splashing zones. Keep the primary cooking corridor clear of stool legs to prevent traffic jams.
Seating Ergonomics
Comfort sells the concept. Choose stools that slide fully beneath the overhang to free circulation, and pick footrests suitable for the chosen height. If you expect longer meals or work sessions, opt for cushioned seats and backrests, and avoid ultra-narrow perches that force awkward posture.
Choose a Layout Strategy That Suits Your Space
Whether your home is a studio or a compact townhouse, there is a breakfast-bar configuration that fits. The secret is tailoring depth, length, and location to your existing kitchen footprint and daily routines.
Galley Kitchens
In a galley, a full-depth island is usually impractical. Instead, explore a peninsula that extends from one run of cabinets, or a pass-through ledge if your galley borders a living room. A slim, 30 to 45-centimeter (12 to 18-inch) deep ledge can host coffee mugs, sandwiches, or a laptop while preserving aisle width.
One-Wall Kitchens
For single-wall layouts, add a parallel bar as a narrow island or a wall-mounted drop-leaf table opposite the cabinets. If the room is tight, a fold-down panel creates an instant micro-breakfast bar without committing precious floor space.
L-Shaped Kitchens
L-shapes are naturals for peninsulas. Extend the short leg by 60 to 90 centimeters (24 to 36 inches) and add an overhang on the living-room side. If you cook with company, design the peninsula as a social prep zone with a cutting board and waste chute, keeping hot surfaces farther back.
U-Shaped Kitchens
In a U-shape, a bridging bar can convert one opening into a casual pass-through, or a partial-height bar can cap one run to delineate spaces. Scale the seating for two rather than three to avoid squeezing.
Studio and Open-Plan Spaces
Let the breakfast bar be your room divider. Keep sightlines low with slim countertops and minimal legs, or use slatted wood or fluted panels under the overhang to add texture without heaviness. Tie the bar materials to both the kitchen and living space to create a cohesive look.
Breakfast Bar Types for Small Kitchens
Understanding the options makes it easier to match form and function to your footprint and budget.
Peninsula vs. Island
- Peninsula: Attached at one end to cabinetry or a wall. Ideal for narrow rooms; provides power and storage easily.
- Compact Island: Freestanding unit, often on casters or with slim legs. Best for larger small kitchens with at least 90 centimeters (36 inches) all around.
Overhang and Cantilever
- Standard overhang: 25 to 30 centimeters (10 to 12 inches). Use steel brackets or concealed supports for longer spans.
- Cantilevered slab: A thicker top projects beyond base cabinets for clean legroom. Plan structure carefully to avoid sag.
Fold-Down, Drop-Leaf, and Pull-Out
- Wall-mounted fold-down: Hinged top lifts when needed and folds flat when not. Great for rentals and micro-kitchens.
- Drop-leaf peninsula: A flip-up panel increases depth during meals; hinges tuck away seamlessly.
- Pull-out surface: Drawer-like panel extends for snacks or laptop time; pushes back to save space.
Window Bar and Wall Ledge
- Window bar: A narrow slab installed under a window creates a bright breakfast perch.
- Floating ledge: A minimalist shelf-style top with hidden brackets for ultra-light visuals.
Integrate Storage Like a Pro
The bar base is prime real estate. Treat it as a storage workhorse so the rest of your kitchen stays calm and uncluttered.
- Deep drawers over doors: Full-extension drawers for pots, small appliances, or pantry bins make access effortless.
- Slender pull-outs: Use 15 to 20-centimeter (6 to 8-inch) pull-outs for oils, wraps, or spices at the bar’s base.
- Toe-kick drawers: Add low-profile drawers for sheet pans, trays, or placemats.
- Open cubbies: Display cookbooks, baskets, or a speaker on the living side to blend kitchen and lounge.
- Appliance garage: Hide toasters or blenders behind tambour or flip-up fronts near the bar.
- Charging drawer: A soft-close drawer with an outlet keeps cords and devices out of sight.
Lighting and Power: Make It Shine and Work
Lighting and electrical planning transform a decent breakfast bar into a delightful one. Add layers of light and thoughtful power access to support every task from chopping to video calls.
Layered Lighting
- Ambient: Recessed lights or ceiling fixtures to evenly illuminate the whole kitchen.
- Task: Under-cabinet strips near prep zones and well-positioned pendants over the bar.
- Accent: LED toe-kick or shelf lighting to add depth and evening glow.
Place pendants in odd-numbered groups for balance. Use dimmers to switch from meal prep to mood lighting. Choose warm-to-neutral temperature bulbs (around 2700K to 3500K) for a cozy yet crisp glow.
Outlets, Data, and Safety
- Pop-up or flush outlets: Preserve clean surfaces while delivering power where it is needed.
- GFCI protection: Use appropriate safety devices near water sources per local code.
- USB and USB-C ports: Integrate device charging so the bar doubles as a work station.
- Cord management: Route cables through grommets or a concealed chase to prevent snags.
Materials and Finishes That Earn Their Keep
In small kitchens, every finish is on display. Balance durability, maintenance, and cost while creating a cohesive look that connects to adjacent rooms.
Countertops
- Quartz: Durable, low-maintenance, and available in light tones that brighten tight spaces.
- Butcher block: Warm and affordable. Seal well near sinks and provide trivets for heat protection.
- Laminate: Budget-friendly with improved edge options; use a sleek profile for modern lines.
- Compact laminate or solid surface: Slim and resilient, excellent for floating or thin-edged looks.
Edge profiles matter in small spaces. A simple eased edge reads modern and saves visual bulk. Consider a waterfall end to frame a peninsula, but keep proportions slim to maintain openness.
Cabinetry and Panels
- Matte finishes: Hide fingerprints in high-touch zones.
- Vertical fluting or slats: Add texture to the bar front without heaviness.
- Color continuity: Match or gently contrast the living area palette for a unified feel.
Stools
- Backless, tuckable designs: Maximize circulation.
- Low backs: Provide support without blocking views.
- Height adjustability: Useful if your bar height deviates from standard.
Style Moves That Make Spaces Feel Larger
Visual tricks can dramatically expand the perception of space without adding a single square centimeter.
- Light, low-contrast palettes: Keep counters, cabinetry, and walls within a similar tonal range to smooth visual breaks.
- Reflective accents: Satin hardware, glass pendants, or a glossy backsplash bounce light around.
- Continuous flooring: Run the same plank or tile from kitchen to living space to reduce visual fragmentation.
- Open corners: Use rounded waterfall edges or softened corners on the bar to improve flow and safety.
- Minimal visual clutter: Store appliances and utensils out of sight; curate only a few display items.
Budget and Build: From Rental-Friendly to Remodel
You do not need a full renovation to enjoy breakfast-bar benefits. Choose the path that matches your budget, skills, and timeframe.
Rental-Friendly Ideas
- Freestanding bar cart or island: Narrow carts with butcher block tops add prep space and perch seating.
- Wall-mounted fold-down table: Use heavy-duty hinges and French cleats to protect walls.
- Tension-mounted shelves: Create a light breakfast ledge without drilling into cabinets.
- Temporary lighting: Plug-in pendants with ceiling hooks and cord covers add style without rewiring.
Mid-Range Upgrades
- Cabinet-based peninsula: Extend a base cabinet run, add a supporting leg, and top with a matching counter.
- Electrical upgrades: Add pop-up outlets and dimmers; wire pendants to a dedicated switch.
- Storage retrofits: Install soft-close drawers, pull-outs, and toe-kick drawers in the bar base.
High-End Solutions
- Custom millwork: Integrated seating nooks, curved ends, or sculpted fluting.
- Structural cantilevers: Hidden steel supports for dramatic, floating overhangs.
- Integrated appliances: Slim dishwashers, drawer fridges, or a built-in beverage center within the bar.
DIY Snapshot: Build a Compact Peninsula
- Plan and measure: Confirm clearances, seating count, and target heights.
- Base structure: Anchor a base cabinet to the floor/wall; add blocking for overhang support.
- Supports: Mount concealed brackets 45 to 60 centimeters (18 to 24 inches) apart.
- Countertop: Template and install; check overhang is level and secure.
- Electrical: Add a pop-up outlet; verify safety requirements.
- Finish: Apply panels to the bar face and add footrests and trim as needed.
Appliance and Fixture Strategy for Small Kitchens
The right mix of compact appliances frees up counter space and makes a breakfast bar more practical.
- Induction cooktops: Safe, fast, and often shallower; pair with a recirculating hood if venting is limited.
- Single-bowl sink with accessories: Use cutting boards and colanders that fit over the basin to expand prep space.
- Slimline appliances: Consider 45-centimeter (18-inch) dishwashers and 60-centimeter (24-inch) fridges.
- Microwave drawer: Place in the peninsula base to clear upper cabinets.
Safety, Accessibility, and Family Life
Design for all ages and abilities so your breakfast bar serves everyone comfortably and safely.
- Rounded corners: Protect hips and little foreheads in tight traffic paths.
- Non-slip flooring: Especially important around stools where spills happen.
- Stable stools: Choose wide bases and anti-tip designs, especially for kids.
- Knee space: Reserve enough legroom for comfortable seated posture.
- Clear sightlines: Keep pendant lights and shelving from blocking views across rooms.
Real-World Sizing Cheat Sheet
Use this quick-reference list to sanity-check your plan:
- Bar or counter height: 90 centimeters (36 inches); bar-height 105 centimeters (42 inches).
- Seat width allowance: 60 centimeters (24 inches) per person.
- Overhang depth: 25 to 30 centimeters (10 to 12 inches).
- Clearance behind stools: 90 to 110 centimeters (36 to 44 inches) for a pass-through aisle.
- Pendant spacing: Space evenly; keep 70 to 80 centimeters (28 to 32 inches) above the top.
Common Mistakes to Avoid
- Skimping on overhang: Too little knee space makes seats uncomfortable and discourages use.
- Blocking the fridge or dishwasher: Ensure doors can open without colliding with stools or the bar end.
- Oversizing the top: A massive slab swallows circulation; keep proportions lean.
- Forgetting outlets: Power transforms the bar into a work spot; plan discreet access.
- Ignoring lighting layers: One dim pendant is not enough; combine task and ambient light.
- Clutter creep: A bar covered in mail and gadgets loses its hospitality. Add storage for the small stuff.
Design Details That Pay Off Big
Small choices can make an outsized impact on functionality and feel.
- Footrest bar: A simple rail increases comfort and encourages better posture.
- Two-tone strategy: Dark base, light top grounds the bar and keeps the room airy.
- Acoustic touches: Upholstered stools and fabric shades help absorb sound in hard-surfaced kitchens.
- Hidden trash or compost bin: Build into the peninsula to keep mess out of sight during prep.
- Magnetic strip or rail: Mount on the bar side for frequently used tools without cluttering the counter.
How to Design a Small Kitchen with a Breakfast Bar: A Step-by-Step Plan
This action plan pulls together the ideas above into a sequence you can follow from concept to coffee at the counter.
- Define the purpose: Is the bar primarily for dining, prep, work, or a mix? Your answer sets depth, height, and location.
- Catalog constraints: Note windows, doors, radiators, and the swing paths of appliances. Mark traffic patterns.
- Measure meticulously: Floor to ceiling; wall lengths; existing counter heights; distances between obstacles.
- Pick your type: Peninsula for narrow rooms; compact island for larger small kitchens; wall-mounted or drop-leaf for minimal footprints.
- Scale the seating: Decide on two or three stools. Allocate 60 centimeters (24 inches) per person and set the overhang accordingly.
- Lock in structure: Determine if you need concealed brackets, a support leg, or a cabinet base to carry the load safely.
- Power and lights: Add outlets, USB ports, and dimmable pendants. Plan cable routes and switch locations.
- Storage plan: Choose drawers, cubbies, and pull-outs for the bar base. Consider a charging drawer and toe-kick storage.
- Material palette: Select countertop, paneling, stool finishes, and hardware that tie kitchen and living areas together.
- Mock it up: Use painter’s tape on the floor and cardboard to simulate bar depth and seating. Sit on a stool to test comfort.
- Refine and order: Adjust sizes and supports based on the mockup. Order materials and schedule trades if needed.
- Build and finish: Install the base, supports, and top; wire and mount lights; add trim, sealants, and protective finishes.
- Style and function: Add stools, a footrest, and a shallow tray for daily essentials. Keep surfaces clear.
Case-By-Case Ideas for Tricky Rooms
Narrow Galley With a Window
Install a slim, wall-mounted window bar at 90 centimeters (36 inches) high with 25 centimeters (10 inches) overhang. Use two narrow, backless stools that fully tuck under. Add a single mini pendant and a pop-up outlet at one end for laptop sessions.
Open-Plan Studio
Create a 120-centimeter (48-inch) long peninsula with a 30-centimeter (12-inch) overhang facing the lounge. Panel the bar front in the same color as the living room console and repeat the metal finish from your coffee table on the stool frames for coherence.
Family-Friendly L-Shape
Use a rounded peninsula end and non-slip flooring around the stools. Install a toe-kick night light strip for safe evening snack runs and place a compost drawer in the bar base beneath the main chopping zone.
Frequently Asked Questions
How deep should a breakfast bar be in a small kitchen?
For dining and light work, 45 to 60 centimeters (18 to 24 inches) is comfortable. If you are extremely tight on space, a 30-centimeter (12-inch) ledge can still function for coffee and quick bites.
Can I add a breakfast bar without a full renovation?
Yes. Consider a wall-mounted fold-down, a narrow freestanding island on casters, or a short peninsula extension using off-the-shelf base cabinets and a prefabricated countertop.
What is the best height for stools?
Pair 90-centimeter (36-inch) counters with 60 to 65-centimeter (24 to 26-inch) stools; pair 105-centimeter (42-inch) bars with 75 to 80-centimeter (30 to 32-inch) stools. Always test for comfort.
How can I prevent the bar from feeling bulky?
Use slim profiles, floating shelves, or open leg designs. Keep finishes light, integrate lighting, and choose backless stools that disappear under the overhang.
Is a peninsula better than an island in a small kitchen?
Often, yes. A peninsula demands less circulation space, is easier to power, and can pack in storage. Islands are best when you can maintain clearances on all sides.
Putting It All Together
Small kitchens reward precise thinking and thoughtful layers. When you plan clearances carefully, commit to useful storage, and add the right light and power, a breakfast bar becomes more than a place to sip coffee. It is your prep station, study hall, and social connector in one streamlined feature. With the steps and ideas above, you know how to design a small kitchen with a breakfast bar that elevates everyday life—beautifully, comfortably, and efficiently.
Quick Checklist
- Purpose set? Dining, prep, work, or all three.
- Clearances verified? Overhang, stool spacing, aisles.
- Supports planned? Brackets, leg, or cabinet base.
- Power and light? Outlets, USB, pendants on dimmers.
- Storage integrated? Drawers, pull-outs, charging, toe-kick.
- Materials chosen? Durable top, matching panels, comfortable stools.
- Mockup tested? Sit, swivel, and simulate daily tasks.
Follow this roadmap and your compact kitchen will gain a bright, hardworking hub that feels tailor-made to your life.