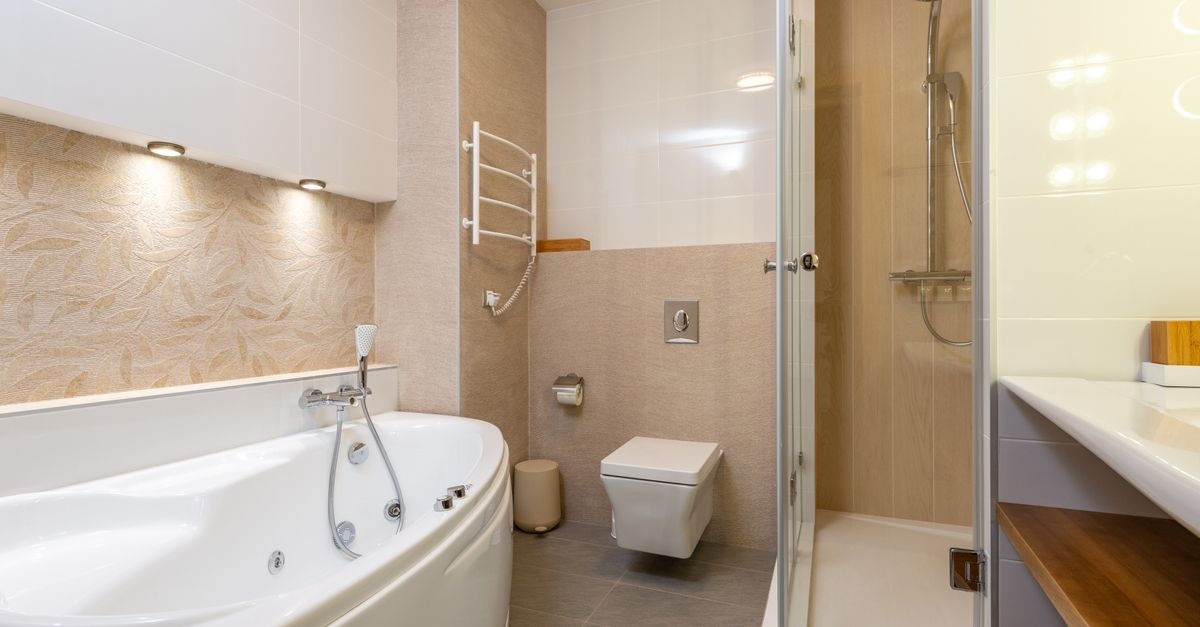
Behind the Tiles: DIY Guide to Replacing In-Wall Bathroom Fittings
Concealed fixtures make bathrooms feel calm, clean, and clutter-free. But when a valve starts to drip, a flush becomes fickle, or a mixer loses temperature control, the fix often sits out of sight—tucked neatly behind tiles and backer board. If you’re wondering How to replace concealed bathroom fittings without turning your bathroom into a dusty construction site, you’re in the right place. This step-by-step, tool-by-tool guide explains how to plan, access, replace, test, and finish in-wall upgrades with professional polish and DIY confidence.
You’ll learn proven methods for in-wall shower mixers and diverters, concealed toilet cistern components, and wall-mounted basin valves. Along the way, you’ll discover what to check before you open a wall, how to pressure test without leaks, and how to protect your waterproofing and tiles. Whether your goal is a like-for-like valve swap, a trim upgrade, or a full concealed shower mixer replacement, the approach below will help you succeed.
What Counts as Concealed Bathroom Fittings?
“Concealed” or “in-wall” fittings are plumbing components designed to hide rough plumbing behind the wall while exposing only sleek trim on the room side. The most common types include:
- Concealed shower mixer/valve: Single- or dual-handle valves, thermostatic mixers, and diverters that feed the shower head, rain head, or handshower.
- In-wall toilet cistern: A hidden tank (often with a carrier frame) paired with a wall-hung toilet and a removable flush plate.
- Wall-mounted basin mixer: A spout and handle(s) on the wall with the mixing body concealed behind tile.
Each requires careful attention to rough-in depth, waterproofing, and access.
How to Replace Concealed Bathroom Fittings: An Overview
At a high level, the process follows the same logic across fixture types:
- Document the current setup and secure replacement parts that fit the rough-in.
- Shut off water, drain lines, protect finishes, and establish safe access.
- Remove trim and isolate the defective internal parts or the entire body.
- Install the replacement, ensuring watertight connections and proper alignment.
- Pressure test, reinstate waterproofing, and refit tiles and trim.
- Fine-tune, seal, and maintain for long-term reliability.
We’ll detail each step below so you can confidently approach How to replace concealed bathroom fittings without guesswork.
Planning Comes First
Identify the Exact Model and Rough-In
Before you buy anything or lift a tool, identify the brand and model of your concealed fitting. Many valves hide the identification on the back of the trim plate, on the valve body, or in the installation manual. Matching the rough-in valve and trim kit matters because manufacturers engineer body dimensions, screw holes, and cartridge geometry to fit together. When possible, stick with the same brand to avoid depth and compatibility headaches.
Key planning checks:
- Wall build-up thickness (tile + thinset + backer board) relative to the valve’s finished wall gauge.
- Connection types: NPT/BSP threads, compression, push-fit, copper sweat, PEX, or CPVC.
- Flow and pressure needs: Especially for rain heads or body jets—some valves restrict flow.
- Thermostatic vs. pressure-balance: Choose what fits your comfort and code.
- Diverter ports and outlet orientation for multi-function showers.
Measure and Photograph Everything
Take clear, dimensioned photos before removal. Note the centerlines, trim plate dimensions, tile cuts, and any shims. Measure:
- Distance from stud face to tile surface (for rough-in depth).
- Valve body’s set-back from the finished surface.
- Pipe diameters and material types.
This documentation prevents guesswork when reassembling and helps you explain your setup at the plumbing counter if questions arise about How to replace concealed bathroom fittings on your specific brand.
Tools and Materials
While every job differs, gather the following:
- Hand tools: Screwdrivers, Allen keys, adjustable wrench, socket set, pliers.
- Pipe tools: Tubing cutter (for copper), PEX cutter and crimp/expansion tools, deburring tool.
- Sealants: PTFE thread seal tape, pipe dope (as required), silicone sealant.
- Waterproofing: Liquid membrane, sealing tape, backer board patches, vapor barrier tape.
- Tile tools: Oscillating multi-tool with grout blade, grout saw, diamond hole saw, notched trowel.
- Testing gear: Pressure gauge, test plugs, bucket and rags.
- Protection: Drop cloths, painter’s tape, plastic sheeting, safety glasses and gloves.
Safety, Codes, and When to Call a Pro
Water damage escalates costs fast. Keep safety and compliance front and center:
- Shut off the water at a whole-house valve or local isolation valves. Test a faucet to confirm there’s no pressure.
- Electrical caution: If your work area is near a light, fan, or mirror demister wiring, cut power at the breaker and verify dead.
- Building codes: Many regions require anti-scald (pressure-balance or thermostatic) valves and specific waterproofing practices.
- Permits and inspections: Some jurisdictions require permits for valve replacement inside walls.
- Call a pro if you encounter corroded risers, mixed materials without proper adapters, or if you’re unsure about soldering, PEX standards, or re-waterproofing.
Good DIY is safe DIY. When in doubt, get professional eyes on the plan for How to replace concealed bathroom fittings in older or complex installations.
Preparation: Protect, Isolate, and Access
1) Shut Off and Drain
Turn off supply lines, then open the lowest faucet in the house to relieve pressure. Open the shower/basin controls you’ll be working on to drain remaining water. Keep a bucket handy for residual drips.
2) Protect Surfaces
Cover floors and fixtures with drop cloths. Tape plastic sheeting over adjacent tile to prevent scratches. Remove nearby accessories (towel bars, shelves) if they impede access.
3) Establish Access
Many concealed systems allow service through the trim opening or the flush plate. If yours does not, you may need to create or enlarge an access panel on the back side of the wall (e.g., in a closet). Aim for the least invasive path to reach the valve body and connections without compromising the shower’s waterproofing layer.
Replacing a Concealed Shower Mixer/Valve
Shower mixers are the most common in-wall replacement. Here’s the step-by-step approach for How to replace concealed bathroom fittings in a shower.
Step 1: Remove Trim and Identify Components
Pop off the handle cap to expose the set screw, back out the screw, and remove the handle. Unscrew the escutcheon plate; some are sealed with silicone—slice gently with a sharp utility knife to avoid pulling tile. Note the cartridge retainer clip, mounting screws, and any extension kits used to match wall thickness.
Step 2: Decide: Cartridge-Only or Full Valve Body
Many leaks and temperature instability issues come from a worn cartridge. Replacing just the cartridge is far less invasive and usually possible through the trim opening. Signs you may need a full body replacement include:
- Body corrosion, stripped threads, or seized cartridge that won’t extract.
- Desire to switch from pressure-balance to thermostatic control.
- Reconfiguring outlets (e.g., adding a diverter for a handshower).
Tip: If the manufacturer still supports your valve, a new cartridge, seals, and trim may restore like-new function without opening the wall.
Step 3A: Cartridge Replacement (Minimal Invasion)
- Pull the retaining clip with needle-nose pliers.
- Gently wiggle and pull the cartridge straight out; stubborn ones may need a puller tool.
- Clean the valve body: remove mineral scale, inspect O-ring seats, and flush debris.
- Lubricate new O-rings (plumber’s silicone grease) and insert the new cartridge, orienting it correctly (hot/cold sides).
- Reinstall retainer clip and test for smooth operation before reassembling trim.
Step 3B: Full Valve Body Replacement (Invasive)
If the valve body must be replaced, you’ll need wider access. Two common routes:
- From the front: Remove surrounding tile and backer board. Best for when re-tiling is planned or unavoidable.
- From the back: Open a drywall panel on the opposite room’s side to expose studs and plumbing without disturbing shower waterproofing.
After access is established:
- Mark and photograph every connection and depth gauge. Label pipes (hot, cold, outlets).
- Disconnect piping:
- Copper: Desolder with heat protection, then clean and prep. Consider new stub-outs if pipe ends are pitted.
- PEX: Cut square, remove crimp rings/fittings, and use new crimp or expansion fittings approved by the valve manufacturer.
- CPVC: Cut and ream carefully; use compatible solvent cement and couplers.
- Remove the old body and dry-fit the new valve. Honor the manufacturer’s “Finished Wall” depth marks.
- Mount solidly to framing using brackets or blocking so the valve won’t flex when handles turn.
- Reconnect piping with the correct adapters, thread sealants, and torque. Keep hot on the left, cold on the right, and outlets correctly oriented.
Step 4: Pressure Test Before Closing
Cap outlets and attach a pressure gauge. Slowly turn on the supply and pressurize to house pressure (or per local code). Watch the gauge for 10–15 minutes. Inspect every joint with a flashlight. If any weeps appear, depressurize, fix, and retest. This is the most important assurance step in How to replace concealed bathroom fittings successfully.
Step 5: Reinstate Waterproofing and Close
If you opened the tiled side, replace any removed backer board, then:
- Seal seams with alkali-resistant mesh tape and thinset.
- Apply liquid waterproofing membrane with embedded sealing tape around penetrations and the valve.
- Honor manufacturer clearances so the escutcheon’s foam or gasket can seal to tile.
Re-tile with proper thinset coverage, restore grout, and allow cure time. From the back-side access route, patch drywall and paint.
Step 6: Refit Trim, Calibrate, and Seal
Install the escutcheon with its foam gasket; add a thin bead of silicone around the top and sides (leave a gap at bottom for drainage). Mount the handle and test range of motion. For thermostatic units, set the maximum temperature stop per instructions. Check for drips with both hot and cold open. Finally, align diverter labels and spout orientation for a polished finish.
Replacing an In-Wall Toilet Cistern’s Serviceable Parts
Most wall-hung systems allow service through the flush plate opening—no tile removal. That’s welcome news for anyone researching How to replace concealed bathroom fittings without demolition.
Step 1: Remove the Flush Plate
Carefully lift or slide the plate per the brand’s instructions. Disconnect the actuator rods or cable mechanisms gently to avoid misalignment.
Step 2: Replace Fill and Flush Valves
Common symptoms include slow fill, ghost flushing, or weak flush. Inside the opening you can usually access:
- Fill valve (inlet): Controls tank refill. Replace seals or the whole valve as needed.
- Flush valve: The mechanism that releases water to the bowl; includes seals that wear.
Shut off water to the cistern (the isolation valve is often inside the cavity), drain, and swap components following the manufacturer’s sequence. Check actuator rod or cable length so the dual-flush functions fire positively but don’t preload the mechanism.
Step 3: Test and Reinstall
Restore water, watch the fill level, and confirm no seepage at connections. Test multiple flushes, then refit the plate. Replace the foam gasket if the plate includes one to minimize air movement and noise.
Replacing a Wall-Mounted Basin Mixer (In-Wall)
Wall-mounted spouts and mixers share much of the shower process, but with fewer outlets:
- Remove handle and escutcheon to access the cartridge or internal mixer parts.
- Attempt a cartridge-only swap first to avoid opening the wall.
- If the body is beyond salvage, create access (preferably from the back), support the new body at the correct depth, and reconnect piping.
- Pressure test, reinstate waterproofing, and refit trim with a clean silicone seal.
Mind the spout’s projection and aerator height so water lands comfortably within the basin bowl without splashing.
Waterproofing and Vapor Control Essentials
Behind-tile waterproofing is your safety net. When you alter any in-wall component, ensure the water management layers remain continuous:
- Backer board should be cementitious or equivalent; greenboard alone is not a waterproof system.
- Membranes: Liquid-applied or sheet membranes must be tied into valve penetrations with manufacturer-approved seals or gasketed escutcheons.
- Weep path: Always leave a tiny gap at the bottom of escutcheon silicone so incidental moisture can escape.
- Vapor barrier strategy should match climate and assembly—avoid double vapor barriers that trap moisture.
Finishing: Tiling, Grout, and Silicone
The best mechanical fix can still look poor if the finishes aren’t thoughtful. Keep it crisp:
- Use a diamond hole saw for round penetrations to avoid tile cracking.
- Cut trim openings slightly oversized and cover with the escutcheon for a neat reveal.
- Color-match grout and caulk; use silicone at plane changes (wall-to-wall, wall-to-trim) and keep grout for in-plane joints.
- Tool silicone with a dampened finger or a dedicated tool for a smooth, narrow bead.
Troubleshooting After Replacement
- Drip persists: Recheck cartridge seating and O-rings; verify the retainer clip is fully seated.
- Temperature swings: Calibrate thermostatic stop; ensure hot and cold aren’t reversed; check that the anti-scald device is present and set correctly.
- Low flow: Inspect debris screens, remove sediment in risers, verify any flow restrictor is appropriate for your system pressure.
- Diverter hums or buzzes: Air in lines or partial obstruction—bleed lines and flush.
- Flush weak on wall-hung toilet: Adjust fill level, verify bowl-to-carrier seal, check flush valve seal seating.
Costs, Time, and Skill Levels
Rough estimates vary by brand and wall type:
- Cartridge-only: 30–90 minutes; $30–$200 in parts.
- Full shower valve (back-side access): 3–6 hours; $150–$700 in parts, plus patch/paint.
- Full shower valve (front access with re-tiling): 1–2 days including tile cure; costs rise with tile work.
- In-wall cistern service: 30–120 minutes; $20–$120 in parts.
- Wall-mount basin mixer: 2–5 hours; $100–$500 in parts.
Skill-wise, simple cartridge swaps suit intermediate DIYers. Full body replacements cross into advanced territory—especially where soldering, PEX standards, or waterproofing are in play.
Eco and Accessibility Considerations
- Water efficiency: Choose valves and heads with WaterSense or similar ratings. Dual-flush plates for in-wall cisterns save water.
- Thermostatic safety: Thermostatic mixers maintain set temperature and can be safer for kids and seniors.
- Access panels: Designing a discreet access panel—even if not strictly necessary—can ease future maintenance.
Maintenance to Extend Service Life
- Annually remove and descale cartridges where hard water reigns.
- Exercise stop valves quarterly to prevent seizing.
- Inspect and refresh silicone seals every 2–3 years.
- Replace worn aerators and clean debris screens to keep flow steady.
Common Mistakes to Avoid
- Skipping pressure tests before closing the wall.
- Ignoring rough-in depth gauges—leading to handles that bind or trim that won’t seat.
- Overusing silicone behind the escutcheon; trap moisture and you invite mold. Seal top and sides only.
- Mixing materials without the correct dielectric unions or brand-approved adapters.
- Cutting waterproofing and forgetting to reinstate a continuous, sealed barrier.
FAQs About Replacing In-Wall Bathroom Fittings
Q: Can I avoid tile removal?
A: Often yes—cartridge swaps and in-wall cistern service are designed for front access. Full valve body changes may be possible from the back side.
Q: Do I need permits?
A: It depends on your jurisdiction. Replacing like-for-like internal parts may not require one; moving pipes or changing valve types may. Check locally.
Q: Pressure-balance or thermostatic?
A: Thermostatic offers stable temperatures and precise control, ideal for multi-outlet showers. Pressure-balance is simpler and common in code-minimum setups.
Q: What about warranties?
A: Many brands warranty cartridges for years. Keep receipts and photos. Using non-approved parts can void coverage.
Q: Is thread seal tape always required?
A: Use PTFE tape on tapered threaded metal joints; do not use on compression, flare, or push-fit connections unless the manufacturer explicitly directs.
Tools and Materials Checklist
- Shut-off aids: Stopper plugs, bucket, towels.
- Demolition/protection: Utility knife, oscillating tool, plastic sheeting, painter’s tape.
- Plumbing: Adjustable wrench, pliers, tubing cutter, PEX tools, solder kit (if competent), PTFE tape, pipe dope.
- Tile/finish: Diamond hole saw, notched trowel, grout, sponge, silicone, caulk gun.
- Waterproofing: Liquid membrane, seam tape, backer board patch, fasteners.
- Testing: Pressure gauge, test caps/plugs.
- Safety: Eye protection, gloves, respirator (for dust).
Glossary
- Rough-in: The in-wall valve body and piping installed before finishes.
- Escutcheon: The trim plate that covers the wall opening.
- Thermostatic valve: Controls outlet temperature precisely, independent of pressure swings.
- Pressure-balance valve: Keeps relative hot/cold balance stable to reduce scald risk.
- Diverter: Valve directing water to different outlets (handshower, rain head, tub spout).
- Cartridge: The internal mixing mechanism—seals, discs, and controls in a removable module.
Putting It All Together
Done right, concealed fixtures deliver spa-like simplicity—and they’re maintainable without wrecking your walls. By planning your parts, respecting rough-in geometry, protecting waterproofing, and testing thoroughly, you can master How to replace concealed bathroom fittings in showers, toilets, and basins. Start small with a cartridge swap, then, as your confidence grows, tackle full valve upgrades. Your future self—enjoying a stable, drip-free, precisely tempered shower—will thank you.
Quick Step-by-Step Recap
- Plan: Identify model, confirm compatibility, gather tools.
- Prepare: Shut water, protect surfaces, establish access.
- Remove: Trim off, document, extract cartridge or body.
- Install: Set correct depth, solid mount, make sound joints.
- Test: Pressure test, inspect, fix weeps.
- Seal: Reinstate waterproofing, tile, grout, silicone.
- Finish: Refit trim, calibrate, and enjoy.
If you’re mapping out How to replace concealed bathroom fittings across multiple bathrooms, consider standardizing brands and rough-ins for easier future maintenance. Consistency behind the tiles can be just as beautiful as what you see in front of them.