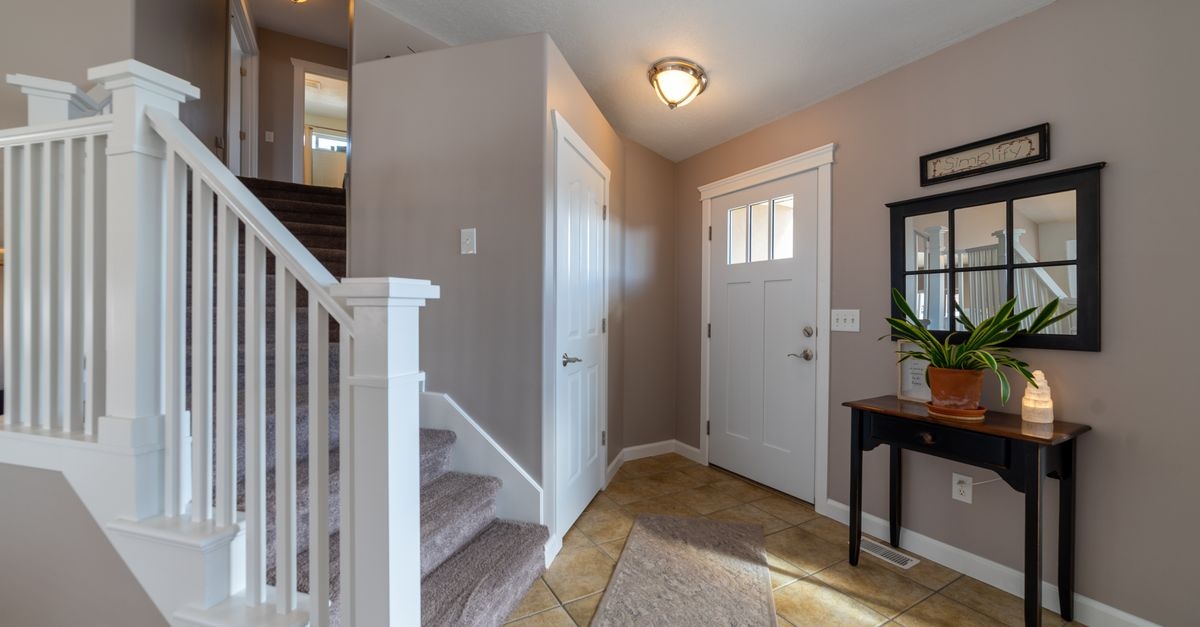
Crisp Finishes Made Easy: Fit Milled MDF Door Trims Like a Pro
If you love the look of razor-straight lines and shadow-gaps that meet with precision, you’ll love working with milled MDF. With its smooth faces, stable core, and ready-to-paint prime coat, milled MDF door trims can deliver a flawless, high-end finish in less time than solid wood—provided you know the right steps. This comprehensive guide walks you through how to install milled MDF door trims like a seasoned finish carpenter, from planning and measuring to cutting, fixing, caulking, and painting. Whether you’re upgrading a single door or trimming an entire renovation, the techniques below will help you work faster, cleaner, and with confidence.
Why Choose Milled MDF Door Trims?
MDF (Medium Density Fiberboard) remains a favorite for interior trim because it’s consistent, smooth, and affordable. When it’s milled—factory-profiled and often pre-primed—you get crisp, repeatable profiles and less prep before paint. Here’s why many pros reach for milled MDF casings and architraves:
- Consistent, smooth finish: No grain, voids, or knots. Primer adheres evenly, and brush strokes level nicely.
- Stable and straight: Less likelihood of warping and cupping compared to some softwoods, especially on longer runs.
- Budget-friendly: Cost-effective without sacrificing appearance once painted.
- Profile variety: From minimalist square-edge to ornate colonial and contemporary shadow-line designs.
- Time-saving: Many profiles come pre-primed; lightly sand, paint, and install.
Potential drawbacks to consider:
- Moisture sensitivity: Standard MDF swells if it absorbs water. For bathrooms, laundry rooms, and kitchens, use moisture-resistant (MR) MDF and seal all cut edges.
- Edge fragility: Unsealed edges can fuzz; handle carefully and prime/seal before paint.
- Fastener blowouts: Improper nailing can mushroom the surface. Use the right gauge and nail depth.
Know Your Trim Anatomy and Terms
Understanding basic door casing terminology makes layout and communication easier:
- Jamb: The door frame’s vertical sides and head (top) surrounding the opening.
- Reveal: The consistent set-back of the trim from the edge of the jamb (commonly 3–6 mm, or 1/8–1/4 inch).
- Head (Top) Casing: Horizontal trim at the top of the door.
- Legs (Side Casings): Vertical trims on the left and right sides.
- Plinth Block: A decorative block at the bottom of leg casings that meets the baseboard.
- Rosette: A square or round block at the top corners, which lets you avoid mitering the head and legs.
- Miters: Angled 45° cuts bringing two pieces together at corners.
- Back-cut: Slightly undercutting the back side of a miter for a tighter front joint.
Tools and Materials Checklist
Before we dive into how to install milled MDF door trims, assemble the right kit. Efficient, accurate work depends on sharp blades and the right consumables.
- Miter saw with a fine-finish blade (80+ tooth for 10–12 inch saws)
- Measuring tape, combination square, and marking knife/pencil
- Level (600–1200 mm; 24–48 in) and laser level or reveal gauge for consistent set-back
- Brad nailer (18 ga) and/or pin nailer (23 ga) with appropriate nails (30–50 mm; 1 1/4–2 in)
- Construction adhesive (low-solvent, paintable) or PVA wood glue
- Caulk (paintable acrylic-latex with silicone) and wood filler/spackle
- Primer (acrylic or shellac-based) and paint (durable trim enamel)
- Sandpaper (180–220 grit), sanding block or finishing sander
- Utility knife, chisel, and oscillating multi-tool (for old trim removal and notching)
- Clamps, painter’s tape, and shims
- Dust mask/respirator, safety glasses, and hearing protection
Safety and Prep Essentials
MDF fibers and fine dust require careful handling. Observe these safety and prep rules every time:
- Dust control: Cut with dust extraction when possible, and wear a respirator when sanding or sawing.
- Blade selection: A sharp, high-tooth-count blade minimizes fuzzy edges and tear-out.
- Acclimate trim: Let MDF acclimate 24–48 hours inside the installation space to limit movement.
- Seal edges: Prime cut ends promptly, especially for bathrooms and kitchens; MR MDF is ideal for humid rooms.
- Check surfaces: Ensure jambs are plumb and secure, drywall edges are clean, and old caulk/adhesive is removed.
Planning Your Layout
Good planning separates crisp, consistent results from fussy, time-consuming rework. Before you begin how to install milled MDF door trims on your project, decide on the look and confirm details:
- Choose your profile: Square, stepped, colonial, or modern shadow-line. Thicker casings read more traditional; slim, square-edge reads modern.
- Set the reveal: Most installers favor 1/8–1/4 inch. Build a simple reveal gauge from scrap for consistency.
- Decide on corners: Mitered corners are classic. Rosettes eliminate miters, speed installation, and suit heritage styles.
- Consider plinth blocks: They solve awkward baseboard intersections and add visual weight at the floor.
- Assess floor and jambs: Out-of-level floors or twisted jambs demand scribing or shims to maintain even reveals.
Measuring: Accuracy Is Everything
For door casings, tiny discrepancies show. The core idea behind how to install milled MDF door trims is holding a dead-even reveal from top to bottom and left to right.
- Mark your reveal: Lightly knife or pencil a line around the jamb at your chosen set-back. A reveal gauge speeds this step.
- Measure leg lengths: Measure from floor to the underside of the head miter (or to the rosette bottom). If floors vary, measure left and right legs independently.
- Measure the head length: For mitered corners, measure from outside-miter to outside-miter. For rosettes, measure between inside edges of the rosettes.
- Account for plinths: Subtract plinth height from total leg length when used.
Cutting Techniques for Perfect Joints
Crisp miters and clean edges are essential to fitting milled MDF. Try these techniques to achieve factory-level results:
- Use a zero-clearance fence: Back your miter saw fence with scrap to prevent tear-out at the cut exit.
- Score your lines: Lightly score the face with a utility knife along your mark before cutting to avoid fuzzy edges.
- Back-cut miters: Tilt the blade 1–2° to undercut the back of the miter. The visible edge closes tight even on slightly imperfect corners.
- Test cuts first: Use offcuts to dial in angles if walls or jambs are not perfectly square.
- Cope vs. miter: For door casings, miters are standard. Coping is more common with baseboards and crown, but you can cope decorative beads if needed.
Step-by-Step: How to Install Milled MDF Door Trims
Here’s a professional workflow that balances speed and precision. These steps are the backbone of how to install milled MDF door trims in a typical room.
1) Dry-Fit and Mark Reveals
Begin by marking a consistent reveal on the jamb. Hold each leg in place to confirm lengths and note any scribing needed near floors or uneven drywall. Dry-fitting minimizes surprises once adhesive and nails are in play.
2) Build Your Head Casing First
Cut the head to length with miters at both ends (or square ends if using rosettes). If your profile is complex, label the orientation to avoid flipping the head piece. Lightly back-cut the miters for a tight front seam.
Pro tip: When using mitered corners, preassemble the head to short return pieces of the legs using PVA glue and pin nails. Let the glue set before lifting the assembly into place. This yields a near-invisible miter line on tricky profiles.
3) Install the First Leg
Butter the back with thin beads of construction adhesive, staying 12–20 mm (1/2–3/4 in) from the edges to avoid squeeze-out. Align to your reveal marks top to bottom. Tack with 18 ga brads: 30–50 mm (1 1/4–2 in) long, angling nails slightly toward the jamb to grab solid wood.
- Nail spacing: Every 200–300 mm (8–12 in) along the jamb side and sparingly along the drywall side (to avoid popping).
- Shimming: If the jamb bows, insert thin shims behind the casing at nail points to keep the reveal uniform.
4) Install the Second Leg
Repeat adhesive and nailing steps, watching the head-height marks and keeping your reveal exact. Where floors are out of level, trim the bottom of the leg to fit. With plinth blocks, set the plinth first, then sit the leg on top for a perfect interface with the baseboard.
5) Fit the Head
Set the head piece on top of the legs, aligning the miters tightly. Where needed, use painter’s tape to clamp the miter seams while the glue sets. Nail the head into the jamb and, if you have studs nearby, a couple of discreet nails into the wall side (filled later) can keep the head perfectly flat.
6) Check and Adjust Reveals
Run your finger along each edge. Any reveal that drifts will “read” as a mistake, even when it’s only a millimeter off. Adjust with light taps, shims, or by pulling a nail and resetting before the adhesive cures.
7) Returns and Transitions
Where casings meet other trims or die into obstacles, a tiny miter return finishes the exposed end. Cut a small 45° return piece and glue it to the exposed profile—pin-nail with a 23 ga nail if possible. This detail looks bespoke and protects fragile edges.
8) Fastening Etiquette
MDF is dense yet fragile at edges. Follow these rules to avoid blowouts and surface mushrooms:
- Keep nails back from edges by at least 10–12 mm (3/8–1/2 in).
- Use proper depth: Nails should set just below the surface; overdriving crushes fibers.
- Angle nails slightly toward solid backing, especially near jambs, for stronger hold.
- Minimize wall-side nails if drywall isn’t solid; favor adhesive for flatness.
9) Fill, Caulk, and Sand
After the adhesive sets, fill nail holes with lightweight spackle or a fine wood filler. Let it dry fully, then sand with 180–220 grit until flush. Caulk small gaps (door casing-to-wall and to jamb) with a thin, even bead of paintable caulk. Tool with a damp finger or caulk tool for a neat, minimal line.
Important: Keep caulk lines minimal; thick caulk shrinks and cracks. Where gaps exceed 3–4 mm (1/8 in), shim first or install a tapered backer strip so you can use a thin bead.
10) Prime and Paint
Even when trim arrives pre-primed, spot-prime all cut edges, filled holes, and miter joints. Shellac-based primer blocks tannins and seals edges fast; water-based acrylic primers also work well for MDF. Apply two topcoats of durable enamel (satin or semi-gloss) for wipeable longevity.
How to Install Milled MDF Door Trims with Rosettes and Plinths
Rosettes and plinth blocks simplify corners and elevate the look:
- Rosettes: Level and fix the rosettes first at the top corners. Then cut legs and head with square ends to meet the blocks. No miters needed.
- Plinths: Set on the floor, level across, then run legs down to meet the plinth tops. This cleans up baseboard intersections, especially on out-of-level floors.
This approach streamlines how to install milled MDF door trims for beginners and delivers consistent corners with minimal fuss.
Advanced Situations and Solutions
Out-of-Square or Twisted Jambs
When jambs aren’t square or are slightly bowed, you have options:
- Scribe the leg: Hold the leg in place and mark the contour of the wall on the back side. Trim with a plane, sander, or oscillating tool. Repeat until the reveal is uniform.
- Shim selectively: Where the wall dips, insert thin shims behind the casing and nail through the shim.
- Back-cut miters: Increases forgiveness at the visible joint face.
Uneven Floors
Make the top reveals perfect; hide floor discrepancies at the bottom.
- Float the bottom: Trim the bottom of one or both legs to follow the floor while keeping the head level.
- Use plinths: They disguise slight height differences and create a deliberate termination at the base.
Metal or Masonry Jambs
For steel frames or masonry returns, fasten with construction adhesive augmented by strategic pins into adjacent studs or with masonry anchors. Pre-finish casings to reduce on-site painting near delicate substrates.
Long Runs and Scarf Joints
If a leg or head exceeds standard stock length, use a scarf joint (30–45° diagonal joint) rather than a butt joint. Glue, clamp, and pin-nail. When sanded and painted, scarf joints virtually disappear.
Adhesives, Fasteners, and Fixing Patterns
Mastering how to install milled MDF door trims also means choosing the right bonding strategy:
- Construction adhesive: Excellent for wall-side bonding and flattening. Choose a low-solvent, paintable formula suitable for MDF.
- PVA wood glue: Best for wood-to-wood (miter joints, returns) and where squeeze-out can be controlled.
- 18 ga brads: Primary mechanical fastener into jambs; balance holding power with minimal surface damage.
- 23 ga pins: Ideal for tiny returns and delicate profiles where holes must be near invisible.
Nailing layout: On each leg, place brads into the jamb every 8–12 inches, staggering heights to avoid splitting. Add a few nails into studs along the wall side if you can hit solid backing; otherwise rely on adhesive and use minimal pins.
Finishing Like a Pro
Filling and Sanding
Use a fine filler that sands without pilling. Two light applications beat one heavy one. Always feather your sanding into the factory primer to avoid shiny depressions after paint.
Caulking Strategy
Apply a thin, continuous bead only where the wall gap needs it. Wipe immediately, and keep corners crisp. For high-humidity rooms, choose a caulk with a little silicone to prevent cracking and mildew.
Priming and Painting MDF
- Edge sealing: MDF edges are thirsty; spot-prime cut ends twice if needed.
- Primer choice: Shellac primer seals fastest; water-based acrylics are low-odor and effective.
- Topcoats: Two coats of waterborne enamel provide durable, low-VOC protection and a refined look.
Common Mistakes to Avoid
- Skipping acclimation: Can lead to slight movement that opens miters later.
- Over-nailing edges: Causes crush marks and blowouts on MDF faces.
- Thick caulk lines: They shrink and crack. Use shims and backer strips instead.
- Unsealed edges in wet rooms: Leads to swelling. Always seal cut ends and consider MR MDF.
- Inconsistent reveals: Use a reveal gauge and check constantly as you fasten.
Troubleshooting Guide
- Open miter after paint: Score the seam with a knife, wick in thin CA glue, clamp with tape, and touch up paint.
- Visible nail dimples: Refill with a finer filler, sand flat with a hard block, reprime, and repaint.
- Gap to wall too big for caulk: Insert a tapered shim or scribe the leg to the wall for a tight fit.
- Raised fibers after priming: Lightly sand and re-prime the area. MDF often needs a quick denib before topcoat.
Bathroom and Kitchen Considerations
Moisture changes how you approach how to install milled MDF door trims in wet zones:
- Use MR MDF: Moisture-resistant boards are denser and resist swelling.
- Back-prime: Seal the back of the casing if persistent humidity is expected.
- Seal bottoms: The bottom edge wicks moisture from mopping; prime and topcoat thoroughly.
- Ventilation: Ensure good room airflow to protect finishes long-term.
Speed Tips for Pros
- Prefab assemblies: Preassemble head-to-leg miters on the bench with glue and pins for faster installs on site.
- Label parts: Mark room, door, and orientation on the back of each piece with pencil for batch work.
- Use a reveal gauge: A simple L-shaped scrap with a stop gives instant, repeatable set-backs.
- Prime edges in batches: Seal every cut end before installation to save cleanup time later.
Environmental and Health Notes
Modern MDF often uses low-formaldehyde resins, but always verify emissions ratings. Cut and sand with dust extraction and wear a respirator. Collect dust responsibly and dispose of offcuts per local regulations.
Cost and Time Estimates
Per doorway (both sides), materials for milled MDF trims typically include casings, adhesive, caulk, primer, and paint. Expect:
- Material cost: Moderate; profile and thickness drive price.
- Time: A practiced DIYer can trim a door in 1–2 hours pre-finish, plus drying and painting time.
Frequently Asked Questions
Do I need a nailer to install MDF door trims?
No, but it helps. You can install with construction adhesive and a few hand-driven finish nails into the jamb. Pre-drill near ends to prevent splitting.
Can I paint before installation?
Yes. Many pros pre-paint one finish coat on the bench. After installation, fill, caulk, spot-prime, and apply the final coat for a perfect result.
What’s the best adhesive for MDF trim?
A quality, low-solvent, paintable construction adhesive works for wall-side bonding. Use PVA glue for wood-to-wood joints like miters and returns.
How do I get tight miter joints on MDF?
Use a sharp, fine-tooth blade; score before cutting; back-cut slightly; dry-fit; glue both faces; and tape-clamp until set. Keep humidity stable while curing.
Can I install milled MDF trims in bathrooms?
Yes—use MR MDF, seal all edges (especially bottoms), and choose a durable, moisture-resistant paint. Good ventilation is key.
How to install milled MDF door trims without a miter saw?
Use square-cut casings with rosettes and plinths to avoid miters, or employ a fine-tooth hand saw with a miter box for careful 45° cuts.
Quick Reference Checklist
- Acclimate trim and verify door/jamb plumb
- Mark consistent reveals with a gauge
- Cut with a sharp, fine-tooth blade; back-cut miters
- Dry-fit, then glue and nail with correct spacing
- Shim to keep reveals dead-even
- Fill, sand, caulk minimally
- Prime all cut edges; apply two durable topcoats
Putting It All Together
When you understand how to install milled MDF door trims, the process becomes a repeatable rhythm: plan your reveal, cut crisp joints, fix with the right balance of adhesive and brads, and finish with disciplined filling, caulking, and painting. The reward is an elevated interior where doors look framed by precision—and your work reads as professional at a glance.
Extended Pro Walkthrough: From Bare Jamb to Final Coat
1) Site Prep
Remove old trim with an oscillating tool and pry bar, protecting walls with wide putty knives. Scrape residual caulk and fill divots in drywall. Verify hinge screws are tight and jambs are secure to studs; adjust shims if the jamb has drifted.
2) Define the Reveal
Create a quick reveal gauge: a small L-shaped scrap set to 1/8–1/4 inch. Glide it around the jamb and mark a light pencil or knife line. This ensures your casing presents consistently around the door.
3) Cut and Pre-finish
Measure twice, cut once. After cutting, lightly break sharp edges with 220 grit to prevent paint ridges. Spot-prime every cut end. If you prefer, roll on the first topcoat now; stacking strips with spacers speeds drying.
4) Install Legs
Start with the hinge side. Adhesive first, then align to reveal marks. Set brads into the jamb side; add minimal wall-side pins if needed. Confirm plumb and maintain reveal at the head line. Repeat for the latch side.
5) Fit the Head
Bring the head to the legs carefully to avoid bruising miter tips. Tape-clamp while glue cures, and secure with brads into the jamb. Where studs are present, add a couple of discreet wall-side nails and fill later.
6) Details and Returns
If your trim dies into a cabinet or tile edge, cut tiny miter returns. Pre-finish these on the bench and attach with PVA and a 23 ga pin for nearly invisible results.
7) Fill, Caulk, Paint
Spot-fill holes and seams, sand, and vacuum dust. Caulk minimally at wall and jamb edges. Prime patches and cut edges; then apply the final topcoat. De-tape carefully while paint is slightly wet for the cleanest lines.
Conclusion
Mastering how to install milled MDF door trims is about process, not luck. Use a consistent reveal, cut precise miters, back them up with smart adhesives and selective nailing, and finish with care. With these habits, your casings will read crisp and confident across every doorway you touch—and your rooms will feel instantly more refined.
Glossary of Useful Terms
- Architrave: Another term for door casing, common in UK/AU usage.
- Reveal: The set-back from jamb edge to trim edge.
- Back-cut: Slight undercut at miter’s back side for a tighter front seam.
- Scarf joint: Long diagonal joint used to extend length discreetly.
- MR MDF: Moisture-resistant MDF for humid environments.
Resources and Next Steps
- Make a reveal gauge and practice on a scrap jamb.
- Test primers on a small offcut to see which seals edges best in your climate.
- Mock up a miter return on a sample to perfect your technique before tackling a feature doorway.
With these insights and methods, you’re fully equipped to approach any project requiring how to install milled MDF door trims—and deliver the kind of fit and finish that looks effortlessly professional every single time.