From Lawn to Legend: Design the Ultimate Backyard BBQ Oasis
Your backyard can be more than a patch of grass—it can be a culinary stage, a social sanctuary, and a signature space that elevates everyday living. If you’ve ever wondered how to turn a simple lawn into a BBQ paradise, this deep-dive guide will show you precisely how to design a garden grilling zone that blends great cooking with high design and effortless hosting. Whether you’re carving a corner on a compact patio or building a full outdoor kitchen pavilion, you’ll find strategies that scale beautifully to your budget, climate, and style.
Start with a Vision: From Lawn to Legend
Before you compare grills or pick pavers, define the experience you want. Picture the sounds of laughter under a pergola, the scent of rosemary drifting over sizzling steaks, the glow of warm lighting and the convenience of a well-planned prep area. Turning that vision into a cohesive plan is the essence of garden grilling design. You’re not just adding a cooker; you’re creating a backyard BBQ oasis—a place that’s functional, welcoming, and unmistakably yours.
- Personality: Modern minimal, rustic farmhouse, coastal casual, Mediterranean courtyard, or desert chic?
- Purpose: Weeknight family dinners, gameday crowd-pleasers, slow-smoke weekends, or all of the above?
- Practicality: Storage, shelter, utilities, cleaning, and maintenance that support consistent use.
Site Analysis and a Master Plan
Every great backyard kitchen starts with smart placement. A little analysis now will save you headaches later and make it easier to decide how to design a garden grilling zone that feels natural to use.
Sun, Wind, and Smoke
Observe your yard for at least a few days, ideally at different times:
- Sun path: Morning shade and afternoon heat dictate seating comfort and shelter needs.
- Prevailing wind: Position the grill so smoke blows away from dining and indoor doors/windows.
- Microclimates: Walls reflect heat, trees cast cooling shade, and open corners funnel breezes.
Space and Flow
Plan smooth circulation between indoor kitchen, grill, dining, and lounge spaces. Consider:
- Walkway width: 36–48 in (90–120 cm) for comfort, more if guests carry trays or if you need universal accessibility.
- Working clearances: Keep at least 36 in (90 cm) behind cooking areas so people can pass safely.
- Dining spacing: Allow 24–30 in (60–75 cm) table width per person; 36 in (90 cm) behind chairs for pushback.
Codes, Permits, and Safety
Local rules vary. Always check municipal building codes and HOA guidelines before trenching or framing.
- Setbacks and fire clearance: Many areas recommend grills be at least 10 ft (3 m) from combustible walls and 8–9 ft (2.4–2.7 m) of overhead clearance. Verify your local requirements.
- Utilities: Gas lines, electrical circuits (GFCI outdoors), and plumbing may require permits and licensed pros.
- Deck loads: Ensure structures can handle appliance and stone countertop weight (often 50 psf or more).
How to Design a Garden Grilling Zone: A Step-by-Step Framework
Here’s a practical blueprint that shows you exactly how to design a garden grilling zone that suits your site, cooking style, and budget.
1) Define Purpose and Guest Count
Start with real-life scenarios:
- Typical headcount: Design for your most common group size, with scalable overflow seating.
- Cooking style: Hot-and-fast searing, low-and-slow smoking, pizza nights, or all-round versatility?
- Hosting rhythm: Weeknight convenience vs. weekend showstoppers influences layout and storage.
2) Choose Fuel and Cooker Types
Your fuel dictates performance, maintenance, and vibe:
- Gas (Propane/Natural): Fast start, consistent heat, easy weeknights. Great for built-ins.
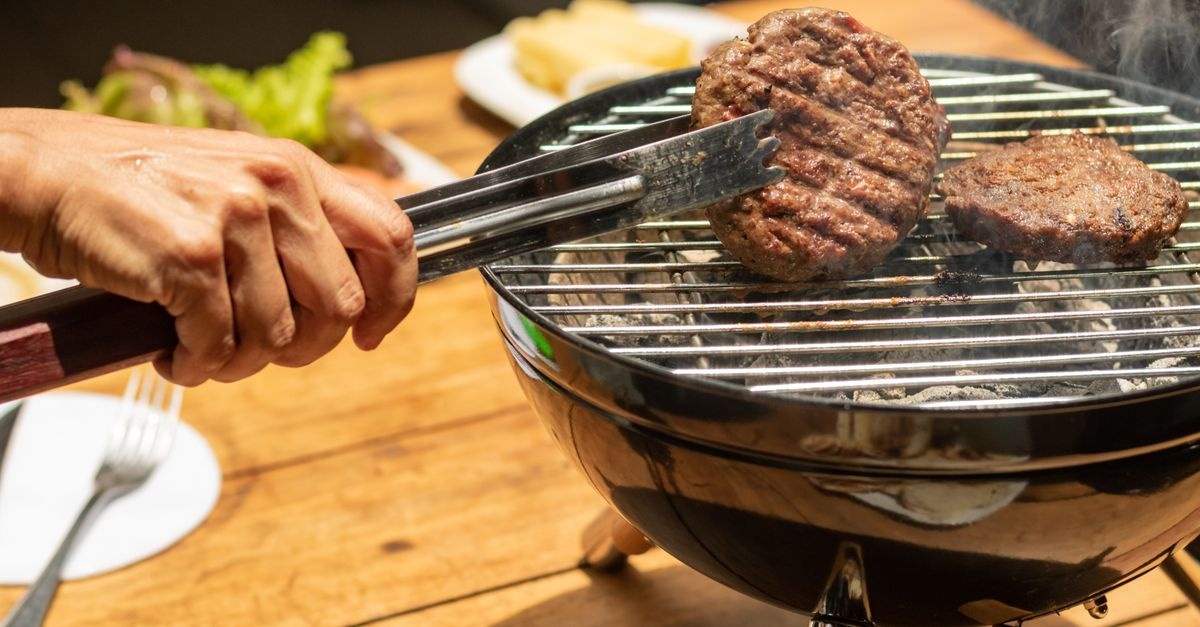
- Charcoal: Classic flavor and high-heat searing; more ritual and cleanup.
- Pellet: Set-and-forget smoking with digital control; needs power and dry pellet storage.
- Kamado/Ceramic: Ultra-versatile from low smoke to pizza temps; stays hot for hours.
- Pizza oven/Plancha/Flat top: Consider specialized cookers if you’ll use them at least monthly.
Many backyard chefs pair a primary grill with a smoker or side burner for total flexibility.
3) Map the Outdoor Cooking Triangle
Mimic indoor kitchen ergonomics for effortless flow. Position:
- Heat (grill/smoker) as the anchor, with safe clearances on all sides.
- Prep (counter + sink) within 2–3 steps of the grill.
- Cold storage (fridge/ice) near prep and beverage zones.
Key dimensions:
- Counter landing zones: 24 in (60 cm) minimum on one side of the grill; 12 in (30 cm) on the other.
- Counter heights: 36 in (91 cm) for prep/cook; 42 in (107 cm) for bar seating.
- Ventilation: Use a rated outdoor vent hood for covered grills; include ventilation panels in enclosed bases.
4) Specify Surfaces and Materials
Exterior materials must handle heat, grease, sun, and rain. Choose durable, low-maintenance finishes.
- Flooring: Porcelain pavers, textured concrete, natural stone, or composite decking with non-slip finish. Target a 2% slope away from the house for drainage.
- Cabinet frames: Stainless steel, masonry block, or aluminum with cement board—avoid combustible cores near heat.
- Countertops: Sintered stone/porcelain slabs, sealed granite, concrete, or soapstone; avoid resin-laminate near heat.
- Claddings: Stone veneer, plaster, stucco, or fiber-cement panels; treat woods with fire-retardant and maintain clearances.
5) Plan Utilities Like a Pro
Utilities are the backbone of a reliable outdoor kitchen:
- Electrical: Dedicated 20A GFCI circuits for appliances and lighting; outdoor-rated conduit and boxes.
- Gas: Size the line for BTU demand; install shutoff valves and drip legs; use licensed professionals.
- Water/Drain: Consider a frost-proof hose bib or plumbed sink with proper traps and venting; use air gaps and backflow prevention.
- Drainage: Perimeter French drains, channel drains along counters where needed; always maintain slope.
6) Add Shelter, Shade, and Weather Strategy
Comfort multiplies usage hours. Integrate:
- Pergolas and pavilions: Slatted or solid roofs for shade and rain; ensure fire-safe distances above grills.
- Retractable awnings/umbrellas: Flexible sun control for smaller spaces.
- Wind screens: Louvered panels, hedges, or fences to deflect gusts and smoke.
- Heating/cooling: Infrared heaters, ceiling fans, misting systems as climate demands.
7) Zone Seating, Dining, and Circulation
Good zoning keeps guests comfortable and cooks focused:
- Dining zone: Close to the kitchen for hot food handoff; allow generous chair clearances.
- Lounge zone: Sofas and fire features set downwind from the cooking area.
- Kid/pet zone: Visible but buffered from heat and knives.
- Service paths: Direct routes from indoor kitchen to grill and table reduce steps and spills.
8) Layer Lighting for Nighttime Magic
Lighting should be beautiful and practical:
- Task: Bright, glare-free lights over cooking and prep (aim for 50–70 foot-candles).
- Ambient: Warm overhead glow from pendants or string lights.
- Accent: Step, path, and planter lights for depth; dimmable zones create mood.
9) Planting for Beauty, Privacy, and Flavor
Plants set the mood and serve the menu:
- Herb bar: Rosemary, thyme, basil, mint, and chives within arm’s reach of the prep counter.
- Edible landscaping: Espaliered fruit trees, berry canes, and citrus in containers.
- Privacy screens: Clumping bamboo, tall grasses, or trellised vines; avoid resinous evergreens near open flame.
- Pest-smart picks: Citronella-scented geraniums, marigolds, and lavender to help deter mosquitos.
10) Build In Storage and Organization
Everything in its place means smoother cooks:
- Dry storage: Sealed drawers for utensils, rubs, and thermometers.
- Trash/recycling: Pull-outs near prep.
- Fuel storage: Weatherproof bins for pellets or charcoal; safe propane caddies.
- Cleaning station: Hooks for brushes, caddy for towels and sanitizers.
11) Curate Style and Finishes
Tie it all together with a cohesive palette:
- Color story: Pick 3–5 tones and repeat across pavers, cabinetry, textiles, and planters.
- Texture: Blend smooth metals with tactile stone or warm woods for depth.
- Hardware/fixtures: Matte black, weathered brass, or stainless—echo finishes for harmony.
Layouts That Work: Small to Spectacular
Not every yard needs a sprawling installation. Here are three proven configurations to inspire how you’ll design a garden grilling zone that suits your space.
Compact Patio Powerhouse (Up to 150 sq ft / 14 sq m)
- Appliances: 3–4 burner gas grill or kamado on a cart; small prep cart; compact fridge.
- Counters: 24–36 in (60–90 cm) of landing; fold-down shelves for flexibility.
- Seating: Bistro table for 2–4; bench seating with storage.
- Shelter: Umbrella or retractable awning; string lights for ambiance.
Pro tip: Use vertical space—wall-mounted spice racks, magnetic tool bars, and trellises that double as screens.
Family Courtyard Kitchen (150–350 sq ft / 14–33 sq m)
- Appliances: Built-in gas grill with side burner; kamado or pellet smoker; undercounter fridge.
- Counters: 6–10 ft (1.8–3 m) of prep with 24 in (60 cm) landing at both sides of the grill.
- Seating: Dining for 6–8 plus a lounge set; 42 in (107 cm) bar top for casual grazing.
- Structure: Pergola with dimmable task lights and fan; planter edge doubles as extra seating.
Pro tip: Align the grill mouth perpendicular to the dining table to minimize smoke drift toward guests.
Entertainer’s Pavilion (350+ sq ft / 33+ sq m)
- Appliances: Built-in grill, dedicated smoker, flat top, pizza oven; kegerator and ice maker.
- Counters: 12–16 ft (3.6–4.8 m) prep + separate plating pass; 2-compartment sink.
- Seating: Dining for 10–12, lounge for 8–10; bar with 4–6 stools.
- Extras: Outdoor TV/projector, distributed audio, radiant heaters, and wind-rated roof.
Pro tip: Create a chef’s alley behind the bar for staff or helpers to move without crossing guest circulation.
Appliances and Gear: Choose with Intention
Pick equipment that matches your menu and maintenance comfort, not just what looks impressive.
Grills and Smokers
- BTUs and heat distribution: Even coverage matters more than raw BTU numbers.
- Grate materials: Stainless resists rust; cast iron retains and transfers heat superbly.
- Thermal mass: Heavier lids and ceramic bodies stabilize temps for long cooks.
- Access panels: Make sure built-ins allow future service and ventilation.
Prep, Cook, and Serve Accessories
- Thermometers: Instant-read and multi-probe wireless for accuracy.
- Boards and knives: Large end-grain boards; dedicated raw/cooked zones.
- Cast iron & planchas: Sear stations for fajitas, smash burgers, and veggies.
- Fire safety: Class B/K fire extinguisher, baking soda for flare-ups; keep within reach.
Refrigeration and Ice
- Outdoor-rated units: With robust gaskets and corrosion-resistant components.
- Beverage station: Ice well, speed rail, and a sink with air gap for pro-style service.
Safety First—Always
Design beauty means nothing without safety baked in. When planning how to design a garden grilling zone, keep these rules nonnegotiable:
- Clearances: Keep grills away from siding, eaves, and overhanging branches; respect manufacturer specs.
- Non-slip surfaces: Textured finishes reduce slips when floors are wet or greasy.
- GFCI and wet location ratings: All exterior outlets and fixtures must be outdoor-rated.
- Ventilation: Enclosed bases need lower and upper vents; covered grills may require a hood and make-up air.
- Child/pet barriers: Gates or low fencing, plus parking spots for hot lids and tools.
- Lighting at steps/edges: Mark transitions to prevent trips in low light.
Budgeting, Phasing, and Timeline
Designing an outdoor kitchen is flexible—phase it smartly to spread costs and reduce disruption.
- Good/Better/Best plan: Start with core cooking and safe surfaces; add shelter and storage; finish with tech and luxuries.
- Cost drivers: Utilities, masonry, appliances, and roofing typically dominate the budget.
- DIY vs. Pro: DIY demo, planting, and furniture assembly can save; leave gas, electrical, structure, and stone to pros.
- Timeline: 1–2 weeks for compact refresh; 6–12+ weeks for major builds (design, permits, lead times, install).
Ballpark ranges vary widely by region and spec. Prioritize performance over sheer size; a well-planned small kitchen often beats an oversized, under-equipped one.
Smart Features and Entertainment
Tech can elevate usability without complicating your cooks.
- App-connected thermometers and pellet controllers: Precision without babysitting.
- Smart lighting scenes: One-tap transitions from prep-bright to dinner-glow.
- Outdoor audio: Weatherproof speakers zoned for lounge vs. cook area.
- Display: Shielded outdoor TV or drop-down projector screen with anti-glare placement.
Planting, Ecology, and Water Wisdom
Design your oasis to be as kind to the planet as it is to your senses.
- Low-water plants: Native and Mediterranean species thrive with less irrigation.
- Efficient watering: Drip irrigation with smart controllers; rain barrels where allowed.
- Compost and soil health: Feed beds with compost; choose permeable paving where possible.
- Shade trees: Strategic canopy trees cool microclimates and reduce heat island effect.
Maintenance and Seasonal Care
Plan for longevity and low effort from day one—this is central to how to design a garden grilling zone that lasts.
- Material choices: Pick finishes you’ll realistically maintain (e.g., sealed stone vs. high-polish metals).
- Covers and caps: Custom covers for appliances; chimney caps on pizza ovens and smokers.
- Winterizing: Drain water lines, clean appliances, and store cushions; consider heaters for shoulder seasons.
- Grease management: Trays and channels; schedule deep cleans to prevent flare-ups and odors.
Common Mistakes to Avoid
- Ignoring wind and smoke: Poor placement can make a gorgeous space miserable to use.
- Too little counter space: Nowhere to land trays is the fastest way to stress.
- Overbuilt, underutilized: Massive appliance suites that don’t match your actual cooking habits.
- No storage plan: Clutter creeps in without dedicated dry and wet storage.
- Forgetting lighting layers: Dim dinners or blinding glare—get dimmers and zone control.
- Skimping on drainage: Standing water shortens the life of everything.
Case Study Vignettes
Urban Balcony Upgrade
A 90 sq ft (8.5 sq m) balcony became a micro-oasis with a compact electric grill, porcelain deck tiles on pedestals, a fold-down stainless shelf, and a slim planter of herbs. String lights and a two-seat bistro made it dinner-ready without violating building rules.
Suburban Family Hub
On a 12x20 ft (3.6x6 m) patio, the owners anchored a built-in gas grill with 8 ft (2.4 m) of counter, added a kamado for weekend smokes, and planted rosemary and bay as fragrant screens. A pergola with a fan kept summer meals comfortable; dimmable sconces and path lights extended evenings.
Entertainer’s Dream Pavilion
A detached 16x24 ft (5x7.3 m) pavilion housed a gas grill, pellet smoker, pizza oven, ice maker, and kegerator. The chef’s alley sat behind a 10-seat bar. Radiant heaters, roll-down screens, and a directional hood controlled climate and smoke. The result? Effortless parties year-round.
Quick Checklist: From Idea to Ignition
- Vision: Pick your style, purpose, and guest count.
- Site study: Sun, wind, smoke, and circulation.
- Layout: Heat–Prep–Cold triangle; clearances and counters.
- Materials: Non-slip floors; heat-proof counters and cladding.
- Utilities: Gas, electric (GFCI), water, and drainage.
- Shelter: Pergola/awning; wind control and heaters/fans.
- Seating: Dining + lounge zones with proper spacing.
- Lighting: Task, ambient, and accent with dimmers.
- Planting: Herbs, privacy screens, and low-water choices.
- Storage: Dry drawers, trash pull-outs, fuel bins.
- Safety: Clearances, ventilation, non-slip, extinguishers.
- Budget & phases: Core now; upgrades later.
- Maintenance: Covers, cleaning, and seasonal care.
Putting It All Together
Designing the ultimate backyard BBQ oasis isn’t about collecting appliances—it’s about choreographing an experience. When you understand how to design a garden grilling zone around real-life cooking and gathering, you create a space that invites you outside more often, works flawlessly during busy moments, and looks amazing all year. Start small or go big, phase it or finish it fast—just keep the essentials in focus: smart placement, durable materials, safe utilities, layered lighting, thoughtful planting, and storage that keeps you organized.
Turn your lawn into a legend. With a clear plan, your backyard can serve up perfect meals, memorable evenings, and a signature style that’s entirely your own.