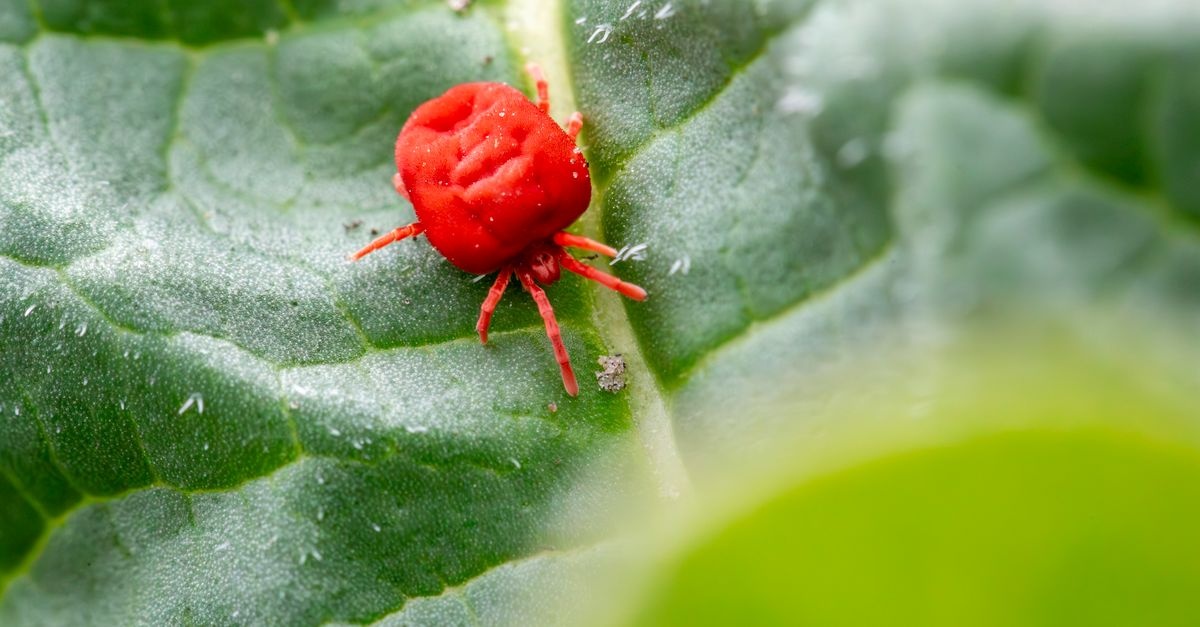
Defeat Spider Mites Naturally: Your Step-by-Step Rescue Plan for Thriving Fruit Trees
Left unchecked, spider mites can scorch leaves, stall growth, and reduce your harvest. If you’ve noticed pale speckling, fine webbing, or dusty, tired-looking foliage, you’re likely dealing with an outbreak. This comprehensive guide walks you through how to fight spider mites on fruit trees without heavy-handed chemicals—starting with rapid relief and ending with season-long prevention. You’ll learn precise diagnostics, a 72-hour rescue protocol, biological control options, and smart cultural practices that keep your orchard resilient.
Why Spider Mites Love Fruit Trees (and How That Helps You Stop Them)
Spider mites thrive in hot, dry, dusty conditions—exactly the microclimate stressed fruit trees often provide in midsummer. They feed by piercing cells on the undersides of leaves, causing the signature light stippling that progresses to bronzing and leaf drop. Several species target fruit trees:
- Two-spotted spider mite (Tetranychus urticae): A heat-loving generalist common on stone fruit.
- European red mite (Panonychus ulmi): A frequent pest on apples and pears.
- Citrus red mite or brown citrus mite: Problematic on citrus in warm climates.
Understanding their triggers means you can build targeted defenses. Reduce water stress, control dust, preserve beneficial predators, and you’ll make your trees much less welcoming to mites.
Spot the Problem Early: Clear Signs and Fast Diagnostics
Early detection is the difference between a light touch and a full-on rescue mission. Use the cues below to confirm an infestation before populations explode.
Visual Clues
- Stippling: Tiny pale dots on leaves, most visible when you look up through the canopy toward the light.
- Bronzing or yellowing: Leaves take on a dull, fatigued look; edges may crisp during heat waves.
- Fine webbing: Often in leaf axils and along midribs, more pronounced in heavy infestations.
- Dust that seems to move: A population of mites and cast skins can look like moving dust on the underside of leaves.
The 60-Second Leaf Test
Use this quick, low-tech method to confirm mites and gauge pressure:
- Hold a white card or paper plate under a suspect branch.
- Tap or sharply flick the branch. Tiny specks will fall.
- Watch for moving dots the size of pepper grains. Smear one gently—mites will streak red, green, or brown.
Repeat at several points around the tree to estimate how widespread the issue is. While thresholds vary by species and tree type, a rough rule of thumb is that a few mites per leaf early season can justify action; in midsummer, consistent counts of 5–10+ moving mites per leaf often indicate the need for stronger interventions—especially if predators are scarce.
Differentiate from Look-Alikes
- Thrips: Leave silvery patches and black specks of frass; bodies are elongated and move faster than mites.
- Leafhoppers: Produce white stippling too but are larger, wedge-shaped, and jump when disturbed.
- Nutrient deficiencies: Usually more uniform across a leaf or branch, without webbing or moving dots.
Your 72-Hour Natural Rescue Plan
When leaves are stippled and webbing appears, act fast. This step-by-step plan delivers immediate suppression, preserves pollinators, and sets you up for sustained control.
Step 1: Protect Beneficials and Pick the Right Window
- Plan sprays for early morning or late evening to avoid heat stress on leaves and reduce risk to pollinators.
- Avoid broad-spectrum insecticides that kill predators (lady beetles, lacewings, predatory mites). These products often trigger worse mite flares later.
- Check weather: aim for a calm, dry period with ambient temps under 85°F/29°C during application.
Step 2: Cool and Knock Back with Water
Before any spray, use a strong hose stream to blast the undersides of leaves. This physically removes mites and dust, cools the canopy, and boosts spray coverage. Work methodically around the canopy and repeat on day 2 if pressure is high.
Step 3: Insecticidal Soap—Your First-Line, Low-Toxicity Knockdown
Soaps disrupt mite membranes on contact and spare most beneficials when targeted carefully.
- Mix: Follow the label. Many ready-to-use products exist; for concentrates, typical dilution is around 2–5 tablespoons per gallon (10–25 mL/L), but always check your product label.
- Coverage: Spray to glisten on leaf undersides and along midribs; re-wet areas that dry quickly.
- Test: Spot-test one branch; wait 24 hours for phytotoxicity signs before full coverage.
- Repeat: Reapply in 3–5 days to catch newly hatched mites.
Soaps work only when they contact mites. Pair with the water blast and careful targeting for best results.
Step 4: Layer in Neem/Azadirachtin for Ongoing Pressure
Neem oil and azadirachtin-based products offer anti-feedant and growth-regulating effects on mites and related pests. Use when populations rebound between soap treatments.
- Timing: Apply at dusk to limit exposure to pollinators and reduce sun-related leaf burn.
- Mix per label: Rates vary widely; follow the exact instructions and do not exceed frequency limits.
- Avoid overlap with sulfur: Do not apply oils within several days of sulfur sprays to prevent leaf injury.
Step 5: Horticultural Oil for Smothering and Residual Suppression
Light, highly refined horticultural oils (summer oils) can smother eggs and nymphs and help shine leaves, reducing dust adhesion.
- Use light rates in the growing season and never on water-stressed trees or when temps exceed 85°F/29°C during or shortly after application.
- Target the underside of leaves and inner canopy where webbing is present.
- Observe intervals: Maintain label-specified intervals between oil and sulfur products to avoid phytotoxicity.
Step 6: Re-Assess at 48–72 Hours
- Repeat the white-card tap test at multiple canopy positions.
- If mites persist at moderate levels, cycle: water blast → soap → oil/neem at labeled intervals.
- If populations are crashing and predators are present, shift toward maintenance with water blasts and cultural fixes.
The 14-Day Stabilization: Cultural Fixes that Keep Mites Down
Short-term sprays buy you time; cultural practices reshape the habitat so mites struggle to rebound. Over the next two weeks, implement the following:
Correct Water Stress
- Deep, infrequent watering: Aim for slow soaks that wet the root zone 12–18 inches (30–45 cm) deep.
- Mulch 2–4 inches (5–10 cm) with wood chips or leaf mold, keeping mulch a few inches away from the trunk.
- Irrigate before heat waves so leaves are turgid, making them less hospitable to mites.
Reduce Dust and Heat
- Control traffic on dry farm rows or driveways near trees; wet down dusty paths during heat spells.
- Understory cover: Low groundcovers or living mulches reduce reflected heat and dust drift.
Prune for Airflow (but Don’t Overdo It)
- Thin the densest interior shoots to improve spray and predator access.
- Avoid heavy summer pruning that can flush tender growth and attract mites and other pests.
Feed for Balance, Not Bloated Growth
- Skip high-nitrogen blasts that cause soft, mite-friendly foliage.
- Use balanced, slow-release nutrition or compost, guided by a soil test if available.
Biological Control: Recruit Natural Enemies
One of the most effective long-term strategies is to maintain a strong community of predators. These allies knock down outbreaks before you notice them.
Top Predators for Mites
- Predatory mites (e.g., Phytoseiulus persimilis, Neoseiulus californicus, Amblyseius andersoni): Excellent at hunting spider mites on leaves; different species prefer different temperature/humidity ranges.
- Stethorus lady beetles (mite destroyers): Specialized mite feeders; adults and larvae both consume mites.
- Lacewings: Generalist predators; larvae help mop up soft-bodied pests, including mite eggs and nymphs.
How to Release Predatory Mites Effectively
- Buy from reputable suppliers and choose species matched to your climate and pest pressure.
- Release early in an outbreak, ideally when you first detect mites and before heavy webbing forms.
- Reduce disruptive sprays for 1–2 weeks before and after release. If sprays are unavoidable, choose softer materials (soaps, selective oils) and target hotspots.
- Condition the site: Maintain moderate humidity in the canopy (early-evening irrigation, mulching) and reduce dust.
Predators work best as part of an integrated pest management (IPM) plan that includes the cultural steps above and careful monitoring. They’re a cornerstone of natural spider mite control in home orchards.
Season-Long IPM Calendar for Fruit Trees
Here’s a practical calendar to keep pressure low from dormancy through harvest, with a focus on organic and low-toxicity tactics.
Dormant to Bud Break
- Sanitation: Remove mummified fruit, prunings, and leaf litter harboring overwintering pests.
- Dormant oil spray (where labeled and appropriate): Smothers overwintering eggs of mites and scale. Apply during true dormancy in frost-free weather above 40°F/4°C, avoiding rain for 24–48 hours.
Spring (Pre-bloom to Petal Fall)
- Monitor weekly: White-card tap test on sunny mornings.
- Preserve pollinators: Avoid sprays during bloom unless absolutely necessary and always choose bee-safe windows.
- Predator releases if mites are detected and conditions favor them.
Early to Mid-Summer
- Water and mulch to prevent drought stress that accelerates mite reproduction.
- Control dust: Water roads, maintain groundcovers.
- Responsive treatments: Rotate soaps and light summer oils as needed, with careful timing to avoid heat stress.
Late Summer to Pre-Harvest
- Reassess thresholds: Fruit sizing is sensitive to leaf loss; protect canopy quality.
- Avoid residues: Mind pre-harvest intervals (PHIs) for any product used; read labels carefully.
Organic and Low-Toxicity Product Toolbox
Use products thoughtfully and always follow label directions. Rotate modes of action and pair with cultural controls to prevent resistance.
Insecticidal Soaps
- Best for: Active knockdown of nymphs and adults on contact.
- Pros: Low residues, minimal impact on many beneficials when targeted.
- Cons: No residual; requires repeat applications and excellent coverage.
Horticultural/Summer Oils
- Best for: Smothering eggs and young stages; cleaning leaves to reduce dust.
- Pros: Multi-stage action; resistance is rare.
- Cons: Heat and drought stress increase risk of leaf burn; avoid close timing with sulfur.
Neem Oil and Azadirachtin
- Best for: Suppressing feeding and reproduction; supplementing soaps/oils.
- Pros: Plant-derived; compatible with IPM when applied carefully.
- Cons: Variable efficacy on heavy infestations; avoid use during bloom and hot conditions.
Microbial and Botanical Options
- Beauveria-based products and certain essential oil blends have labeled activity against mites in some regions; results vary by product and conditions.
- Always verify local registration, crop labeling, and PHI/REI before use.
Selective Miticides (Last Resort)
If natural measures fail and trees are at risk, consult local guidance on selective miticides with activity against spider mites (e.g., products containing bifenazate, hexythiazox, spiromesifen, or spirodiclofen). These can be more compatible with beneficials than broad-spectrum insecticides, but they still demand careful stewardship.
- Read labels fully for your specific fruit crop, safety gear, PHI, and resistance management.
- Target hotspots and avoid treating the entire landscape when possible.
Tree-Specific Notes
Different fruit trees and mite species call for slight strategy shifts.
Apples and Pears (European Red Mite, Two-Spotted Spider Mite)
- Early monitoring is key—these orchards often see spring egg hatch.
- Threshold guidance commonly ranges from a few mites/leaf early to around 10–20/leaf in midseason, adjusted for predator presence. When in doubt, act conservatively.
- Predatory mites and dormant oils are cornerstones of suppression.
Stone Fruit (Peach, Plum, Apricot, Cherry)
- Heat waves ignite outbreaks—double down on watering and dust control beforehand.
- Soaps and light oils are effective between 70–85°F (21–29°C) when leaves are well-hydrated.
Citrus
- Frequent light rinses (underside leaf washing) can dramatically suppress mites without residues.
- Oils are widely used on citrus; mind heat thresholds and avoid spraying during bloom.
Common Mistakes to Avoid
- Overusing broad-spectrum insecticides (e.g., pyrethroids, organophosphates): They often kill predators and unleash worse mite flares.
- Spraying in heat: Oils or soaps applied during high temperatures or to water-stressed trees can burn foliage.
- Skipping coverage: Mites hide under leaves; top-only sprays waste time and product.
- Ignoring dust and drought: These are root causes. Fixing them shrinks future outbreaks.
How to Fight Spider Mites on Fruit Trees: A Clear, Repeatable Framework
Here’s a simple, memorable framework to keep you on track when pressure spikes:
- Detect: Weekly white-card taps, underside inspections, and look for stippling/webbing.
- Disrupt: Water blast the canopy, then apply soap for contact kill.
- Suppress: Layer neem or a light summer oil, avoiding heat and sulfur conflicts.
- Stabilize: Fix water, dust, and airflow; add predators if needed.
- Safeguard: Follow an IPM calendar and preserve beneficials to prevent rebound.
FAQs
How quickly will I see results?
After a thorough water blast and soap spray, expect a visible reduction within 24–72 hours. Because soaps and oils don’t have strong residuals, repeat at labeled intervals and re-test with the tap method to confirm decline.
Are these methods safe for pollinators?
Yes—when used thoughtfully. Spray at dawn/dusk, target leaf undersides, and avoid bloom periods. Soaps and light oils have minimal residual impact when applied outside pollinator foraging windows.
Can I harvest fruit after spraying?
Always check the pre-harvest interval (PHI) on your product label. Soaps and some oils often have short or no PHIs, but labels vary by crop and jurisdiction.
What if mites keep coming back?
Recurrent outbreaks usually point to drought stress, dust, or predator loss. Strengthen irrigation and mulching, reduce dust sources, and consider predator releases. Rotate compatible products to avoid resistance.
Do homemade remedies work?
Diluted potassium salts of fatty acids (commercial insecticidal soaps) and labeled horticultural oils are more reliable than improvised mixtures. If you experiment, spot-test and never exceed safe rates—unlabeled detergents can burn foliage.
Printable Checklist: Step-by-Step Rescue Plan
- Day 0: Confirm mites (white-card tap test). Water-blast undersides; cool canopy.
- Day 0 Evening: Spray insecticidal soap to full underside coverage. Spot-test first.
- Day 2–3: Re-test. If needed, re-apply soap or layer in neem/light oil (observe labels and temps).
- Day 3–7: Correct irrigation; add mulch; reduce dust; light canopy thinning for airflow.
- Day 7–14: Consider releasing predatory mites; minimize disruptive sprays.
- Week 3+: Monitor weekly, water deeply, and maintain groundcovers to prevent dust.
Putting It All Together
Learning how to fight spider mites on fruit trees naturally is about timing, coverage, and ecology. Hit populations early with water blasts and soap, add gentle suppression with oils or neem under the right conditions, then stabilize the orchard with smart irrigation, dust control, and predator support. With this integrated approach, your leaves will stay green, your fruit will size up beautifully, and mites will remain an occasional nuisance—not a yearly crisis.
Key Takeaways
- Early detection prevents runaway outbreaks—tap test weekly.
- Contact tools (soaps, water) provide fast relief; precise coverage matters.
- Ecology first: Fix water, dust, and airflow to undermine mite habitat.
- Protect and recruit predators to keep populations in check naturally.
- Stay label-true: Products differ by crop, climate, and regulations—follow directions exactly.
Armed with this step-by-step plan, you can confidently practice natural spider mite control and keep your fruit trees vigorous from spring flush to fall harvest.