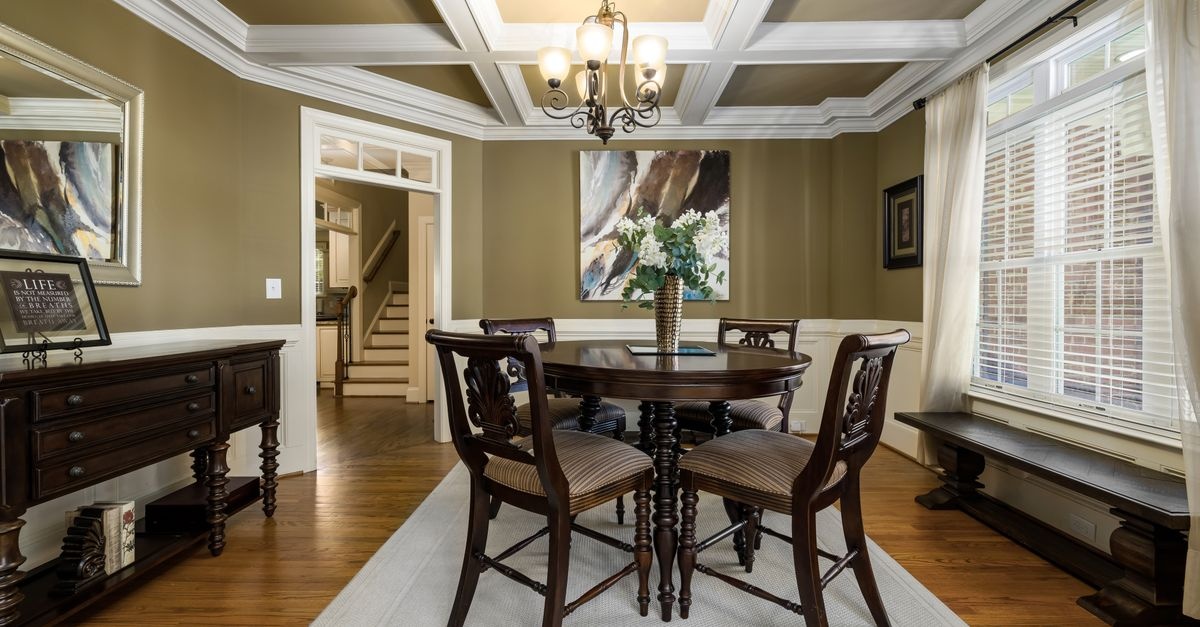
Your coffered ceiling is more than a grid of beams and panels—it’s the crown of your room, capable of transforming the entire space when properly cared for. If you’ve wondered how to refresh faded stain, heal cracks, erase water rings, or simply bring back the glow of richly figured wood, you’re in the right place. This comprehensive guide explains how to restore a wooden coffered ceiling with a preservation-minded, professional workflow that balances craft, safety, and longevity.
What Makes Coffered Ceilings Special—and Tricky
Coffered ceilings combine intersecting beams (or faux beams), inner panels, and decorative moldings. They can be solid hardwood, softwood with stain, or even painted assemblies. Their depth and detail are stunning—but those same recesses, profiles, and inside corners raise the stakes during restoration. A successful refinish demands careful access, consistent color control across different grain orientations, and finishing strategies that won’t pool in corners or lap on long runs.
Project Overview: The Pro-Level Roadmap
Before touching a scraper or brush, map your path. The following roadmap keeps you efficient and avoids costly do-overs:
- Assessment: Identify wood species, existing finish, damage, and moisture issues.
- Safety and setup: Lead-paint testing, proper PPE, dust control, and stable scaffolding.
- Finish testing: Determine whether you can clean and refresh or must strip and start over.
- Stripping or deep cleaning: Remove failing finish without losing crisp moldings.
- Repairs: Address cracks, gaps, dented profiles, and veneer issues.
- Color work: Even out discoloration, bleach stains if needed, then stain or tone to match.
- Topcoats: Choose the right sealer and finish for durability with the sheen you want.
- Final curing and maintenance: Protect the new finish and set a care routine.
Safety First: Working Overhead Without Risks
Wood restoration often involves chemicals, dust, and height. Prioritize safety:
- PPE: Use a properly fitted respirator rated for organic vapors and particulates, safety glasses or goggles, nitrile gloves, and hearing protection.
- Lead paint awareness: If the ceiling is painted or pre-1978, use a lead test kit. If positive, follow local regulations, use HEPA vacuums, and avoid open-flame or aggressive sanding.
- Scaffolding: Work from stable platforms; secure planks; never overreach from ladders.
- Ventilation: Cross-ventilate, consider negative air machines and VOC-rated filters when spraying finishes.
- Fire safety: Keep solvents away from ignition sources; store rags in a metal container to prevent spontaneous combustion.
Inspection: Understanding What You’re Working With
Identify Wood Species
Different woods react differently to stain and finish. Oak’s open pores accept pigment; maple can blotch without a washcoat; pine amberizes and telegraphs knots. If unsure, examine end grain with a magnifier or consult a pro. Document species in each component (beams, coffers, moldings) because mixed woods require extra color control.
Determine the Existing Finish
You’ll restore faster if you know what’s on the surface. Try these spot tests on a discreet area:
- Alcohol wipes off shellac. If it gets sticky or dissolves, it’s likely shellac.
- Lacquer thinner softens lacquer. Quick melting suggests lacquer.
- Mineral spirits affect oil/varnish blends minimally and primarily clean grime.
- Water beads on polyurethane and modern varnishes; solvents won’t easily reflow them.
Note the sheen and whether the surface is alligatored, flaking, or cloudy—clues that indicate cleaning vs. stripping.
Moisture, Movement, and Damage
- Water stains: Identify the source (roof leak, plumbing). Fix the leak before finishing.
- Cracks and gaps: Seasonal movement can open miters; check for loose returns and popped brads.
- Rot or softness: Probe suspect areas with an awl. Soft wood may need consolidation or patching.
- Veneer lift: Some coffer panels are veneered; edge lifting requires delicate re-adhesion.
Decide: Clean and Refresh or Strip and Refinish
Not every ceiling needs a full strip. Use this decision tree:
- Clean and refresh if the finish is intact but dull or greasy. A deep clean, light scuff, and fresh topcoat may suffice.
- Targeted spot repair if isolated rings, smoke shadows, or scuffs exist. Blend-in toners and touch-up varnish can disappear defects.
- Full strip and refinish if there’s heavy alligatoring, peeling, incompatible finishes, or substantial color correction needed.
Setup: Protect the Room and Create a Pro Workspace
- Mask and cover: Plastic sheeting on walls, drop cloths on floors. Mask light fixtures and vents. Label HVAC returns and consider temporary filters.
- Lighting: Set up raking lights to reveal scratches and lap marks. Portable LED panels are ideal.
- Access: Arrange rolling scaffold or podium ladders to reach the deepest coffers without overextension.
- Organization: Create stations: stripping, neutralizing, repairs, staining, and finishing. Keep fresh and used rags separate.
Method A: Clean, Degrime, and Refresh the Finish
If the film is sound, you can transform a tired ceiling in a few steps:
- Degrease: Wipe with a mix of warm water and a few drops of mild detergent. For stubborn grime, use mineral spirits on a lint-free cloth. Dry thoroughly.
- De-wax if needed: If paste wax is present, use naphtha or a commercial de-waxer to prevent adhesion problems.
- Scuff sand: Hand-sand with 320–400 grit foam pads; avoid rounding edges. Vacuum with a HEPA brush and tack with a microfiber cloth.
- Color tune: Use a gel stain or toner to even out minor fade. Work in thin coats; wipe excess out of corners.
- Topcoat: Apply a compatible finish (dewaxed shellac as a universal sealer, followed by waterborne polyurethane or a wiping varnish). Two thin coats usually suffice.
Method B: Full Strip and Refinish
When the old film is failing or you need significant color correction, a complete refinish yields the best results.
Choosing a Stripping Strategy
- Chemical strippers: Modern, safer strippers based on benzyl alcohol or dibasic esters are slower than methylene chloride but far less hazardous. Apply generously, wait for lift, then scrape with plastic tools.
- Heat and infrared: Infrared plates soften finish without scorching; heat guns work too but require caution. Never use open flame near old finishes or in lead-painted environments.
- Mechanical abrasion: Minimal sanding preserves profiles. Save abrasives for flattening after stripping, not as the primary removal method.
Stripping Workflow
- Work in zones: Divide the ceiling into manageable sections so stripper doesn’t dry out overhead.
- Apply and dwell: Brush on a heavy coat; keep it wet per product directions. Cover with plastic to extend dwell on stubborn varnish.
- Scrape carefully: Use plastic or sharpened wooden scrapers to protect carvings. Follow profiles; clean residue with brass brushes in corners.
- Neutralize: Many strippers require a neutralizer (often water, mineral spirits, or vinegar, depending on chemistry). Follow the label precisely.
- Rinse and dry: Wipe residue, allow the wood to dry 24–48 hours. Use a moisture meter; aim for 6–10% before finishing.
Detail Work: Repairs That Disappear
Hairline Cracks and Seasonal Gaps
- Structural check: Confirm movement isn’t ongoing moisture intrusion. Stabilize humidity (35–50% RH is ideal).
- Adhesive: For tight splits, wick in thin CA glue or liquid hide glue, clamp gently with padded cauls.
- Fill: Use stainable wood filler for small defects on painted assemblies; for stained hardwood, opt for tinted epoxy or burn-in sticks for invisible patches.
Broken Moldings and Losses
- Dutchman patches: Inlay matching grain-oriented wood for larger defects. Align growth rings for a believable repair.
- Profile replication: Use a small molding plane, custom router bit, or 3D-printed sanding blocks to recreate missing profiles.
- Fastening: Pin-nail discreetly and fill holes with tinted wax or lacquer sticks after coloring.
Veneer Lift in Panels
- Inject warm hide glue or PVA under the lift with a syringe.
- Press with a caul that matches the panel contour; protect with release paper.
- Clamp evenly; wipe squeeze-out immediately with a damp cloth.
Erase Stains and Discoloration
Water Rings and Tannin Marks
- Oxalic acid bleach: Excellent for iron and water stains. Dissolve crystals in warm water, apply with a natural-bristle brush, keep wet until discoloration fades, then neutralize with a baking soda rinse and dry thoroughly.
- Two-part wood bleach (A/B): Lightens overall tone when UV darkening or smoke shadowing is present. Follow timing precisely; neutralize as directed.
- Chlorine bleach: A last resort for dye-type stains; rinse thoroughly and allow extended drying to prevent adhesion issues.
Color Blending on Mixed Woods
If coffers combine species (e.g., oak beams with pine panels), plan a layered approach:
- Washcoat first: A thin coat of dewaxed shellac (1–1.5 lb cut) evens absorption and tames blotching on pine and maple.
- Dyes for depth, pigments for grain: Use water- or alcohol-based dye for base tone, then a light pigment or gel stain to emphasize pores in oak.
- Glazing and toning: Transparent toner coats sprayed between seal and finish subtly unify color across different parts.
Color, Sheen, and Finish: Building a Durable Film
Choosing Your System
- Shellac (dewaxed): Beautiful warmth, fast-drying, excellent sealer under most finishes. Avoid high heat and moisture exposure.
- Waterborne polyurethane: Low odor, non-ambering, great for maintaining a pale tone on maple or light species. Dries quickly; sand lightly between coats.
- Oil-based varnish: Rich amber tone with long open time for brushing. Higher VOCs and slower cure; can yellow over time.
- Lacquer: Fast and repairable; best with spray equipment and good ventilation. Not ideal where moisture is a concern.
- Hardwax oils: Low-build, natural feel. Less protective than film finishes in high-traffic environments but fine for ceilings if you prefer a soft luster.
Stain and Tone Like a Pro
- Test boards: Always replicate your stack (sealer, dye, stain, toner, topcoat) on offcuts or concealed areas before committing overhead.
- Condition or washcoat: On blotch-prone woods, apply a conditioner or thin dewaxed shellac to regulate absorption.
- Apply dye: Use a pump sprayer or pad; work wet-on-wet to avoid lap marks in long runs. Wipe evenly.
- Apply pigment or gel stain: Work it into pores, then wipe with the grain. Avoid puddling in inside corners.
- Glaze: After sealing, use a slow-dry glaze to shade moldings and create visual depth if desired.
Sealers and Topcoats
- Seal: One thin coat of dewaxed shellac locks in color, raises grain minimally, and provides excellent adhesion.
- Sand lightly: Use 320–400 grit foam pads or maroon non-woven pads. Vacuum and tack.
- Build coats: Apply 2–3 coats of your chosen finish. For waterborne polys, 2 hours between coats is common; oil varnishes may need 12–24 hours. Follow the can’s recoat window.
- Sheen control: Satin hides minor imperfections, semi-gloss adds sparkle. Stir flattening agents thoroughly and consistently for uniform sheen.
Application Techniques for Complex Coffers
- Order of operations: Finish the deepest recesses first, then work out to beams and perimeter moldings. This prevents drips from spoiling completed areas.
- Cut-in tools: Short-handled sash brushes and artist’s brushes for corners; microfiber pads for flat panel fields.
- Back-brushing: If spraying, keep a brush on hand to tip off sags in corners before the film sets.
- Thin coats: Multiple thin passes beat one heavy coat. Avoid runs at bead and cove transitions.
- Temperature and RH: Maintain 60–75°F and 35–50% RH for consistent leveling and cure.
Tools and Materials Checklist
- PPE: Respirator (OV/P100), goggles, nitrile gloves, hearing protection
- Access: Rolling scaffold, podium ladder, stabilizers
- Surface prep: Plastic sheeting, painter’s tape, drop cloths, HEPA vacuum, microfiber cloths
- Stripping and cleaning: Chemical stripper, plastic scrapers, brass brushes, neutralizer, mineral spirits, denatured alcohol
- Abrasives: 220–400 grit paper and foam pads, non-woven pads
- Repair: CA glue, liquid hide glue, epoxy, wood filler, syringes, clamps, small planes, touch-up crayons
- Color and finish: Dyes, stains, glaze, dewaxed shellac, chosen topcoat, high-quality brushes, pads, or HVLP sprayer
- Misc: Raking lights, moisture meter, mixing cups, labeled containers, metal safety can for oily rags
Scheduling and Workflow Tips
- Work in quadrants: Complete one bay or quadrant fully through seal coats before moving on. This helps maintain color and sheen consistency.
- Record your mix: Note dye concentrations, stain ratios, and toner formulas so touch-ups match later.
- Dry-time discipline: Don’t rush recoats; trapped solvents cause blushing and adhesion failure.
- Edge awareness: Maintain a wet edge along long beams; plan exits so you don’t paint yourself into a literal corner overhead.
Common Mistakes to Avoid
- Over-sanding profiles: It softens crisp edges and screams “refinished.” Strip chemically, sand minimally.
- Skipping washcoats: Leads to blotching on pine, maple, and cherry.
- Heavy corner buildup: Pooled stain or finish in inside corners dries sticky and glossy. Brush out immediately.
- Mismatched color sequencing: Changing the order of dye, stain, and sealer between sections creates patchwork tones.
- Ignoring moisture sources: Finishing before fixing leaks guarantees recurring stains.
When to Call a Professional
- Lead-positive coatings requiring certified abatement.
- Extensive rot or structural movement in beams or attachments.
- Historic landmark projects with strict conservation standards.
- Complex spray finishes in occupied spaces requiring specialized containment and ventilation.
Maintenance Plan: Keep the Dazzle
- Gentle cleaning: Dust quarterly with a microfiber mop. Spot-clean fingerprints with a damp cloth; avoid ammonia.
- Humidity control: Maintain 35–50% RH year-round to minimize movement and gaps.
- Light protection: UV-filtering shades reduce sun fade on stained softwoods.
- Refresh coats: A light scuff and a maintenance coat every 5–10 years keeps finishes looking fresh.
Estimated Time and Cost
For a 12x16 room with a moderately detailed grid:
- Clean and refresh: 2–3 days, modest material cost (brushes, scuff pads, topcoat).
- Full strip and refinish: 5–10 days depending on detail, with higher costs for strippers, dyes, sealers, and finish.
- Pro spray toning: Add 1–2 days for masking and controlled ventilation.
Step-by-Step Summary: How to Restore a Wooden Coffered Ceiling
- Assess and test: Identify species and finish; check moisture and damage.
- Plan and protect: Mask the room, set up safe access, and arrange lighting.
- Choose the path: Clean-and-refresh if the film is sound; otherwise strip thoroughly.
- Repair discreetly: Glue splits, fill defects, replicate missing moldings.
- Correct color: Bleach stains if necessary, then dye and stain with a regulating washcoat.
- Seal and finish: Dewaxed shellac to lock color, then multiple thin topcoats in your chosen sheen.
- Final cure and maintain: Respect cure times, then dust gently and control humidity.
FAQs
Can I refinish without stripping?
Yes, if the existing film is intact. Degrease, scuff with 320–400 grit, then apply a compatible topcoat. For uneven color, use a toner or gel stain between a sealer and finish.
What if my ceiling has lead paint?
Stop and test first. If positive, follow EPA and local rules. Consider hiring certified pros for removal or encapsulation. Avoid heat or aggressive sanding.
What finish is best for a ceiling?
Waterborne polyurethane over dewaxed shellac offers durable protection with minimal odor and non-yellowing clarity. Oil varnish adds warmth but cures slower and ambers more over time.
How do I keep stain from blotching on pine or maple?
Apply a washcoat of dewaxed shellac or a pre-stain conditioner, then use dye first for even tone, and follow with a light pigment or gel stain for grain character.
Is spraying necessary?
No, but HVLP spraying excels at even toners and topcoats in deep coffers. If brushing, use high-quality sash brushes and work in thin, controlled coats.
The Payoff: Historic Character, Modern Durability
With deliberate prep, smart color sequencing, and thin, well-leveled coats, your coffered ceiling can go from dull to dazzling—without losing its soul. Whether you clean and refresh or perform a full strip and refinish, the techniques above show how to restore a wooden coffered ceiling in a way that respects the craft and holds up for decades. Take your time, test each step, and enjoy seeing the room glow again every time you look up.