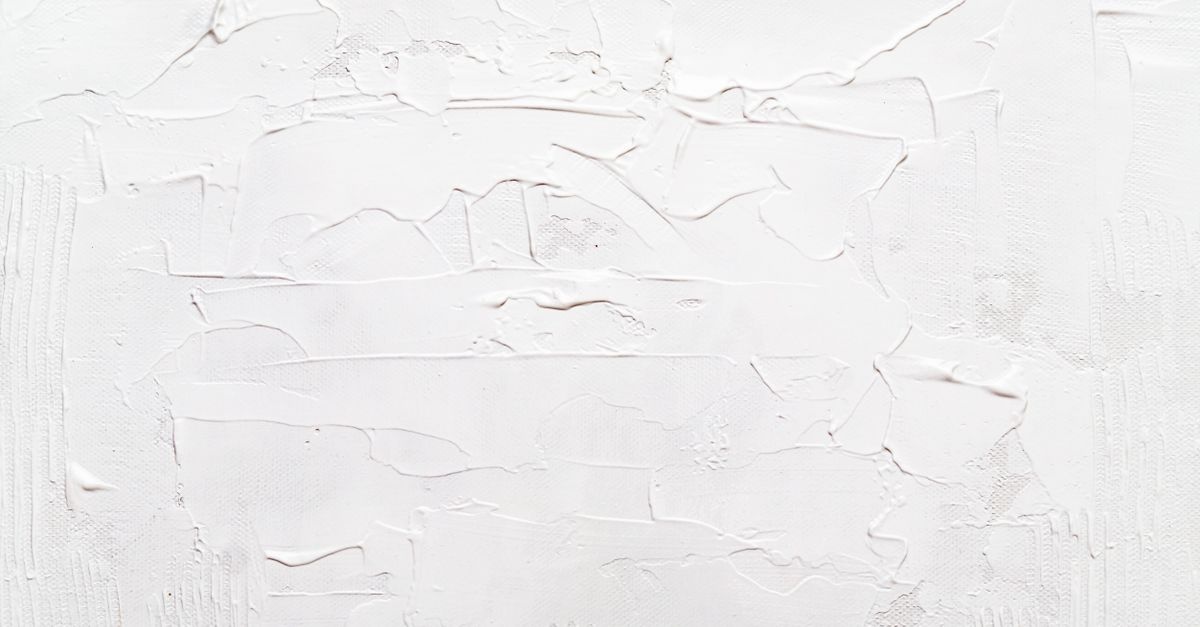
If you’re searching for fresh, design-forward ways to restyle your interior, gypsum plaster is a standout material. It creates crisp surfaces, whisper-quiet textures, and expressive reliefs without the mess or long cure times of cement-based systems. In this comprehensive guide, you’ll find Gypsum plaster wall finish ideas that range from ultra-minimal to artistically bold, plus step-by-step pointers, maintenance advice, and room-by-room inspiration to help you deliver a finish you’ll love for years.
Why Choose Gypsum Plaster for Modern Interiors
Gypsum-based plaster has been a designer favorite for decades because it merges technical reliability with aesthetic versatility. Whether you want a gallery-ready surface or a textured feature wall, gypsum adapts beautifully to your design intent.
- Superb smoothness: Achieve a Level 5 finish that looks flawless even under raking light—ideal for matte paints and subtle color washes.
- Speed and efficiency: Faster setting than many alternatives, enabling quicker project turnarounds.
- Low-VOC and indoor air quality: Most gypsum plasters are inherently low-odor and compatible with low-VOC primers and paints.
- Thermal and acoustic comfort: Gypsum helps buffer temperature swings and, paired with the right assemblies, improves sound attenuation.
- Fire performance: Gypsum contains chemically bound water that contributes to fire resistance in tested assemblies.
- Sustainability potential: Many products incorporate recycled content (e.g., FGD gypsum) and are fully recyclable at end of life.
Before You Begin: Substrates, Primers, and Planning
Flawless finishes start with meticulous preparation. Even the best plaster texture ideas underperform if the substrate or workflow is off. Keep these fundamentals front and center:
- Check the substrate: Gypsum board, cured gypsum basecoat, or stable masonry are ideal. Address movement, moisture, and cracks before finishing.
- Control joints and detailing: Where building joints exist, continue them through the plaster to prevent random cracking. Plan reveals and shadow gaps early.
- Joint treatment: Tape and embed with compatible compound. Feather joints wide to avoid telegraphing through smooth coats.
- Prime smartly: Use a plaster sealer or high-quality, bonding primer to equalize porosity and support uniform sheen.
- Mock-ups: Create 24″ x 24″ sample boards in the actual room’s lighting. This is mandatory for polished or textured ideas.
- Environmental controls: Keep relative humidity stable and ensure adequate ventilation. Avoid drafts or direct heat that can flash-set surfaces.
21 Gypsum Plaster Wall Finish Ideas You Can Use Right Now
Looking for Gypsum plaster wall finish ideas that balance style, durability, and ease of maintenance? Explore these curated options—from understated to expressive—along with tips on where each shines.
1) Ultra-Smooth Level 5 Skim Coat
For gallery-grade walls, nothing beats a meticulous Level 5 skim. Multiple tight trowel passes yield a seamless, velvet-matte base for paint or glaze.
- Best for: Living rooms, bedrooms, hallways, minimalist interiors.
- Pair with: Matte or eggshell paint, soft neutral palettes, large-format art.
- Pro tip: Cross-trowel with light pressure at a near-closed angle to reduce chatter and ridging.
2) Burnished Satin (Polished Gypsum Finish)
While traditional Venetian plaster is typically lime-based, you can achieve a soft, satin sheen with premium gypsum finishing plasters. Repeated compression and selective polishing produce a tactile, light-catching surface without high-gloss glare.
- Best for: Dining rooms, foyers, boutique hospitality settings.
- Pair with: Neutral or mid-tone tints, curated lighting, metallic accents.
- Pro tip: Burnish only after partial set; too early and you’ll drag, too late and you’ll score the surface.
3) Fine Sanded Matte
Introduce a whisper of texture by lightly sanding a set skim coat with ultra-fine grits (e.g., 320+). The result is a tactile, chalky-luxe finish that diffuses light.
- Best for: Contemporary and Japandi interiors, cozy bedrooms.
- Pair with: Limewash-style paints, monochrome schemes, natural woods.
- Pro tip: Seal with a breathable primer to lock dust, then use flat or mineral paints.
4) Linear Striations (Comb Texture)
Create architectural linework using a fine-tooth comb trowel on a thin plaster pass. Vertical or horizontal runs elongate or widen perceived proportions.
- Best for: Narrow hallways, low ceilings (use vertical lines to lift).
- Pair with: Soft monochromes, minimalist trim, concealed lighting.
- Pro tip: Pre-mark guides with a laser; keep pressure consistent to avoid banding.
5) Skip Trowel “Suede”
Apply irregular, thin patches then flatten partially for a subtle knockdown reminiscent of suede. The texture is refined, forgiving, and hides minor substrate variation.
- Best for: Family rooms, rentals, high-traffic corridors.
- Pair with: Warm neutral paints, soft rugs, leather accents.
- Pro tip: Rotate your wrist slightly as you skip to avoid repetitive patterns.
6) Mineral-Flake Luminosity
Introduce mica or fine marble dust (manufacturer-approved) into a finish coat for gentle sparkle under evening light.
- Best for: Dining nooks, bars, powder rooms.
- Pair with: Warm LEDs, satin topcoats, jewel-tone accents.
- Pro tip: Keep the mix ratio low and test—too much filler can weaken bond or sandability.
7) Metallic Wax Veil
After sealing a smooth gypsum plaster, float on a thin metallic wax or pearlescent glaze for depth. The metal is a veil, not a coat, offering nuanced reflectivity.
- Best for: Feature walls, headboards, boutique retail.
- Pair with: Burnished finishes, matte black accents, brass hardware.
- Pro tip: Work in small sections and back-buff to avoid lap lines.
8) Color-Washed Plaster
Use a translucent color wash over a smooth or lightly textured plaster to create layered chroma without losing material depth.
- Best for: Living rooms, serene bedrooms, reading nooks.
- Pair with: Earth tones, limewash-like paints, linen textiles.
- Pro tip: Feather edges with a damp brush for cloudless transitions.
9) Stenciled Relief
Apply a thin pass through a durable stencil to form repeating low-relief motifs. Sand or burnish high points selectively.
- Best for: Accent panels, dining rooms, boutique lobbies.
- Pair with: Picture-frame molding, tone-on-tone palettes.
- Pro tip: Use repositionable spray adhesive to prevent bleed-under.
10) Clouded Soft Stucco Effect
Emulate a soft, clouded ambiance with tonal variations applied in thin passes. While classic stucco is lime/cement-based, you can achieve the mood with tinted gypsum glazes.
- Best for: Entrances, dining spaces, cozy dens.
- Pair with: Warm light, natural stone, aged brass.
- Pro tip: Alternate translucent and opaque tints for realistic depth.
11) Micro-Orange Peel (Ultra-Fine)
For acoustic softness without visual noise, create an ultra-fine orange peel with a roller and subsequent light sand-back.
- Best for: Media rooms, kids’ rooms, hallways.
- Pair with: Durable, scrubbable paints, soft furnishings.
- Pro tip: Keep aggregate ultra-fine; the effect should be tactile, not bumpy.
12) Bullnose Corners and Soft Edges
Replace sharp drywall corners with rounded bullnoses and softened edges. The look feels tailored and reduces chipping.
- Best for: Contemporary, organic, and child-friendly homes.
- Pair with: Curved furniture, arched openings, cove lighting.
- Pro tip: Use matching corner beads and skim seamlessly to avoid “telegraphed” lines.
13) Integrated Niches and Recessed Shelves
Gypsum makes it simple to frame niches that look carved from the wall. Perfect for art, lighting, or display.
- Best for: Hallways, living rooms, baths (with moisture protection).
- Pair with: LED reveals, sculptural ceramics, subtle textures.
- Pro tip: Slope bottom shelves slightly outward to shed dust and highlight edges.
14) Limewash Over Gypsum
Desire breathable, mottled color? Many modern limewash paints are compatible over sealed gypsum. Always prime with a compatible mineral or acrylic primer first.
- Best for: Bedrooms, offices, serene living spaces.
- Pair with: Textured fabrics, pale woods, vintage rugs.
- Pro tip: Expect visible brushwork—it’s part of the charm.
15) Moisture-Tough Finish (Baths and Kitchens)
In splash zones, combine moisture-resistant gypsum board, setting-type compounds, and a high-quality sealer or topcoat. Keep gypsum away from direct, constant water exposure.
- Best for: Powder rooms, backsplashes (with protective topcoat), ceilings in baths.
- Pair with: Mold-resistant primers, semi-gloss paints, good ventilation.
- Pro tip: Seal all cut edges and penetrations to limit moisture ingress.
16) Cove Ceilings and Light Valances
Use gypsum to sculpt elegant coves and LED light valances that float ceilings and stretch sightlines.
- Best for: Living rooms, primary suites, corridors.
- Pair with: Dimmable indirect lighting, whisper-smooth walls.
- Pro tip: Maintain clean access for LED tape replacement; pre-plan ventilation gaps.
17) Faux Concrete with Gypsum
Love concrete but want lighter weight and warmer touch? Create a faux concrete look by tinting finishing plaster, applying in passes, then sanding and selectively burnishing.
- Best for: Lofts, offices, modern kitchens.
- Pair with: Black metal, oak, glass.
- Pro tip: Introduce faint trowel marks and “lift lines” to mimic formwork.
18) Two-Tone Banding and Panel Frames
Define architecture with two-tone plaster banding or create inset “panels” using reveal beads and tonal shifts.
- Best for: Dining rooms, formal living areas, corridors.
- Pair with: Picture lights, wainscot heights, coordinated trims.
- Pro tip: Keep color delta subtle (LRV difference of ~10–15) for sophistication.
19) Micro-Stipple, Then “Eggshell” Sand-Back
Roll a micro-stipple pass, let it set, then sand gently to a satin-matte “eggshell” feel that hides minor wear.
- Best for: Busy households, kids’ rooms, stairwells.
- Pair with: Durable acrylic paints, wash-and-wear finishes.
- Pro tip: Vacuum the wall before priming to remove fine dust.
20) Bas-Relief Art Wall
Hand-sculpt a low-relief mural in finishing plaster for a one-off statement. Think botanicals, geometrics, or abstract waves.
- Best for: Entry walls, behind sofas, boutique workspaces.
- Pair with: Grazing light, restrained color palettes.
- Pro tip: Use sculpting tools and keep a mister bottle on hand to refine edges during set.
21) Texture-on-Texture Layering
Combine two compatible textures—for example, a fine comb over a burnished base—for depth that remains subtle.
- Best for: Design-forward living spaces, creative studios.
- Pair with: Neutral fabrics, minimal art, natural light.
- Pro tip: Keep contrast gentle to avoid visual clutter.
Use these Gypsum plaster wall finish ideas as a springboard: adapt scale, sheen, and color to your room’s architecture and light for the most refined outcome.
Color and Sheen: Getting the Mood Right
Color choice transforms the same texture from rustic to refined. Consider how Light Reflectance Value (LRV), sheen, and undertone play together.
- LRV and light: Higher LRV clads rooms in brightness; lower LRV increases drama and intimacy.
- Matte vs. satin: Matte hides surface variation; satin emphasizes undulations and trowel movement.
- Undertones: Warm greiges and oat hues flatter textured walls; cool grays can skew flat under warm LEDs.
- Sampling: Always apply at least two coats of your chosen paint or glaze over the exact plaster finish used.
Tools and Techniques: What You’ll Actually Use
Whether DIY or pro, the right tools and sequencing ensure success with these plaster wall ideas:
- Trowels: Stainless finishing trowel (rounded corners), flexible Venetian-style trowel for polishing, margin trowel for tight spaces.
- Hawk and pan: For efficient material handling and cleaner loading.
- Floats: Sponge and plastic floats to open texture or close surfaces.
- Abrasives: Ultra-fine sanding mesh and blocks (220–400+).
- Primers and sealers: Bonding primers, mineral-compatible sealers, clear protective coats for high-wear zones.
- Lighting: Use raking light during application to spot defects in real time.
Timing matters: Gypsum has a finite working time. Mix small batches, note the “open time,” and never re-temper once it starts to set.
DIY or Hire a Pro? Costs, Timelines, and Expectations
Some Gypsum plaster wall finish ideas are friendly to skilled DIYers; others demand seasoned hands:
- DIY-friendly: Level 4-5 skim (with practice), micro-stipple-and-sand, fine sanded matte, subtle color washes.
- Pro-recommended: Burnished satin, bas-relief murals, complex stenciled reliefs, large cove details.
Typical ranges (vary by region and complexity):
- Basic skim and paint-ready finish: $2.50–$5.50 per sq ft
- Textured decorative finish: $5.00–$12.00 per sq ft
- Polished or specialty finish: $10.00–$25.00+ per sq ft
Pros bring speed, consistency, and invaluable troubleshooting. If timeline is tight or the wall will be a focal point under strong lighting, consider hiring out.
Durability, Cleaning, and Long-Term Care
Gypsum finishes are easy to live with when protected correctly:
- Sealing: Smooth or polished finishes benefit from a clear, breathable sealer to reduce smudging.
- Cleaning: Dust with microfiber; spot clean with a barely damp cloth. Avoid harsh degreasers.
- Repairs: Hairline cracks can be V-grooved, filled, and touched up. Match texture and sheen carefully.
- Repainting: Use a high-quality primer when changing sheen or color dramatically.
Room-by-Room Inspiration
Translate these gypsum wall finishes into tailored solutions room by room:
- Living room: Level 5 skim with a subtle limewash; add a stenciled relief panel behind the sofa.
- Kitchen: Micro-stipple with scrubbable paint; faux-concrete feature near the dining nook.
- Primary bedroom: Burnished satin headboard wall with soft mid-tone color wash.
- Kids’ rooms: Fine sanded matte for durability and easy touch-ups.
- Home office: Linear striations to elongate the wall; acoustic-friendly micro-texture.
- Entry/powder room: Mineral-flake luminosity or metallic wax veil for a boutique feel.
Common Mistakes to Avoid
- Skipping mock-ups: Colors and sheens shift with texture; always test.
- Overworking the set: Troweling too late scars the surface and causes burn marks.
- Poor priming: Uneven porosity leads to blotchy paint and flashing.
- Ignoring movement: Failing to carry control joints through the finish invites cracking.
- Wrong topcoats in wet zones: Use appropriate sealers and avoid constant water exposure on gypsum.
Quick-Start Recipes: Three Finishes with Steps
A) Level 5, Paint-Ready Smooth
- Prep: Tape, embed, and sand joints. Vacuum dust.
- Prime: Apply a high-quality bonding primer.
- Skim 1: Tight coat with finishing plaster, cross-trowel.
- Skim 2: Light fill to level, maintain low profile.
- Spot check: Raking light, fill pinholes.
- Sand: 320+ mesh where needed. Tack rag.
- Seal/Prime: Equalize surface for paint.
- Finish: Two coats matte/eggshell paint.
B) Burnished Satin Sheen
- Base: Smooth primed surface.
- Pass 1: Thin tinted plaster coat, tight steel trowel.
- Pass 2: Cross-trowel with slightly richer tint, minimal overlap.
- Compression: As it firms, increase pressure to close pores.
- Burnish: Polish select areas to a satin glow; avoid full mirror.
- Protect: Apply breathable sealer if needed.
C) Faux Concrete Gypsum
- Prime: Uniform bonding primer.
- Base coat: Mid-gray tint, leave faint trowel lifts.
- Variation: Add a lighter gray pass in irregular panels.
- Refine: Sand lightly to expose “lift lines.”
- Accents: Optional micro-aggregate for speckle.
- Seal: Matte clear coat to unify sheen.
Sustainability and Health Considerations
- Low-VOC systems: Pair low-VOC plasters, primers, and paints.
- Recycled content: Many gypsums use synthetic (FGD) or recycled content—check product disclosures.
- Longevity: Durable finishes reduce repaint cycles and waste.
- Dust control: Sand with extraction and wear proper PPE.
FAQs: Your Top Questions Answered
Q: Can I use these Gypsum plaster wall finish ideas in a bathroom?
A: Yes, in powder rooms and well-ventilated baths away from constant splash or steam. Use moisture-resistant substrates, sealers, and appropriate paints. Avoid direct shower zones.
Q: How do I avoid visible seams on smooth finishes?
A: Feather joints wide, apply multiple thin passes, use raking light to spot defects, and prime to equalize porosity before paint.
Q: Will textured walls reduce resale appeal?
A: Subtle, well-executed textures in neutral palettes typically enhance value. Extreme patterns can be polarizing; opt for refined, removable techniques if uncertain.
Q: What if a hairline crack appears?
A: V-groove the crack, fill with setting compound or finishing plaster, sand smooth, spot-prime, and touch up with matching sheen.
Q: Are polished effects slippery for maintenance?
A: Vertical surfaces are fine; just specify a breathable sealer. Reserve high-gloss for accent walls to minimize fingerprints in busy areas.
Bringing It All Together
From gallery-smooth skims to sculptural reliefs and clouded color washes, the breadth of Gypsum plaster wall finish ideas makes plaster a top choice for contemporary interiors. Start with a clear design intent, build a small mock-up, and refine sheen, color, and texture under your room’s actual lighting. With the right preparation and a thoughtful finish, your walls won’t just be backgrounds—they’ll be the quiet luxury that makes every space feel designed.
Next step: Choose three finishes that fit your style and test them on sample boards this week. You’ll quickly discover which texture, tint, and sheen combination elevates your space—and you’ll be ready to transform your walls with confidence.