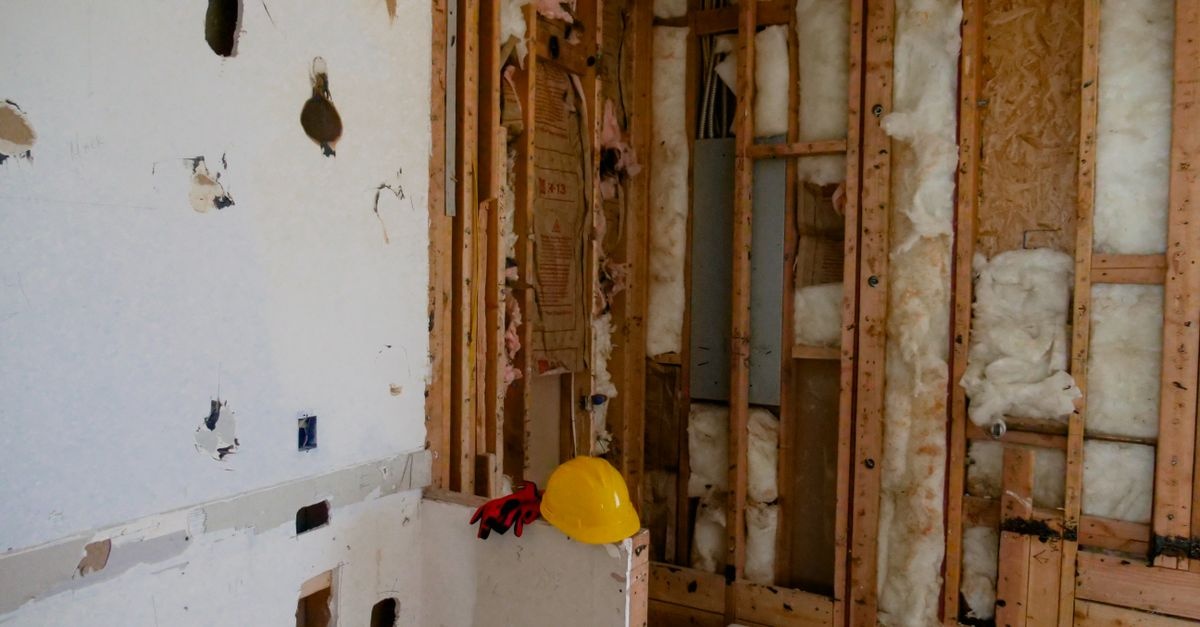
Comfort you can feel, safety you cannot see. In bathrooms, the way walls are insulated and controlled for vapor is as important as the tile and fixtures you admire every day. Done right, insulation keeps heat where you want it, prevents condensation inside the wall, and creates a quieter, more durable room. Done wrong, it can trap moisture, feed mold, and force costly repairs. This in-depth guide explains how to pick and install Bathroom wall thermal insulation materials that stand up to steam, splashes, and daily temperature swings—without sacrificing energy efficiency or indoor air quality.
Why Bathrooms Challenge Insulation More Than Any Other Room
Bathrooms create unique loads on walls: frequent bursts of humidity, intermittent heating from showers or radiant floors, and concentrated wet zones around tubs and showers. These conditions raise the risk of interstitial condensation—moisture migrating through the assembly and condensing at the dew point inside the wall.
- Moisture and steam: High humidity raises vapor pressure, pushing water vapor into colder wall layers where it can condense.
- Temperature swings: Rapid shifts encourage moisture to move toward cooler surfaces, increasing condensation risk.
- Limited drying: Tiled surfaces and waterproof membranes are great at stopping liquid water, but they also reduce drying potential if moisture gets behind them.
- Penetrations everywhere: Niches, valves, fan ducts, and fasteners become vulnerability points for leaks, air leakage, and vapor diffusion.
To address these risks, bathroom walls must combine three strategies: air sealing to stop convective moisture transport, vapor control to keep steam out of vulnerable layers, and thermal continuity to prevent cold spots and dew point formation.
Vapor Control 101: Perm Ratings and Classes
Understanding how vapor moves through walls is essential when choosing Bathroom wall thermal insulation materials. Per ASTM E96, materials are categorized by water vapor permeance (perms):
- Class I vapor barrier: 0.1 perm or less (very low vapor transmission)
- Class II vapor retarder: > 0.1 to 1 perm
- Class III vapor retarder: > 1 to 10 perms
In typical bathrooms, showers need a low-perm waterproofing membrane on the interior side to block vapor drive from steam into the assembly. In other bathroom areas, you often want a smart, balanced approach: a moderate interior retarder with robust air sealing, or a smart membrane that tightens when wet and opens for drying when conditions permit.
Key Criteria for Selecting Insulation in Wet Rooms
Choose insulation based on how it behaves with heat and moisture, not just R-value. The following criteria help compare Bathroom wall thermal insulation materials fairly.
- R-value per inch: Higher R/in reduces the thickness needed for code-minimum or better performance.
- Vapor permeability: Impacts where the dew point sits and whether the assembly can dry inward or outward.
- Moisture tolerance: Materials that do not absorb or that dry quickly are safer in bathrooms.
- Mold resistance: Inorganic or treated fibers resist biological growth even if damp events occur.
- Air sealing capability: Some insulations double as air barriers when installed correctly.
- Fire and smoke ratings: Critical for safety and code compliance.
- Acoustics: Good bathroom walls also dampen sound between rooms.
- Installation complexity: Some materials are DIY-friendly; others need pro application.
- Environmental profile: Blowing agents, recycled content, and embodied carbon vary widely.
Bathroom Wall Thermal Insulation Materials: What Works and Why
Below are the most common Bathroom wall thermal insulation materials, with moisture behavior, pros and cons, and best-fit uses. Combine them with the correct waterproofing and vapor strategy for reliable, steam-safe assemblies.
Closed-Cell Spray Polyurethane Foam (ccSPF)
Moisture behavior: Low perm, very low water absorption; can serve as both insulation and air barrier. Class II to Class I depending on thickness.
Pros:
- High R-value per inch (about R-6 to R-6.7)
- Excellent air sealing and condensation control
- Adds structural rigidity and blocks bulk water migration
Cons:
- Professional installation required; sensitive to substrate moisture and temperature
- Lower permeability can limit drying if incorrectly paired with other vapor-tight layers
- Environmental impacts depend on blowing agents; check low-GWP options
Best for: Exterior walls in cold climates where condensation risk is high, small cavities around plumbing, and as part of an interior-side vapor-tight shower assembly when combined with a waterproof membrane and appropriate backer.
Extruded Polystyrene (XPS) Rigid Foam
Moisture behavior: Low water absorption, relatively low perm (more vapor resistant than EPS). Often used as backer boards designed for wet areas.
Pros:
- Good R-value per inch (around R-5)
- Dimensional stability and ease of cutting
- Some boards integrate waterproofing surfaces
Cons:
- Must be detailed for fire protection per code
- Edges and fasteners must be sealed to maintain moisture control
- Check environmental profile of blowing agents
Best for: Shower walls and tub surrounds as part of a tile-ready, waterproof board system; interior retrofit over masonry when combined with taped seams and sealed penetrations.
Expanded Polystyrene (EPS) Rigid Foam
Moisture behavior: Higher permeability than XPS; can allow some inward drying but still offers useful vapor resistance at greater thickness.
Pros:
- Cost-effective with decent R/in (around R-3.6 to R-4.2)
- Recyclable, lower embodied energy than some foams
- Compatible with many finishes and membranes
Cons:
- Edges must be well sealed; sensitive to some solvents and adhesives
- Thicker boards may be needed to reach target R-values
Best for: Over-masonry interior insulation in bathrooms where some drying potential is desired; substrate for panelized wall systems when paired with a low-perm surface membrane in wet zones.
Polyisocyanurate (Polyiso) Rigid Foam
Moisture behavior: Foil-faced types are very low perm; glass-fiber facers are moderately vapor resistant. Performance can vary with temperature.
Pros:
- High R/in (about R-6 to R-6.5 nominal)
- Foil-faced boards can serve as an excellent interior vapor retarder when detailed well
- Lightweight and easy to cut
Cons:
- Foil facers eliminate inward drying; avoid double vapor barriers
- R-value can decrease at low temperatures; consider climate
Best for: Interior foam layer behind wall panels in non-shower bathroom walls to minimize thermal bridging and improve air tightness.
Mineral Wool (Rock Wool) Batts or Boards
Moisture behavior: Inorganic, hydrophobic fibers; does not promote mold growth, drains and dries quickly. Vapor-open, so drying potential remains if air barrier is well managed.
Pros:
- R-4.0 to R-4.3 per inch; retains R-value when damp events occur
- Excellent fire resistance and sound attenuation
- Easy to friction-fit around plumbing without slumping
Cons:
- Requires separate air and vapor control layers
- Can shed fibers during cutting; use PPE
Best for: Stud walls throughout bathrooms when paired with a continuous interior air barrier and a suitable vapor retarder or waterproof membrane in wet zones.
Fiberglass Batts
Moisture behavior: Non-hygroscopic glass fibers but can hold moisture via surface tension; R-value drops when wet and can support mold on collected dust if assemblies trap moisture.
Pros:
- Affordable, widely available, R-3.2 to R-3.7 per inch
- Can be installed DIY with careful cutting
- Available in formaldehyde-free and coated options
Cons:
- Performance highly dependent on installation quality
- Requires robust air sealing and vapor control
Best for: Non-shower bathroom walls where budgets are tight and air/vapor layers are properly executed.
Foam Glass and Cellular Glass
Moisture behavior: Impermeable, non-absorbent, inert. Completely inorganic and mold-proof.
Pros:
- Excellent moisture and vapor barrier properties
- Fireproof and dimensionally stable
- Long service life
Cons:
- Higher cost and specialized installation
- Heavier than foamed plastics
Best for: High-performance, steam-intensive applications or historic masonry retrofits where absolute moisture control is desired.
Calcium Silicate and Cementitious Backer Boards
Moisture behavior: Inorganic, noncombustible, dimensionally stable when wet; not an insulator by itself but forms part of a durable wet-wall system.
Pros:
- Mold-proof substrate for tile in showers
- Resists heat and steam
- Pairs well with waterproofing membranes
Cons:
- Low R-value; requires separate insulation layer
- Heavier and more labor-intensive to cut and hang
Best for: Tile-ready wet walls in showers and around tubs, installed over cavity insulation with a properly detailed membrane.
Aerogel Blankets and Boards
Moisture behavior: Hydrophobic, very high R/in for thin profiles; can be integrated behind tile or inside tight cavities.
Pros:
- Exceptional thermal performance in minimal thickness
- Useful for solving cold spots and thermal bridges
- Non-fibrous, good for niche and pipe chase details
Cons:
- Premium cost
- Often requires adhesives and careful handling
Best for: Retrofits where thickness is constrained, like masonry baths or around window returns inside wet rooms.
Phenolic Foam and PIR Boards
Moisture behavior: Low absorption, good vapor resistance; high R/in similar to polyiso with different facers.
Pros:
- High efficiency in limited space
- Can be part of interior continuous insulation strategy
Cons:
- Some products brittle; edge protection is important
- Verify compatibility with adhesives and membranes
Best for: Non-shower bathroom walls seeking thin yet effective continuous insulation layers.
System Design: Layered Assemblies That Stay Warm and Dry
Choosing Bathroom wall thermal insulation materials is only half the solution. The other half is how layers are ordered and sealed. Below are proven assemblies for common situations.
1) Standard Bathroom Stud Wall (Non-Shower)
Goal: Good R-value, quiet operation, managed vapor, and drying potential.
Recommended stack (interior to exterior):
- Finish layer: Paint-grade moisture-resistant drywall with high-quality paint, or panel system
- Smart vapor retarder or Class III retarder in temperate climates; Class II in cold climates
- Cavity insulation: Mineral wool or fiberglass batts (snug fit, no compression)
- Exterior sheathing with taped seams as primary air barrier
- Exterior continuous insulation where feasible to reduce thermal bridging
Notes: In cold climates, consider a thin interior continuous foam layer (e.g., foil-faced polyiso) behind drywall to warm the dew point away from the interior surface—but avoid pairing with a low-perm interior paint if you already use a low-perm foam.
2) Shower or Steam Shower Wall
Goal: High moisture protection and vapor control near the interior surface.
Recommended stack (interior to exterior):
- Tile over a low-perm waterproofing membrane (sheet membrane or liquid-applied meeting steam room ratings as required)
- Backer board: Cement board or fiber-cement; some systems use foam-core waterproof boards
- Cavity insulation: Closed-cell spray foam for superior condensation control, or mineral wool with a robust interior membrane
- Air-sealed sheathing and continuous exterior WRB
Notes: For true steam showers, aim for a Class I or tight Class II interior vapor layer. Avoid double vapor barriers; coordinate with exterior layers to allow some drying direction.
3) Interior Insulation Over Masonry
Goal: Stop condensation on cold masonry and improve comfort.
Recommended stack (interior to exterior):
- Finish layer: Tile or panel over cement board or foam board
- Vapor control: Low-perm membrane behind tile in wet zones
- Continuous insulation: XPS, EPS, or foam glass (taped and sealed)
- Masonry wall (brick, block, or concrete)
Notes: Use capillary breaks between masonry and insulation. Mechanically fasten and seal all penetrations. Aerogel boards can solve thickness constraints around trim.
4) Basement Bathroom Walls
Goal: Resist cold surfaces and ground moisture while controlling indoor humidity.
Recommended stack:
- Foam board directly against concrete (XPS, EPS, or foam glass) with taped seams
- Framing inboard of foam with mineral wool batts for sound and added R
- Moisture-resistant drywall in dry zones; cement board plus membrane in showers
Notes: Do not place batts directly against concrete. Maintain a continuous air seal at the top and bottom plates and around services.
Installation Best Practices: Details That Make or Break Performance
Even the best Bathroom wall thermal insulation materials fail without careful detailing. Focus on these steps:
- Air sealing first: Seal top and bottom plates, sheathing seams, electrical boxes, and pipe penetrations with acoustical sealant, gaskets, or high-quality sealants and tapes.
- Right-sized insulation: Batts should fit snugly without compression; cut around boxes and pipes, do not stuff.
- Continuous membranes: Overlap, tape, and roll interior membranes. Transition cleanly into niches and corners with preformed corners or carefully lapped seams.
- Fastener care: Use corrosion-resistant screws; predrill where necessary. Seal penetrations through membranes per manufacturer instructions.
- Thermal bridge mitigation: Add a thin continuous interior foam layer or insulated backer boards behind tile to warm surfaces and reduce condensation risk at studs.
- Plumbing layout: Keep supply lines on the warm side of insulation wherever possible to reduce risk of condensation and freezing in cold climates.
- Ventilation: Size exhaust fans for 8 to 10 ACH during showers, include delayed-off timers, and ensure ducts are smooth, short, and terminate outdoors.
- Surface finishes: Use high-quality bath-rated paints in non-tiled areas to resist vapor diffusion and mold growth.
Waterproofing and Vapor Membranes: Getting the Balance Right
Bathrooms need both waterproofing in wet zones and vapor control across the room. These two are not always the same product, but they must be compatible with your chosen Bathroom wall thermal insulation materials.
- Wet zones (showers, tub surrounds): Use a low-perm, tile-approved waterproofing membrane close to the interior surface. Seal overlaps, penetrations, and niches meticulously.
- Dry zones: A smart vapor retarder or Class II/III retarder behind drywall works with mineral wool or fiberglass, allowing controlled drying while limiting inward vapor drive.
- Steam rooms: Specify membranes rated for steam service; target Class I or tight Class II for the interior layer.
- Avoid double barriers: If exterior sheathing or foam is low-perm, coordinate interior layers to preserve at least one drying path.
Acoustic Comfort and Fire Safety
Bathrooms benefit from quieter walls and robust fire performance. Mineral wool excels at both, while many foam products require a thermal barrier (like drywall) to meet fire code. Confirm that the wall assembly—including any continuous foam—meets required flame spread and smoke development indices.
Energy, Comfort, and Condensation Control: Climate Matters
Climate drives where vapor wants to go and where the dew point sits. Align Bathroom wall thermal insulation materials with local conditions:
- Cold climates: Keep interior surfaces warm with higher R-values and consider interior continuous foam. Favor lower-perm interior membranes in showers.
- Mixed climates: Smart vapor retarders help assemblies adapt to seasonal changes.
- Hot-humid climates: Manage inward vapor drive from outside; ensure conditioned spaces are air-sealed and avoid trapping moisture behind interior finishes.
Cost Ranges and Value
Expect a spread based on performance and labor:
- Fiberglass batts: Low cost, high dependence on detailing quality
- Mineral wool: Moderate cost, improved acoustics and fire resistance
- EPS/XPS boards: Moderate with strong moisture control in panelized systems
- Polyiso/PIR/phenolic: Moderate to high for high R/in and vapor control
- Closed-cell spray foam: High upfront; excellent air and vapor control
- Aerogel/foam glass: Premium; niche performance for thin or severe-moisture conditions
Look beyond material cost to whole-assembly value: fewer callbacks for mold, better acoustic privacy, tighter energy control, and longer finish life all contribute to lifecycle ROI.
Common Mistakes to Avoid
- Double vapor barrier traps: Pairing a foil-faced foam interior with a low-perm exterior sheathing without a drying path.
- Skipping air sealing: Air leaks move far more moisture than vapor diffusion; seal first, insulate second.
- Poor transitions: Membranes that are not lapped, rolled, or sealed at corners and penetrations.
- Stuffed batts around pipes: Compression creates voids and cold spots where condensation can form.
- Unvented rooms: A great wall assembly fails if the room retains high humidity for hours after showers.
- Ignoring thermal bridges: Tile over bare studs at niches or blocking leads to cold stripes and possible condensation.
Quick Selector: Match Materials to Your Bathroom Scenario
- Budget refresh, non-shower walls: Mineral wool batts + smart vapor retarder + good air sealing
- Premium comfort and sound control: Mineral wool batts + interior continuous foam + resilient channels for drywall
- Steam shower: Cement or foam-core waterproof board + steam-rated membrane + closed-cell spray foam in cavities
- Masonry retrofit, limited space: Thin XPS/EPS or aerogel boards + sealed seams + cement board and tile
- Basement bath: Foam board against concrete + inboard mineral wool + membrane in wet zones
Sustainability Notes
When comparing Bathroom wall thermal insulation materials, consider recycled content, blowing agents with low global warming potential, and durability. A long-lived, moisture-safe assembly that avoids premature replacement often beats a slightly greener product that fails early due to moisture mismanagement.
Step-by-Step: Building a Durable Shower Wall
Use this sequence to integrate insulation with waterproofing for a tiled shower:
- Frame and preplan: Lay out niches away from exterior corners. Slope horizontal surfaces to drain.
- Rough-in and air seal: Seal around valves, pipes, and boxes with gaskets or sealant. Tape sheathing seams if exterior wall.
- Insulate cavities: Install closed-cell spray foam (or mineral wool if you prefer a more vapor-open cavity, knowing the membrane will provide vapor control).
- Install backer board: Use cement board or waterproof foam boards per manufacturer instructions. Leave proper gaps and fastener spacing.
- Apply waterproofing membrane: Sheet or liquid membrane rated for showers or steam as needed. Overlap and seal corners, seams, and penetrations.
- Detail niches and valves: Use preformed corners and gaskets; maintain low perm continuity across fixtures.
- Tile and grout: Use appropriate thinset and grout; consider epoxy grout in high-steam settings. Seal as recommended.
- Ventilation commissioning: Verify fan flow and timer function; encourage post-shower run time.
Maintenance and Inspection
- Watch for cold stripes: Persistent cool areas on exterior bathroom walls may indicate missing insulation or thermal bridges.
- Monitor humidity: Hygrometer readings above 60% for extended periods suggest ventilation upgrades are needed.
- Sealant upkeep: Re-caulk joints as required to prevent liquid water bypassing membranes.
- Fan filters and ducts: Clean regularly to maintain rated airflow.
FAQs: Fast Answers for Smart Choices
What is the best all-around insulation for bathroom stud walls? Mineral wool batts offer a strong mix of moisture tolerance, sound control, fire resistance, and stable R-value, provided you add proper air and vapor layers.
Can fiberglass be used safely? Yes, in non-shower zones with careful air sealing and a suitable interior vapor retarder. Avoid trapping moisture and ensure robust ventilation.
Do I need a vapor barrier behind shower tile? You need a vapor control layer. In standard showers, a low-perm waterproofing membrane directly behind the tile is typical. For steam showers, use a steam-rated, very low-perm membrane.
Is spray foam overkill? Not if you face high condensation risk. Closed-cell spray foam delivers air sealing, insulation, and vapor control in one, making it valuable for exterior shower walls in cold climates.
How do I prevent mold in bathroom walls? Combine moisture-tolerant Bathroom wall thermal insulation materials with continuous air sealing, properly rated vapor membranes in wet zones, and strong mechanical ventilation.
Bringing It All Together
Bathrooms reward assemblies that think like a system. Select Bathroom wall thermal insulation materials that handle moisture gracefully, place vapor control where it belongs for your climate and wall type, and seal every transition. Do this well and your bathroom stays warmer, quieter, and drier—protecting finishes and air quality for years to come.
Material and Assembly Recap
- Best cavity insulators for bathrooms: Mineral wool for balanced performance; closed-cell spray foam for maximal condensation control; fiberglass for budget builds with careful detailing.
- Best continuous layers: XPS, EPS, or polyiso boards for interior retrofits; foam glass for severe moisture cases; aerogel for thin retrofits.
- Wet zone surfaces: Cement board or waterproof foam boards plus a low-perm, tile-approved membrane.
- Always: Air seal first, size ventilation correctly, and avoid double vapor barriers.
Next Steps
Before starting, confirm local code requirements for vapor retarders, fire ratings, and exhaust ventilation. If in doubt, consult a building scientist or experienced tile and waterproofing professional to fine-tune your Bathroom wall thermal insulation materials to your climate and wall construction. The right plan today prevents moisture headaches tomorrow—and keeps every shower feeling warm, not worrisome.