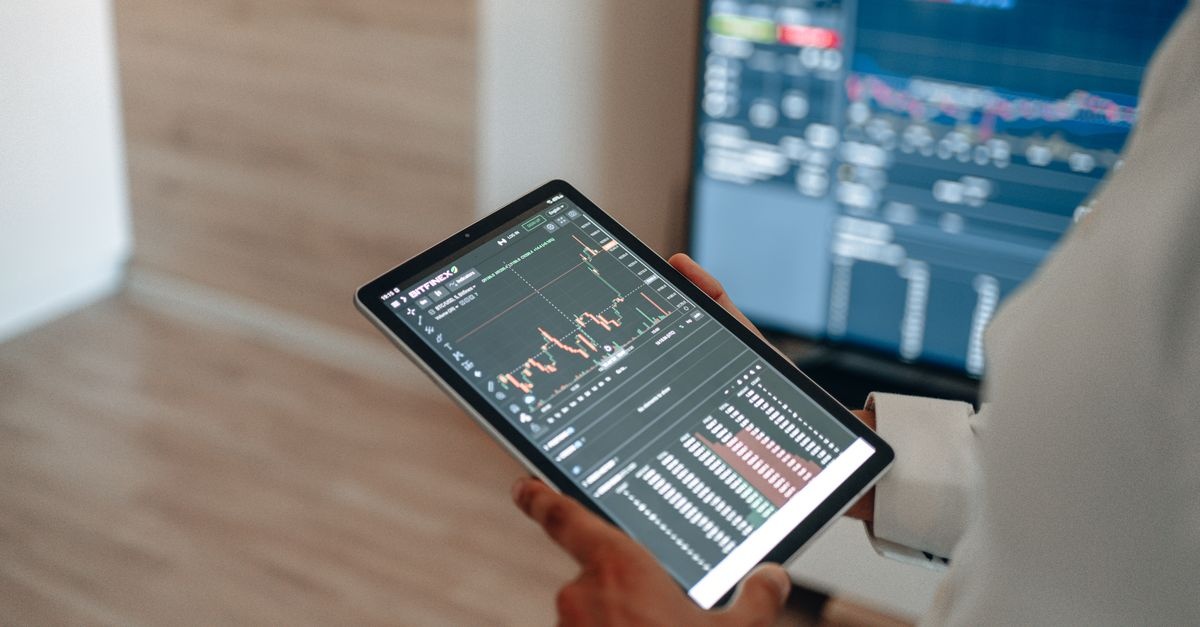
Electricity is the ultimate out-of-sight, out-of-mind expense—until the bill arrives. By the time you learn how much you spent, it is too late to change the behavior that drove the cost. Real-time energy monitoring flips that script. It makes electricity visible in the moment, so you can adjust appliances, schedules, and automations instantly. In this guide, you will learn how to monitor real‑time energy consumption with confidence—from selecting hardware and software to building dashboards, setting alerts, and translating live data into lower bills and lower emissions.
Whether you are a homeowner trimming peak usage, a small business preventing demand charges, or a facility manager orchestrating solar, storage, and EV charging, the principles are the same: capture high-quality data, turn it into insight, and act quickly. Let’s turn your kilowatts into knowledge—and savings.
Why Real-Time Monitoring Matters
From monthly bills to moment-by-moment control
Traditional utility bills summarize a month’s worth of usage into a single number. You can spot trends but not causes. Live monitoring, by contrast, shows what is happening right now. You can immediately see the spike when an oven preheats, the standby draw of a media center, or how much your heat pump consumes at various outdoor temperatures. That visibility makes it practical to reduce waste without guesswork.
- Instant feedback: Turn a device on and watch wattage jump within seconds.
- Targeted action: Find the exact loads that drive costs—no more broad, ineffective changes.
- Continuous verification: Confirm that efficiency upgrades and schedules actually work.
- Engagement: Real-time displays make energy tangible for households and teams.
Benefits you can measure
- Cost savings: Identify and eliminate phantom loads; shift usage to off-peak rates; avoid demand charges.
- Comfort and reliability: Tune HVAC schedules to preserve comfort while trimming waste; catch failing equipment early via abnormal draw.
- Climate impact: Time usage to greener grid hours or maximize on-site solar self-consumption.
- Operational awareness: Make facility operations measurable—support audits, maintenance, and compliance.
The Building Blocks of a Live Energy-Monitoring Setup
Data sources: where the truth comes from
Choosing the right sensors determines what you can see and how precisely. Here are common sources for live power data:
- Utility smart meter: Many meters publish live or near-live consumption via an in-home display or a standardized interface. Pros: utility-grade accuracy; whole-premise coverage. Cons: some regions offer only delayed or aggregated data.
- Whole-home or main-panel monitors (CT clamps): Clamp-on current transformers (CTs) around service conductors deliver second-by-second wattage. Pros: high sampling rate; works with any utility meter. Cons: requires panel access; installation must respect electrical safety.
- Submetering at circuits: CTs or inline meters on key circuits (HVAC, water heater, EVSE, servers). Pros: detailed attribution. Cons: more hardware and installation effort.
- Smart plugs and inline device meters: Plug-level monitors report watts for individual appliances. Pros: renter-friendly; pinpoint device usage. Cons: limited to plug-in loads; not for high-amp circuits unless purpose-built.
- IoT-enabled equipment: Heat pumps, EV chargers, inverters, and UPS systems often provide real-time telemetry via apps or local APIs.
Protocols and connectivity that keep data flowing
Your sensors need a reliable path to your dashboard or automation logic. Common options include:
- Wi‑Fi: Ubiquitous and simple; ensure strong signal near panels and mechanical rooms.
- Zigbee / Z‑Wave / Thread: Low-power mesh networks for smart plugs and sensors; may require a hub.
- Modbus / BACnet: Industrial protocols for meters, drives, and building systems.
- MQTT: Lightweight publish/subscribe messaging popular in IoT energy stacks.
- Ethernet: Most reliable for fixed installations and gateways.
Power metrics explained
Understanding the numbers makes dashboards meaningful:
- W (Watts): Instantaneous power—how fast you are using energy right now.
- kWh (kilowatt-hours): Energy over time—what utilities bill for.
- A (Amps) and V (Volts): Current and voltage feeding your loads.
- Power factor (PF): Ratio of real to apparent power. Low PF indicates inefficiency, common with motors and power supplies.
- kVA and kVAR: Apparent and reactive power—important for commercial sites and demand charges.
- Phases: Single-phase for most homes; three-phase for many commercial/industrial panels.
Sampling, latency, and data resolution
Not all “real-time” streams are equal. The update interval and end-to-end latency shape what you can detect and automate.
- Sampling rate: 1–10 second updates capture most household and light-commercial dynamics; sub-second helps with device fingerprinting.
- Latency: Round-trip time from sensor to dashboard. Keep under a few seconds for responsive control.
- Smoothing/averaging: Rolling averages reduce noise but can hide short spikes; set appropriately for your use case.
Plan Before You Plug In
Set goals and key performance indicators
Clarity beats complexity. Decide what success looks like before deploying hardware:
- Cost objectives: Reduce monthly spend by a percent or dollar target; cap peak demand at a threshold.
- Comfort & operations: Maintain temperature bands; minimize nuisance alerts; prevent breaker trips.
- Sustainability: Align loads with low-carbon grid hours; maximize on-site solar self-use.
Choose the right scope
- Whole-premise only: Fastest path to visibility; pair with analytics to identify big loads.
- Whole-premise + top circuits: Ideal balance of cost and insight for homes and SMBs.
- Device-level: For problem devices or renter setups using smart plugs.
Budget and ROI
Estimate payback by comparing installed cost versus expected annual savings. Example:
- Hardware: main monitor + two circuit CTs + a few smart plugs
- Software: open-source (time cost) or subscription (cash cost)
- Savings drivers: off-peak shifting, thermostat tuning, phantom load cuts, equipment scheduling
A conservative 5–15% reduction in electricity spend is common with attentive use of real-time data. For sites facing demand charges, strategically shaving peaks can yield outsized returns.
Privacy, security, and data ownership
- Data minimization: Collect what you need; anonymize where possible.
- Local-first: Consider systems that work without cloud dependence; sync to cloud as desired.
- Access control: Strong passwords, MFA for remote dashboards, segmented networks for IoT devices.
- Backups and retention: Define how long you store raw and aggregated data.
Step-by-Step: How to Monitor Real‑Time Energy Consumption
This section walks you through practical pathways, from plug-level quick wins to whole-building visibility. If you are asking yourself, “How to monitor real‑time energy consumption without rewiring my home?”, start with the renter-friendly path. If you manage a panel and want deep insight, choose CT-based or submetering routes.
Path A: Renter-friendly quick start (smart plug + app)
- Pick a smart plug rated for your device’s load. Look for continuous power metering with at least 1–5 second updates.
- Install and connect via the vendor app or a local hub; place the monitored device behind the plug.
- Verify live readings: Toggle the device and watch watts update. Check idle versus active draw.
- Set alerts and schedules: For example, notify if a space heater is left on after bedtime, or auto-off after 60 minutes.
- Expand thoughtfully: Add plugs to your biggest plug-in loads first: dehumidifier, window AC, entertainment center, office gear.
Path B: Whole-home via a smart meter gateway
- Check availability: Does your utility expose a home-area network interface or provide a consumer access device?
- Pair the gateway: Follow the utility’s enrollment to authorize your device.
- Connect to your dashboard: Use the vendor app or a local integration to stream live kW.
- Cross-check accuracy: Compare 15–60 minute cumulative kWh against your bill over a few days.
Path C: CT clamp-based whole-home monitors
- Choose a UL/IEC-certified monitor with CTs sized for your service conductors and optional add-on CTs for key circuits.
- Plan installation: Schedule a qualified electrician for panel access and CT placement. Safety is paramount.
- Configure networking: Connect via Ethernet or strong Wi‑Fi. Ensure low-latency paths to your data store.
- Label channels: Name mains and circuits clearly (HVAC, water heater, dryer) to streamline analysis.
- Validate readings: Cross-reference with plug meters where possible and your utility’s cumulative reading over a day.
Path D: Small business submetering for critical loads
- Map the panel: Identify equipment that drives peak demand: HVAC, ovens, compressors, IT racks, EVSE.
- Install submeters or multi-channel CT monitors on those circuits.
- Integrate with BMS/EMS: Use Modbus/BACnet or MQTT to consolidate into a central dashboard.
- Set demand caps and automations: Stagger noncritical loads when approaching a threshold.
Configure software: dashboards, alerts, and automations
- Dashboards: Build tiles for total kW, circuit kW, daily kWh, and rolling 15-minute demand. Add sparklines to visualize trends.
- Alerts: Examples: “Whole-home exceeds 6 kW”, “Server rack PF drops below 0.9”, “Water heater runs longer than 45 minutes”.
- Automations: Pause EV charging during peaks; pre-cool before on-peak windows; switch dehumidifier to eco mode based on humidity and price signals.
- Data export: Store raw readings in a time-series database for analysis; aggregate to hourly/daily for long-term trends.
Validate and calibrate
- Meter-to-bill match: Over a week, the sum of real-time kWh should closely match the utility’s register (within a few percent).
- Spot checks: Compare a known 1500 W space heater against dashboard readings.
- CT orientation and phase alignment: Reverse CTs if power shows negative when it should be positive.
Making Sense of the Data
Baselines and daily patterns
Start by building a baseline. What is your typical overnight wattage? How high do you spike on weekday evenings? Baselines make deviations obvious and savings measurable.
- Overnight baseline: Aim for the lowest steady draw; every extra 100 W costs roughly 73 kWh/month.
- Active periods: Identify the hours and routines that drive peaks (cooking, laundry, HVAC swings).
- Seasonality: Expect HVAC-driven shifts; compare to degree days for insight.
Phantom loads and always-on consumption
Always-on is the sum of devices that never fully power down—routers, chargers, set-top boxes, standby circuits. Smart plugs and submetering expose culprits quickly.
- Inventory always-on: Sort devices by minimum draw. Replace, unplug, or schedule as appropriate.
- Consolidate power: Use smart strips for entertainment centers and offices.
- Optimize settings: Enable eco modes, sleep timers, and proper shutdown policies.
Peak shaving and demand management
For sites with demand charges or demand thresholds, the 15-minute (or 30-minute) rolling maximum is what matters. Live kW and predictive alerts let you trim those peaks.
- Stagger heavy loads: Avoid running oven, dryer, and EV charger simultaneously.
- Pre-condition: Pre-cool or pre-heat before on-peak windows, then coast through the most expensive periods.
- Automated capping: Pause non-critical loads when live kW approaches a setpoint.
Non-intrusive load monitoring (NILM)
NILM algorithms infer which devices are running from whole-home signals using load signatures. While not perfect, NILM helps attribute energy without many submetered circuits.
- Calibrate with ground truth: Label big events by toggling known devices during setup.
- Focus on the big movers: HVAC, water heater, EV charger, dryer—small loads are harder to separate reliably.
Time-of-use optimization and tariff choice
If your utility offers time-of-use (TOU) rates, live monitoring enables tactical shifting:
- Schedule flexibility: Run dishwasher and laundry off-peak; charge EV mid-day if you have solar.
- Automate by price: Trigger device schedules based on real-time or day-ahead price signals.
- Compare tariffs: Use your own profiles to simulate bills across available plans.
Coordinating solar, storage, and EV charging
Live power flows let you orchestrate on-site generation and flexible loads intelligently:
- Maximize self-consumption: Start water heating or charge EVs when solar output peaks.
- Battery strategy: Discharge to shave peaks; charge when rates are cheap or carbon intensity is low.
- Grid-friendly behavior: Reduce export during constrained periods if incentivized.
Tools and Platforms for Real-Time Energy Analytics
Consumer-friendly apps
These solutions prioritize simplicity, polished dashboards, and built-in recommendations. They are ideal if you want fast setup and actionable insights without building a custom stack. Ensure the app provides:
- Live kW updates at 1–10 second intervals.
- Device attribution via NILM or integration with smart plugs.
- Alerting and basic automations triggered by thresholds and schedules.
- Export features for CSV or API access.
Open-source and DIY stacks
If you want full control, a local-first stack offers flexibility and privacy:
- Home Assistant (HA): Integrates meters, plugs, inverters, and chargers; provides dashboards (Lovelace), automations, and add-ons.
- MQTT broker: Acts as the message bus between sensors and services.
- InfluxDB: Time-series database to store high-frequency energy data.
- Grafana: Advanced visualization and alerting.
Example data flow:
- CT monitor publishes to MQTT: topic like energy/main/power with JSON payload.
- HA subscribes, displays live tiles, and triggers automations.
- Telegraf ingests MQTT payloads to InfluxDB for retention and downsampling.
- Grafana queries InfluxDB for dashboards and alert rules.
Enterprise EMS/BMS features
For multi-site or commercial facilities, look for:
- Demand charge analytics and forecasting.
- Portfolio benchmarking and normalization (weather, occupancy).
- Automated measurement and verification (M&V) for projects.
- User roles and audit logs for governance.
- Standards support (Modbus, BACnet, OPC UA) and robust APIs.
APIs and utility data
- Utility APIs: Some offer near-real-time intervals or day-after data. Useful for validation and billing simulations.
- Green Button / data portability: Download historical intervals to compare against your live system.
- Webhooks and cloud events: Connect price signals or grid carbon intensity to your automations.
Advanced Tips and Troubleshooting
Accuracy pitfalls (and how to fix them)
- CT placement and direction: Reversed CTs invert signs; ensure arrows point toward the load, not the source.
- Loose conductors or poor contact: Can cause noise or intermittent readings; have a professional inspect if suspected.
- Voltage reference: Monitors that measure current but assume nominal voltage can misestimate power during voltage swings; choose hardware that measures voltage when possible.
- Power factor effects: Cheap plug meters that ignore PF will misread motor loads; verify with better instrumentation.
Network reliability and latency
- Prefer Ethernet for gateways near panels; otherwise, ensure strong Wi‑Fi and minimal interference.
- Edge buffering: Choose devices that cache data during outages and backfill later.
- QoS for MQTT: Use appropriate quality-of-service levels for critical telemetry.
Edge vs cloud trade-offs
- Edge (local): Low latency, privacy, resilient to internet loss; requires local maintenance.
- Cloud: Easy remote access and AI features; depends on service uptime and data policies.
- Hybrid: Process locally, mirror summaries to cloud for convenience.
Safety notes
- Panel work: Any work inside an electrical panel should be performed by a qualified electrician.
- Device ratings: Ensure smart plugs and meters are rated for the load’s voltage and current.
- Environmental conditions: Use enclosures and appropriate ingress protection in damp or dusty spaces.
A 30-Day Action Plan for Results
Week 1: Install and verify
- Choose your path (plug, smart meter, CT monitor) and get live data flowing.
- Label circuits or devices; build a basic dashboard for total kW, always-on, and key circuits.
- Validate against a known load and your utility register to confirm accuracy.
Week 2: Baseline and quick wins
- Measure overnight baseline; identify and cut phantom loads.
- Set alerts for abnormal spikes; fix the top 3 no-regret issues.
- Estimate savings potential from TOU shifting and scheduling.
Week 3: Optimize schedules and behavior
- Implement schedules for laundry, dishwashing, and EV charging.
- Tune thermostat setbacks and fan schedules based on comfort feedback and live kW.
- Rebalance heavy loads to avoid simultaneous peaks.
Week 4: Automate and review
- Automate peak caps using live thresholds.
- Build a monthly report: savings, peak reduction, and next steps.
- Decide where to add submetering for deeper attribution if needed.
Frequently Asked Questions
Is “real-time” really instant?
Most systems update every 1–10 seconds with a few seconds of latency. That is fast enough for dashboards and automations. Sub-second monitoring is possible with specialized hardware for research or detailed device signatures.
What if my internet goes down?
Prefer solutions that buffer data locally and sync later. Local dashboards via a home server or gateway keep working during outages.
Can renters do this without electrical work?
Yes. Smart plugs and certain in-home display gateways are plug-and-play. You can still achieve meaningful savings by targeting large plug-in loads and optimizing schedules.
How much does a typical setup cost?
From under the cost of a smart plug for a single device, to a few hundred dollars for a whole-home CT monitor with a couple of sub-circuits, to higher budgets for commercial submetering and enterprise platforms. Payback often arrives within 6–18 months depending on tariffs and behavior changes.
How do I keep the data private?
Use local-first platforms, strong network security, and selective cloud sharing. Review privacy policies and disable unnecessary telemetry. Segment IoT devices on a separate VLAN or SSID.
Putting It All Together
By now, you know how to monitor real‑time energy consumption in a way that fits your building, budget, and goals. The formula is simple but powerful:
- Sense: Accurate meters—whole-home, circuit-level, and smart plugs—feed live data.
- Understand: Clear dashboards, alerts, and analytics reveal baselines, peaks, and opportunities.
- Act: Schedules and automations shift usage, cap demand, and verify results.
Real-time visibility transforms electricity from a monthly mystery into a daily practice of smart choices. Start with a single meter or plug, build momentum with a few quick wins, and scale insight where it matters most. The moment you can see your watts, you can start to watch them—and that is when the savings begin.
Appendix: Quick Reference Checklist
- Goals defined: Cost, comfort, sustainability, or all three.
- Scope chosen: Whole-premise, submetering, or device-level.
- Hardware selected: Smart meter gateway, CT monitor, and/or smart plugs.
- Connectivity ready: Reliable Wi‑Fi or Ethernet; hubs for Zigbee/Z‑Wave if needed.
- Dashboard built: Live kW, daily kWh, always-on, top circuits.
- Alerts configured: Peak thresholds, abnormal runtimes, low power factor.
- Automations deployed: EV charging, HVAC pre-conditioning, appliance schedules.
- Validation done: Meter-to-bill cross-checks; known-load tests.
- Privacy & security: Local processing where possible, strong auth, backups.
With these pieces in place, you have everything needed to practice smarter, safer, and more sustainable power management every single day—and to confidently explain to anyone else exactly how to monitor real‑time energy consumption and turn live data into meaningful results.